

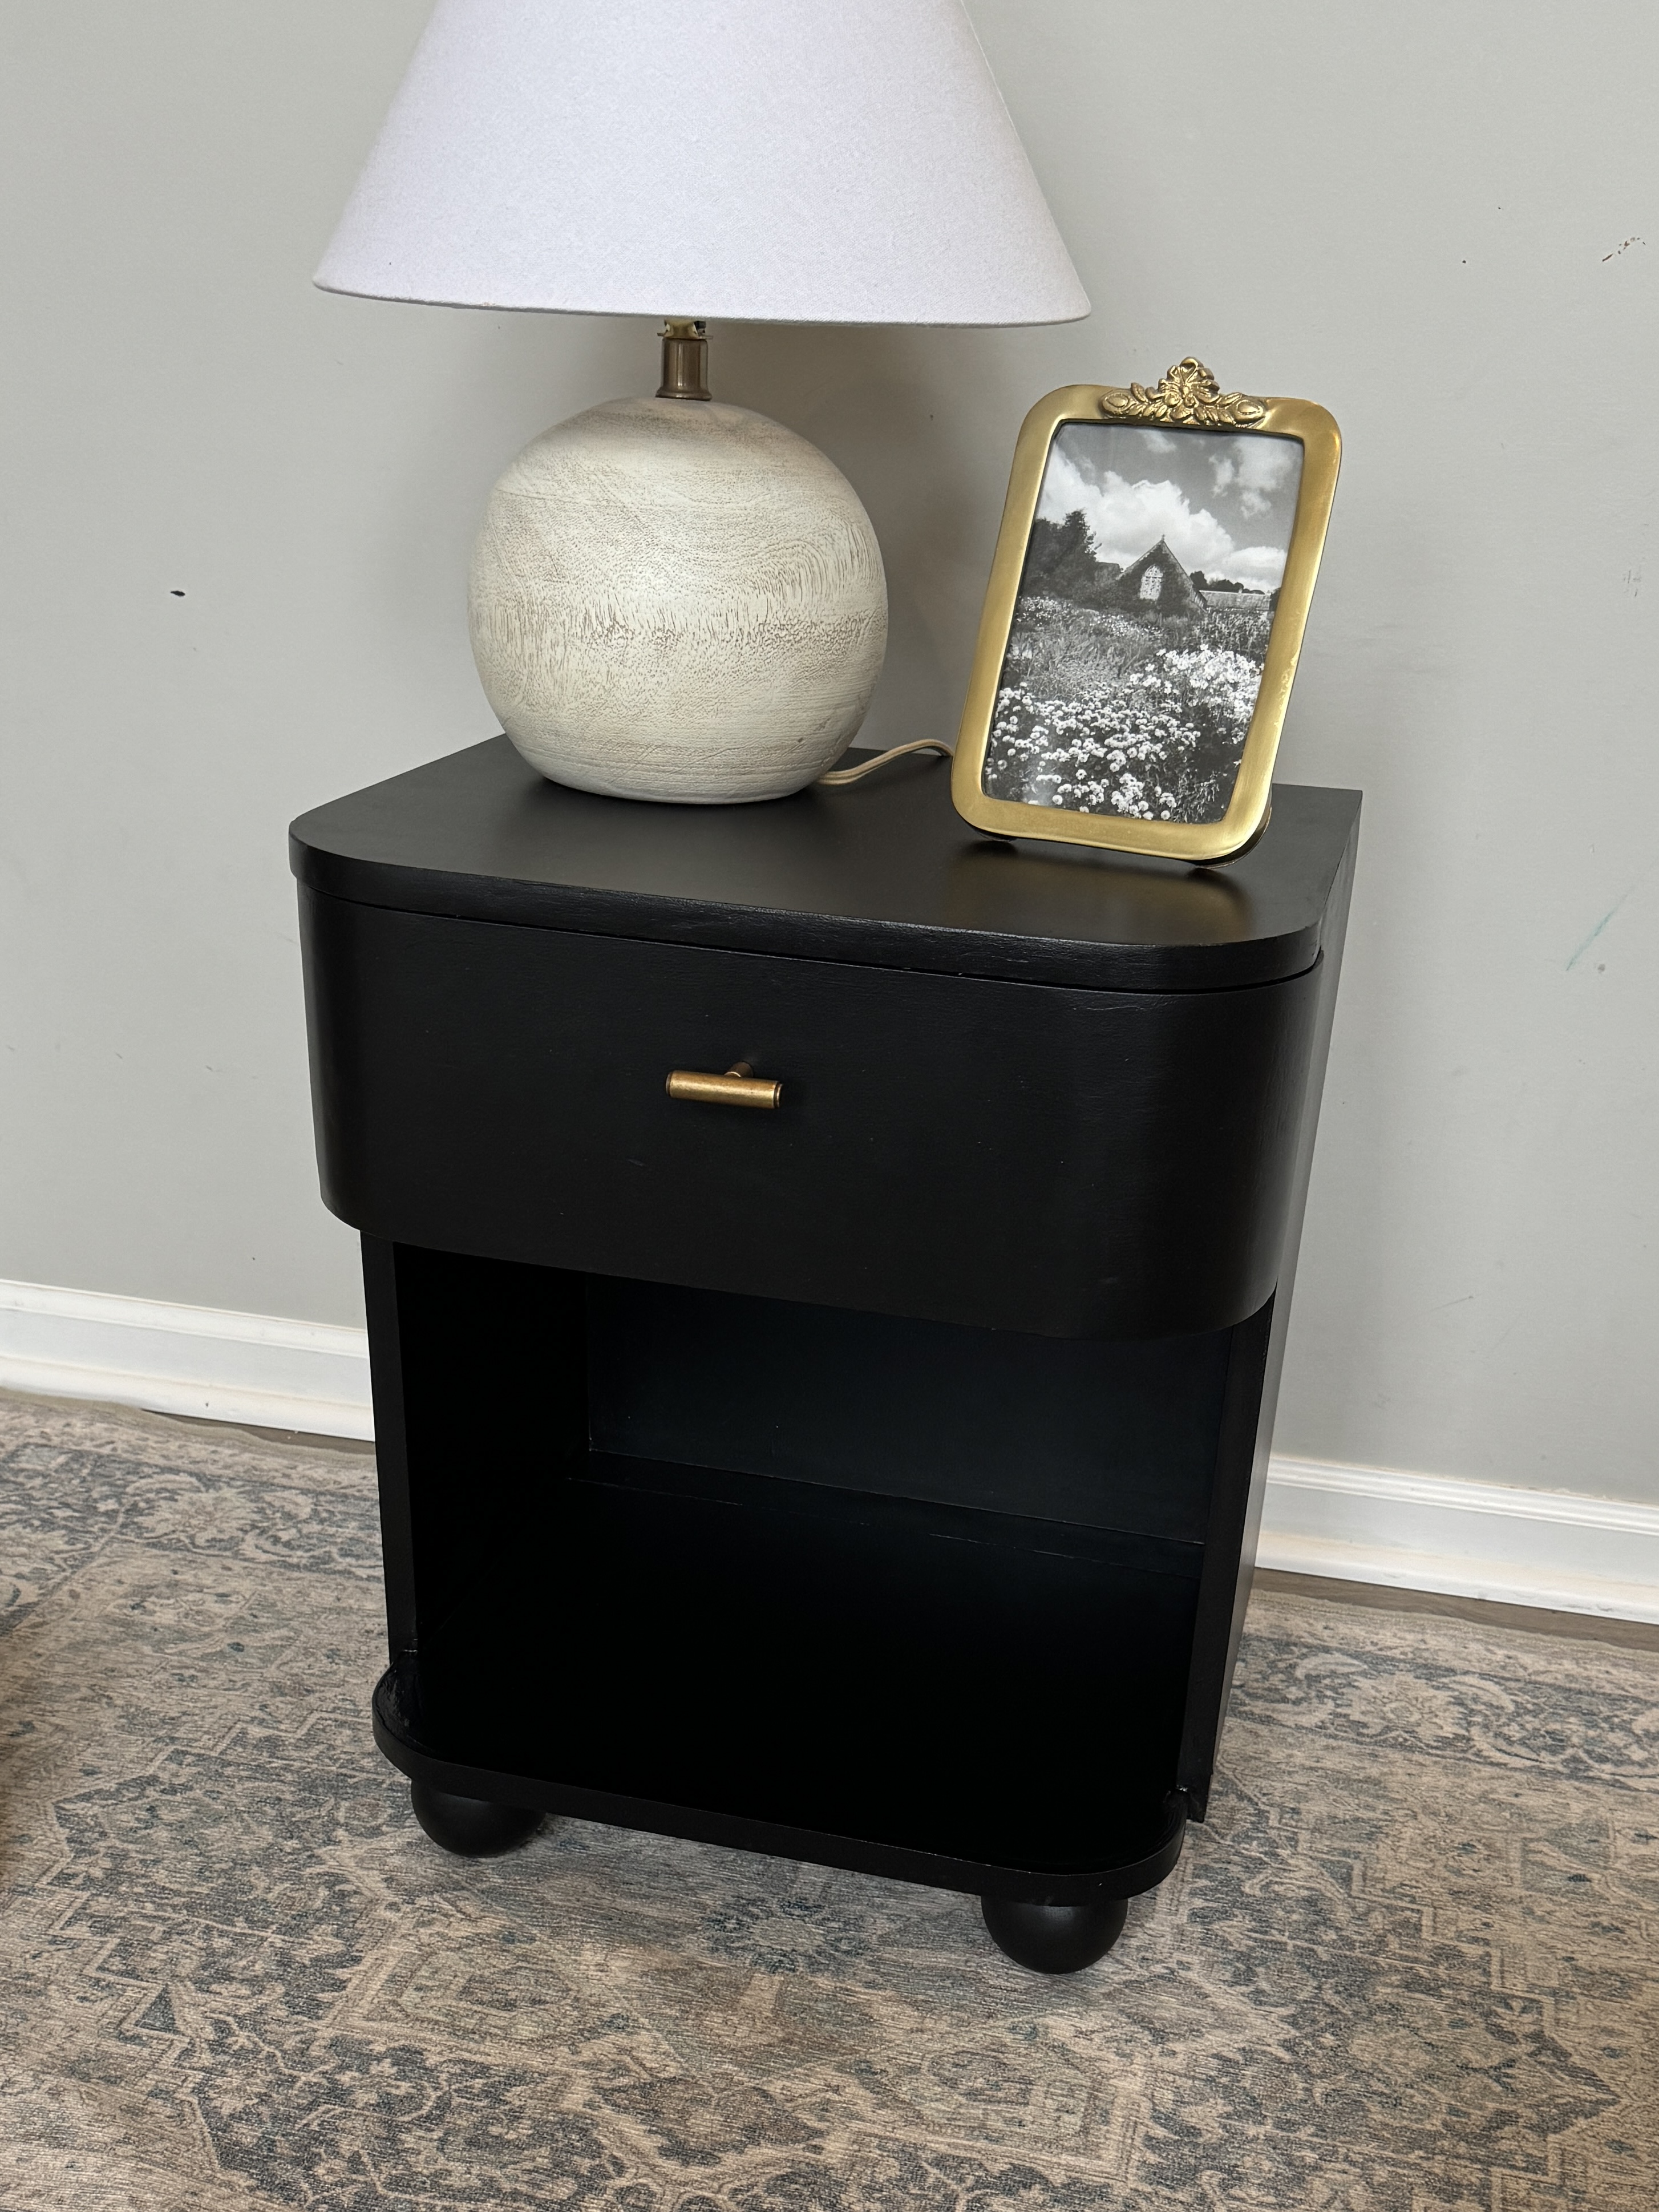


This modern nightstand has a beautiful curvy drawer and plenty of open space for storage. If you want to learn how to curve wood this is the perfect build for you!
Tools
Kreg Tools


Other Tools
-
Measuring tape

-
Strap clamp
-
Nail gun
Materials
Wood Products
- 1 Plywood , 3/4"x4'x8'
- 1 Plywood , 1/4"x2'x4'
Hardware & Supplies
- 1 Edge Banding
- 1 Furniture Feet
- 2 12" Drawer Slides
- 1 Wood Glue
- 50 1 1/4" Pocket Screws
- 1 Flush Trim Bit
Directions
-
1
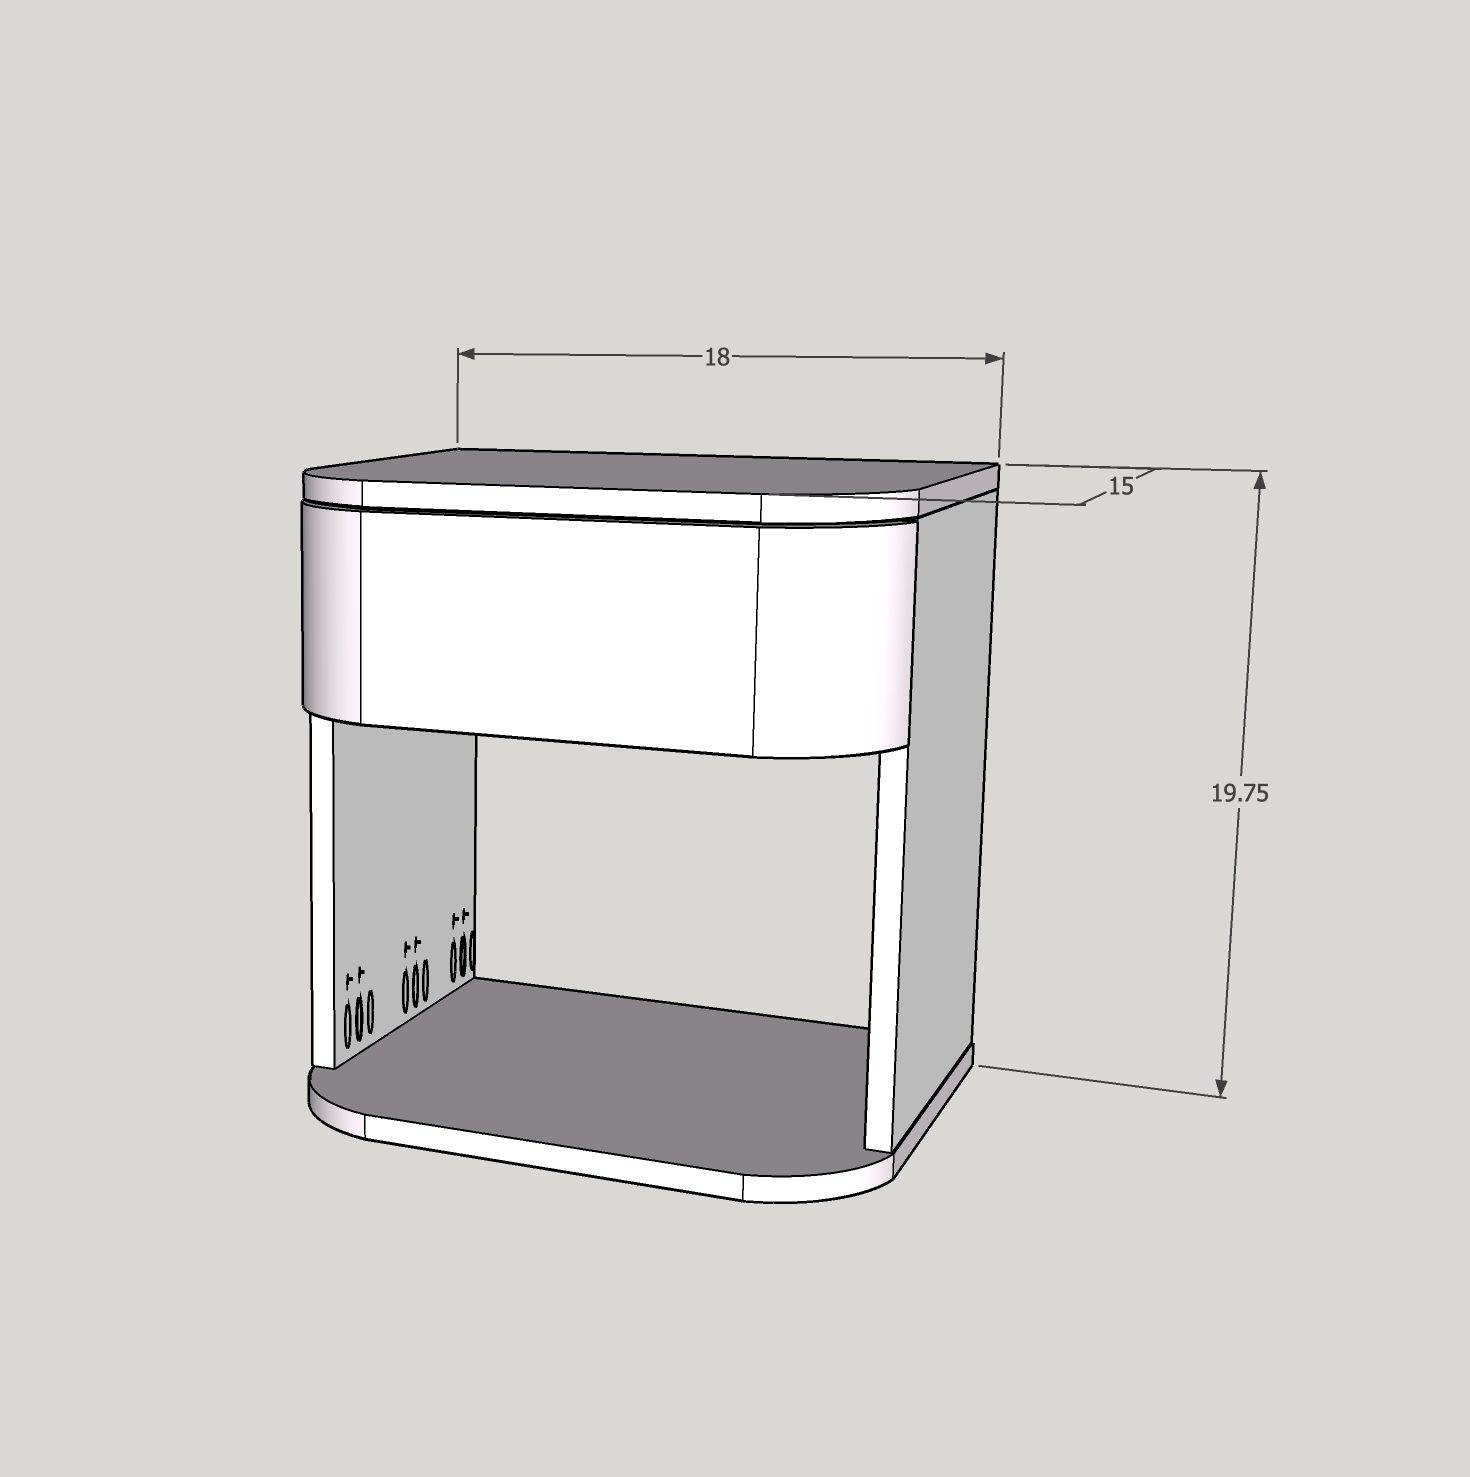
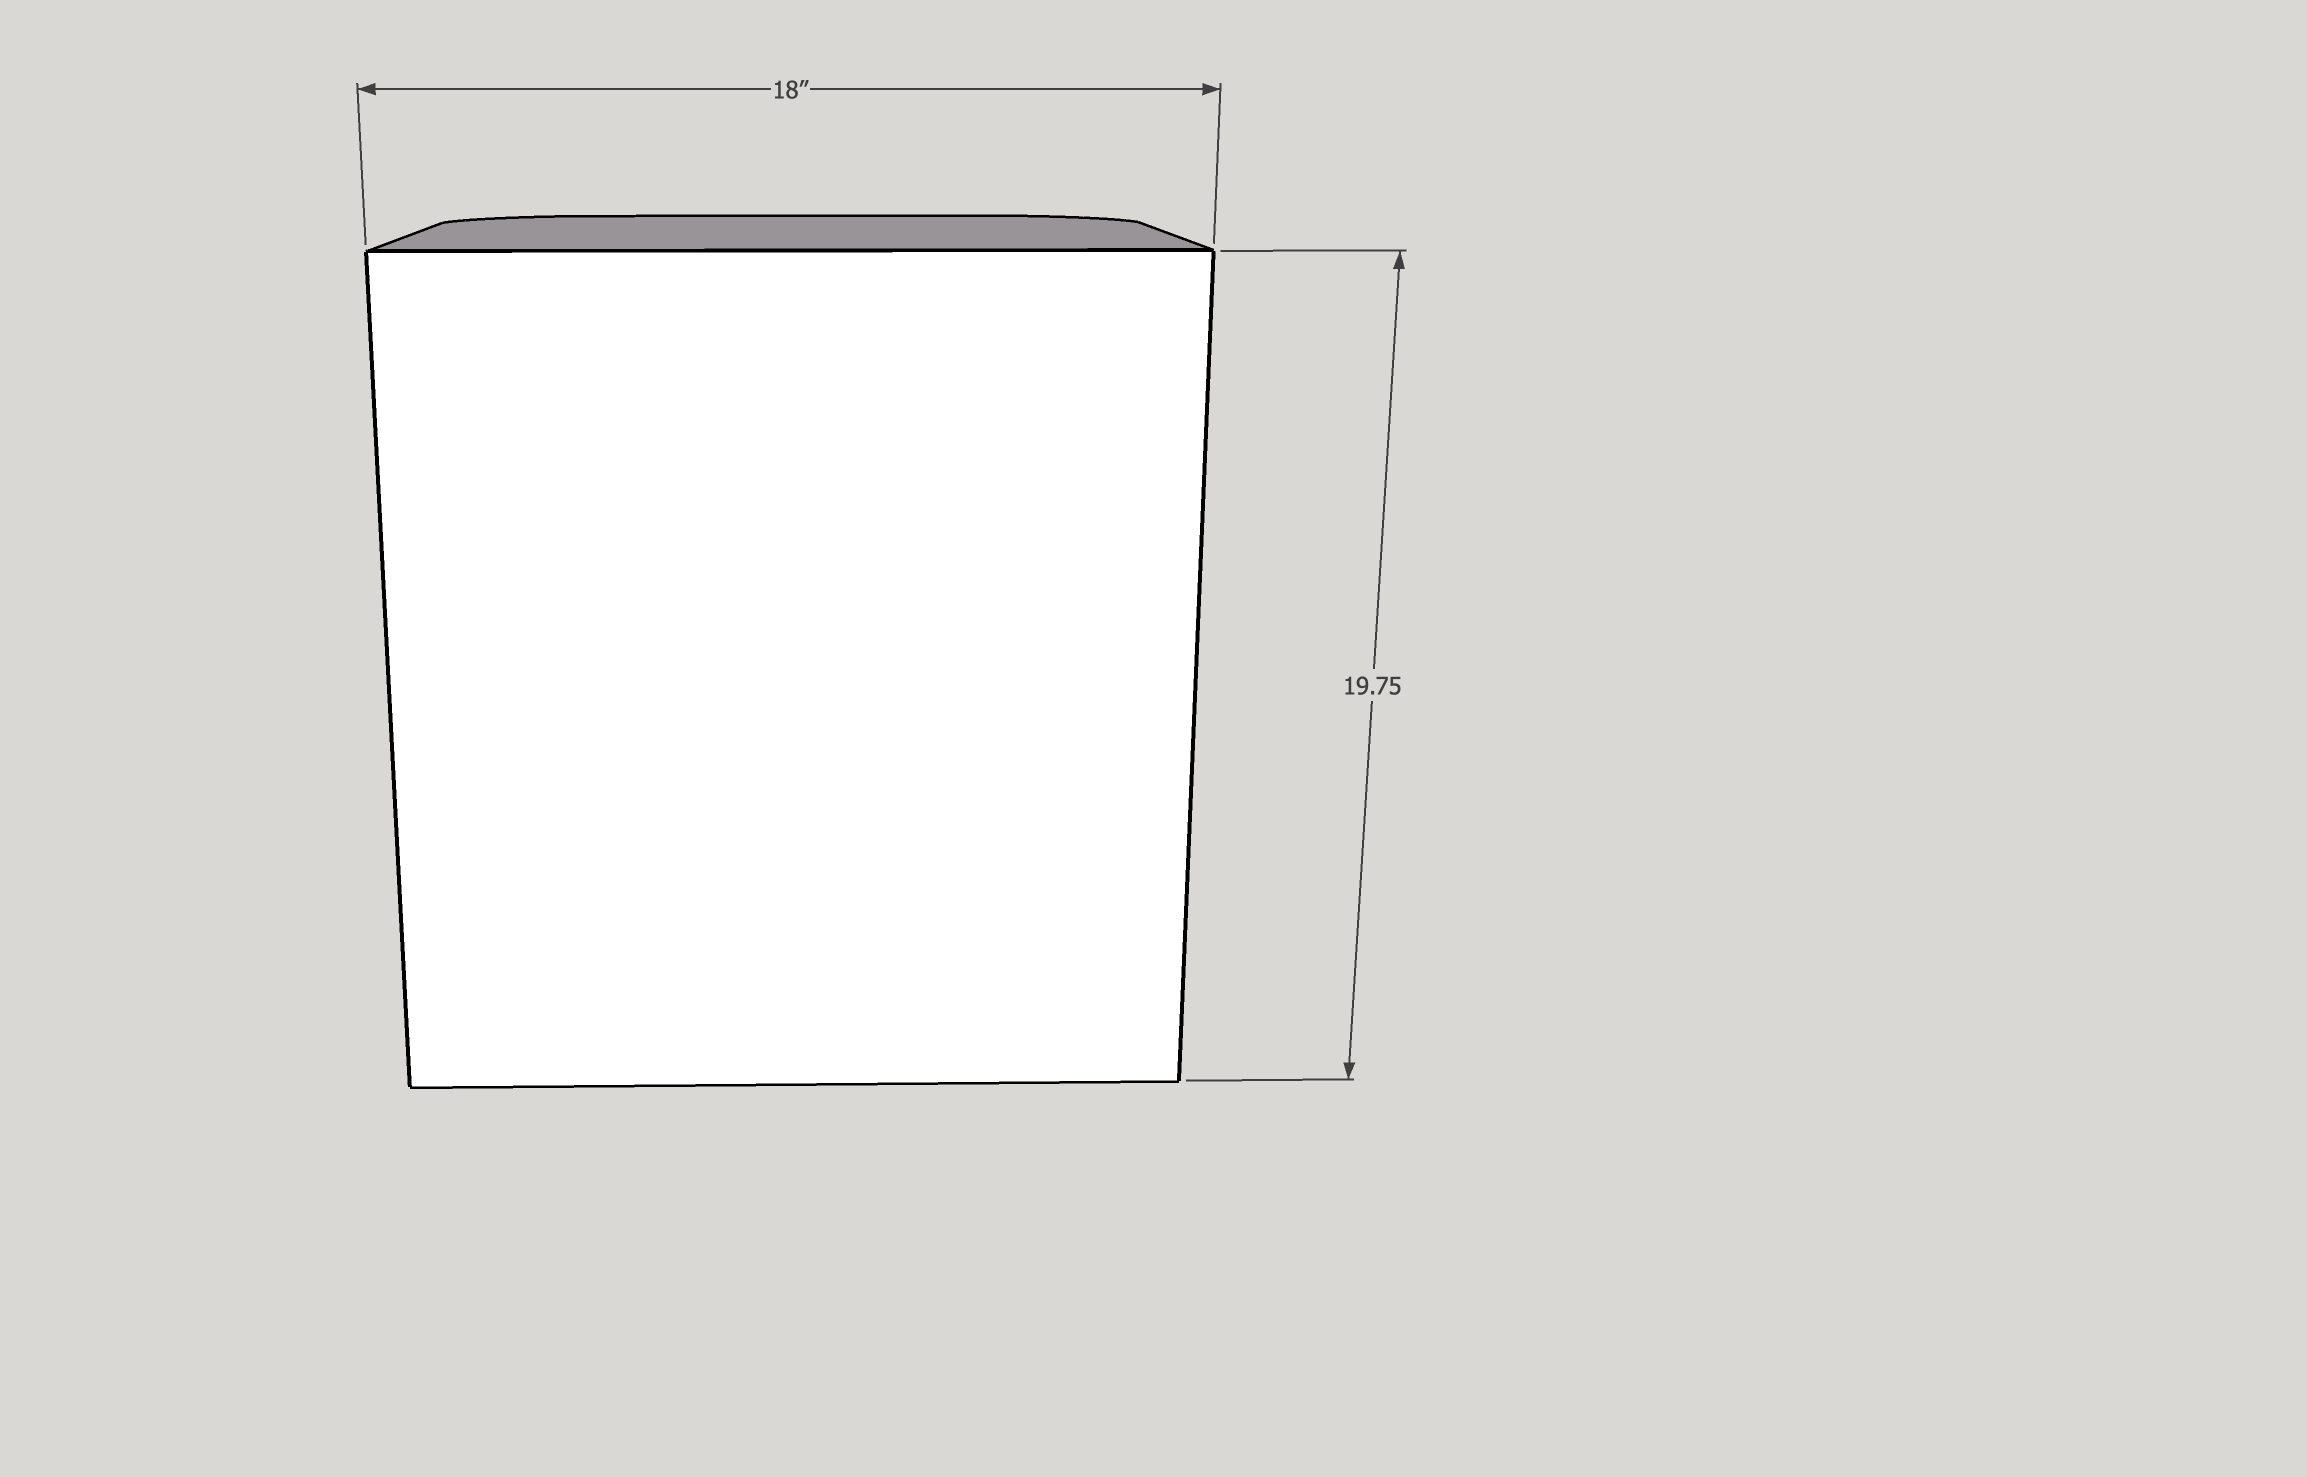
Repeat each of the steps to build two nightstands. Cut list provides measurements for one nightstand.
-
2
Make 8 kerf cuts that are 3/4" apart. Start making the cuts 1/2" into your drawer front on both sides. Make sure to only leave 1/8" of material left when making your kerf cuts. Using wood glue and a strap clamp bend the drawer front until all the kerfs are closed up. Leave to dry for 24 hours.
-
3
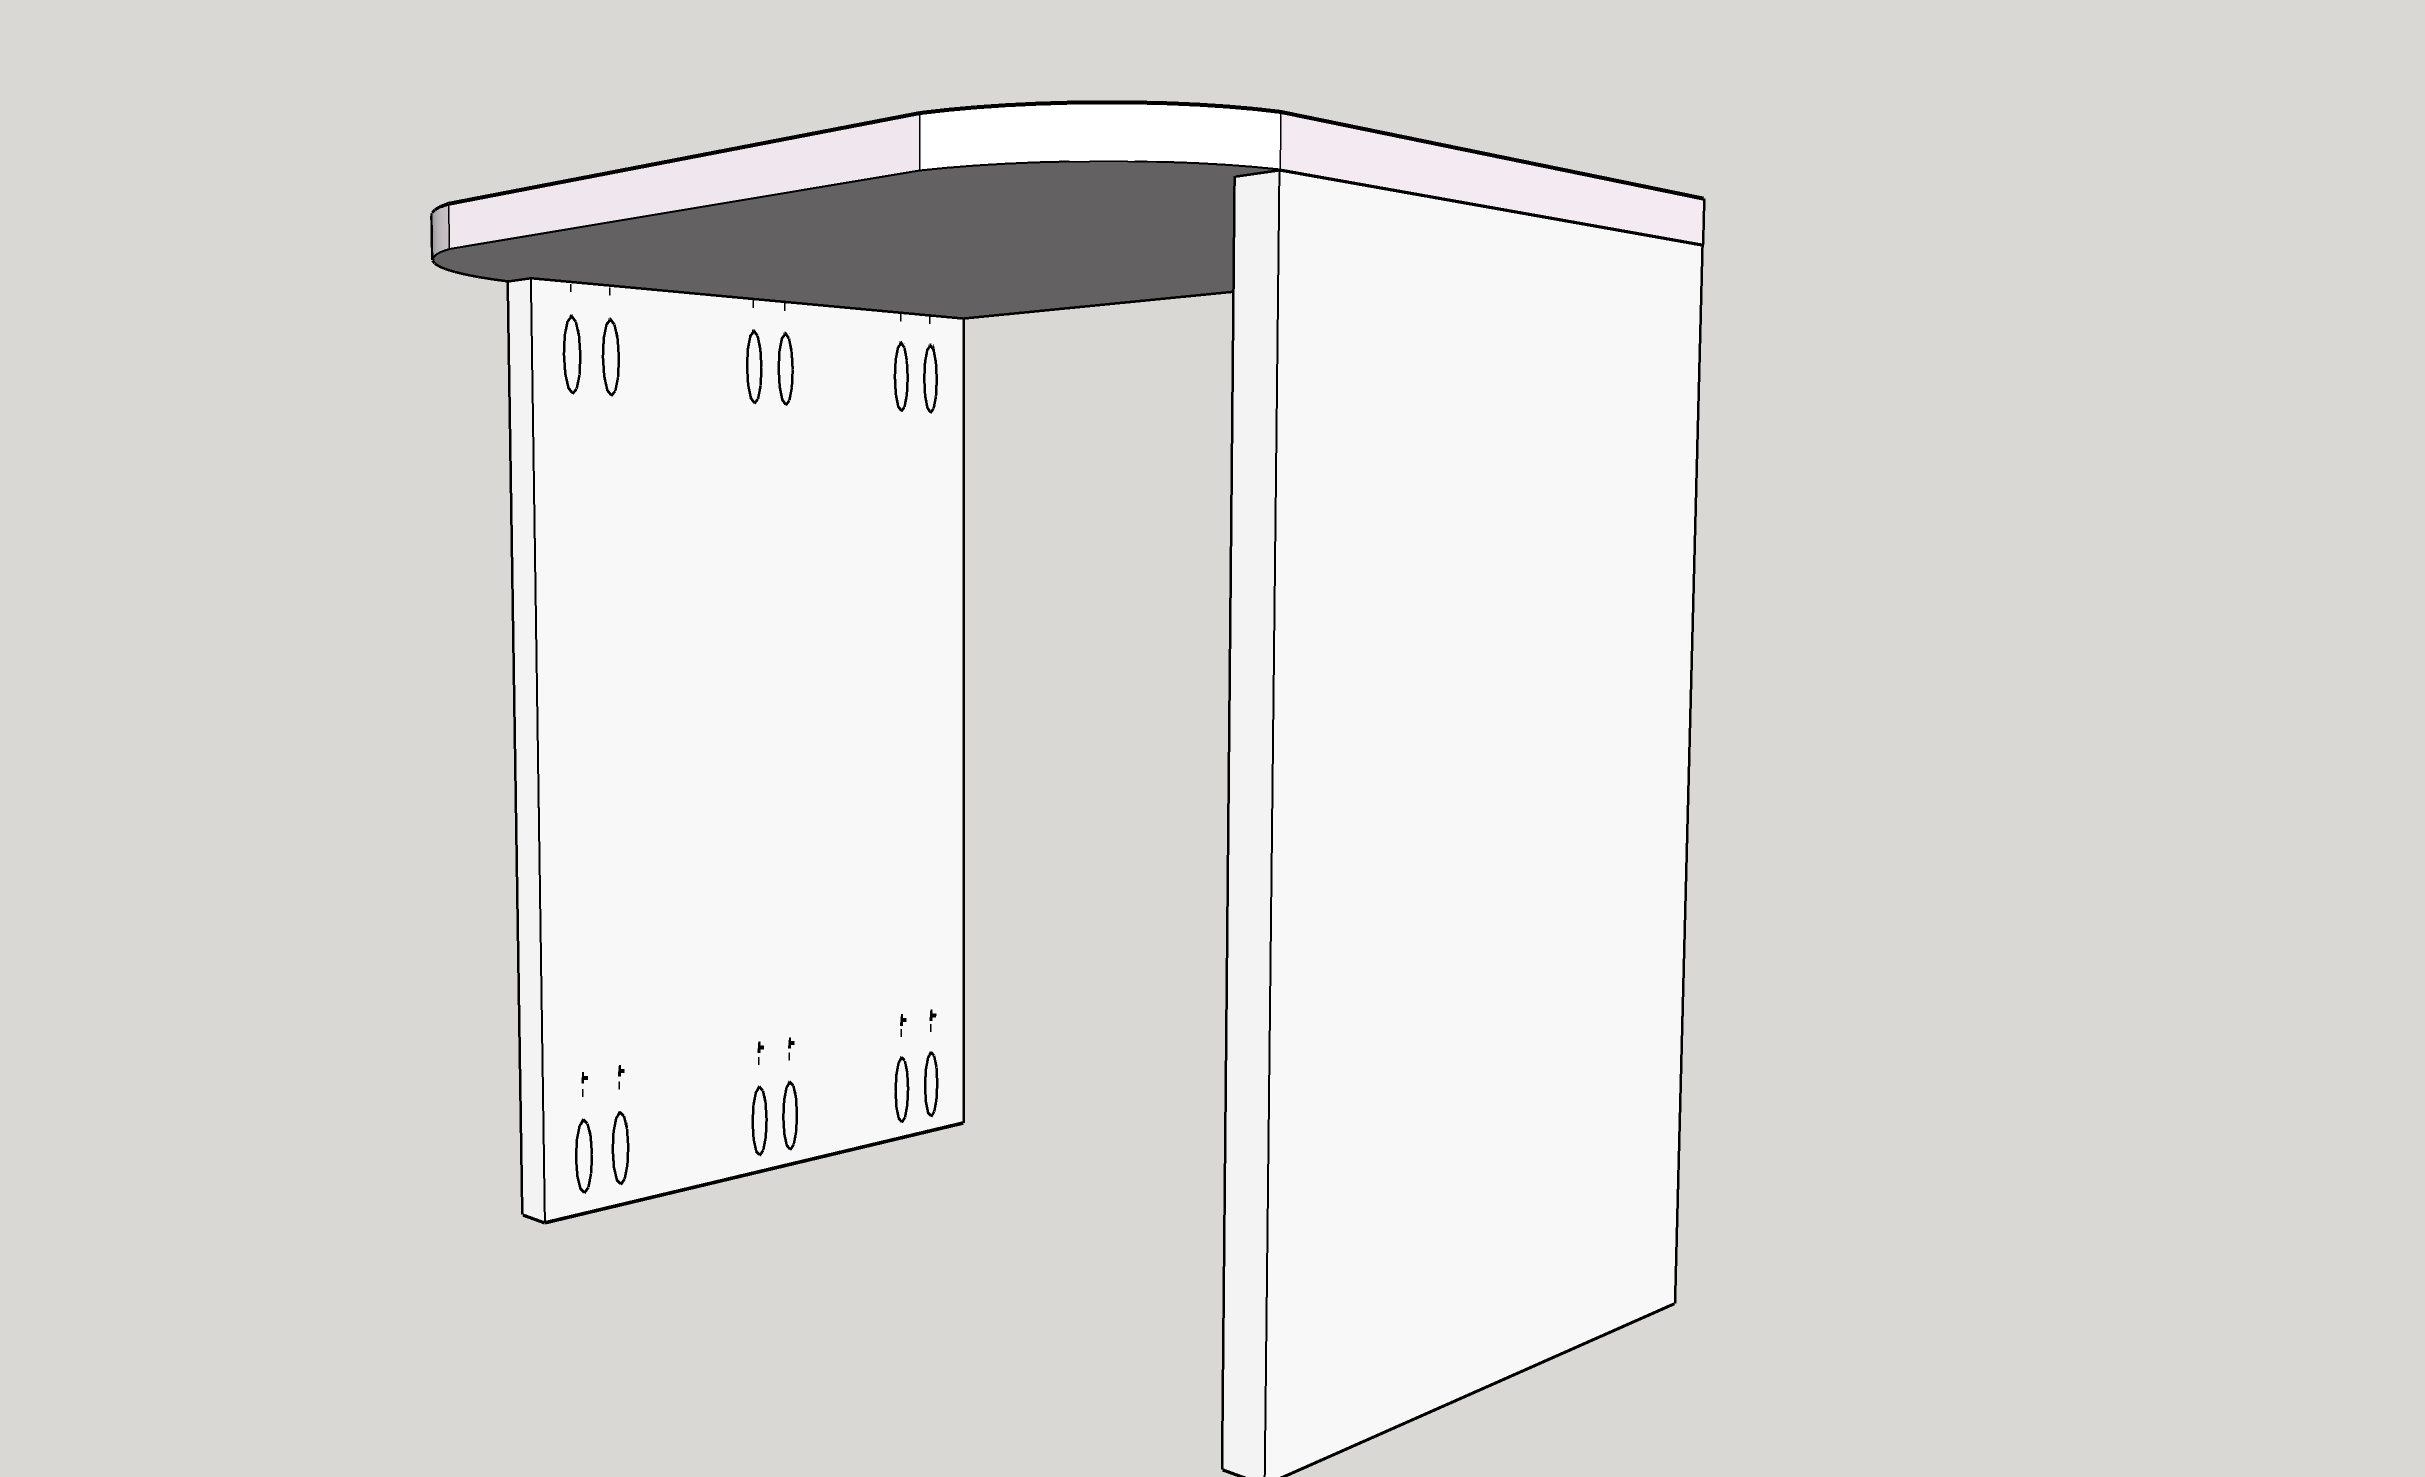
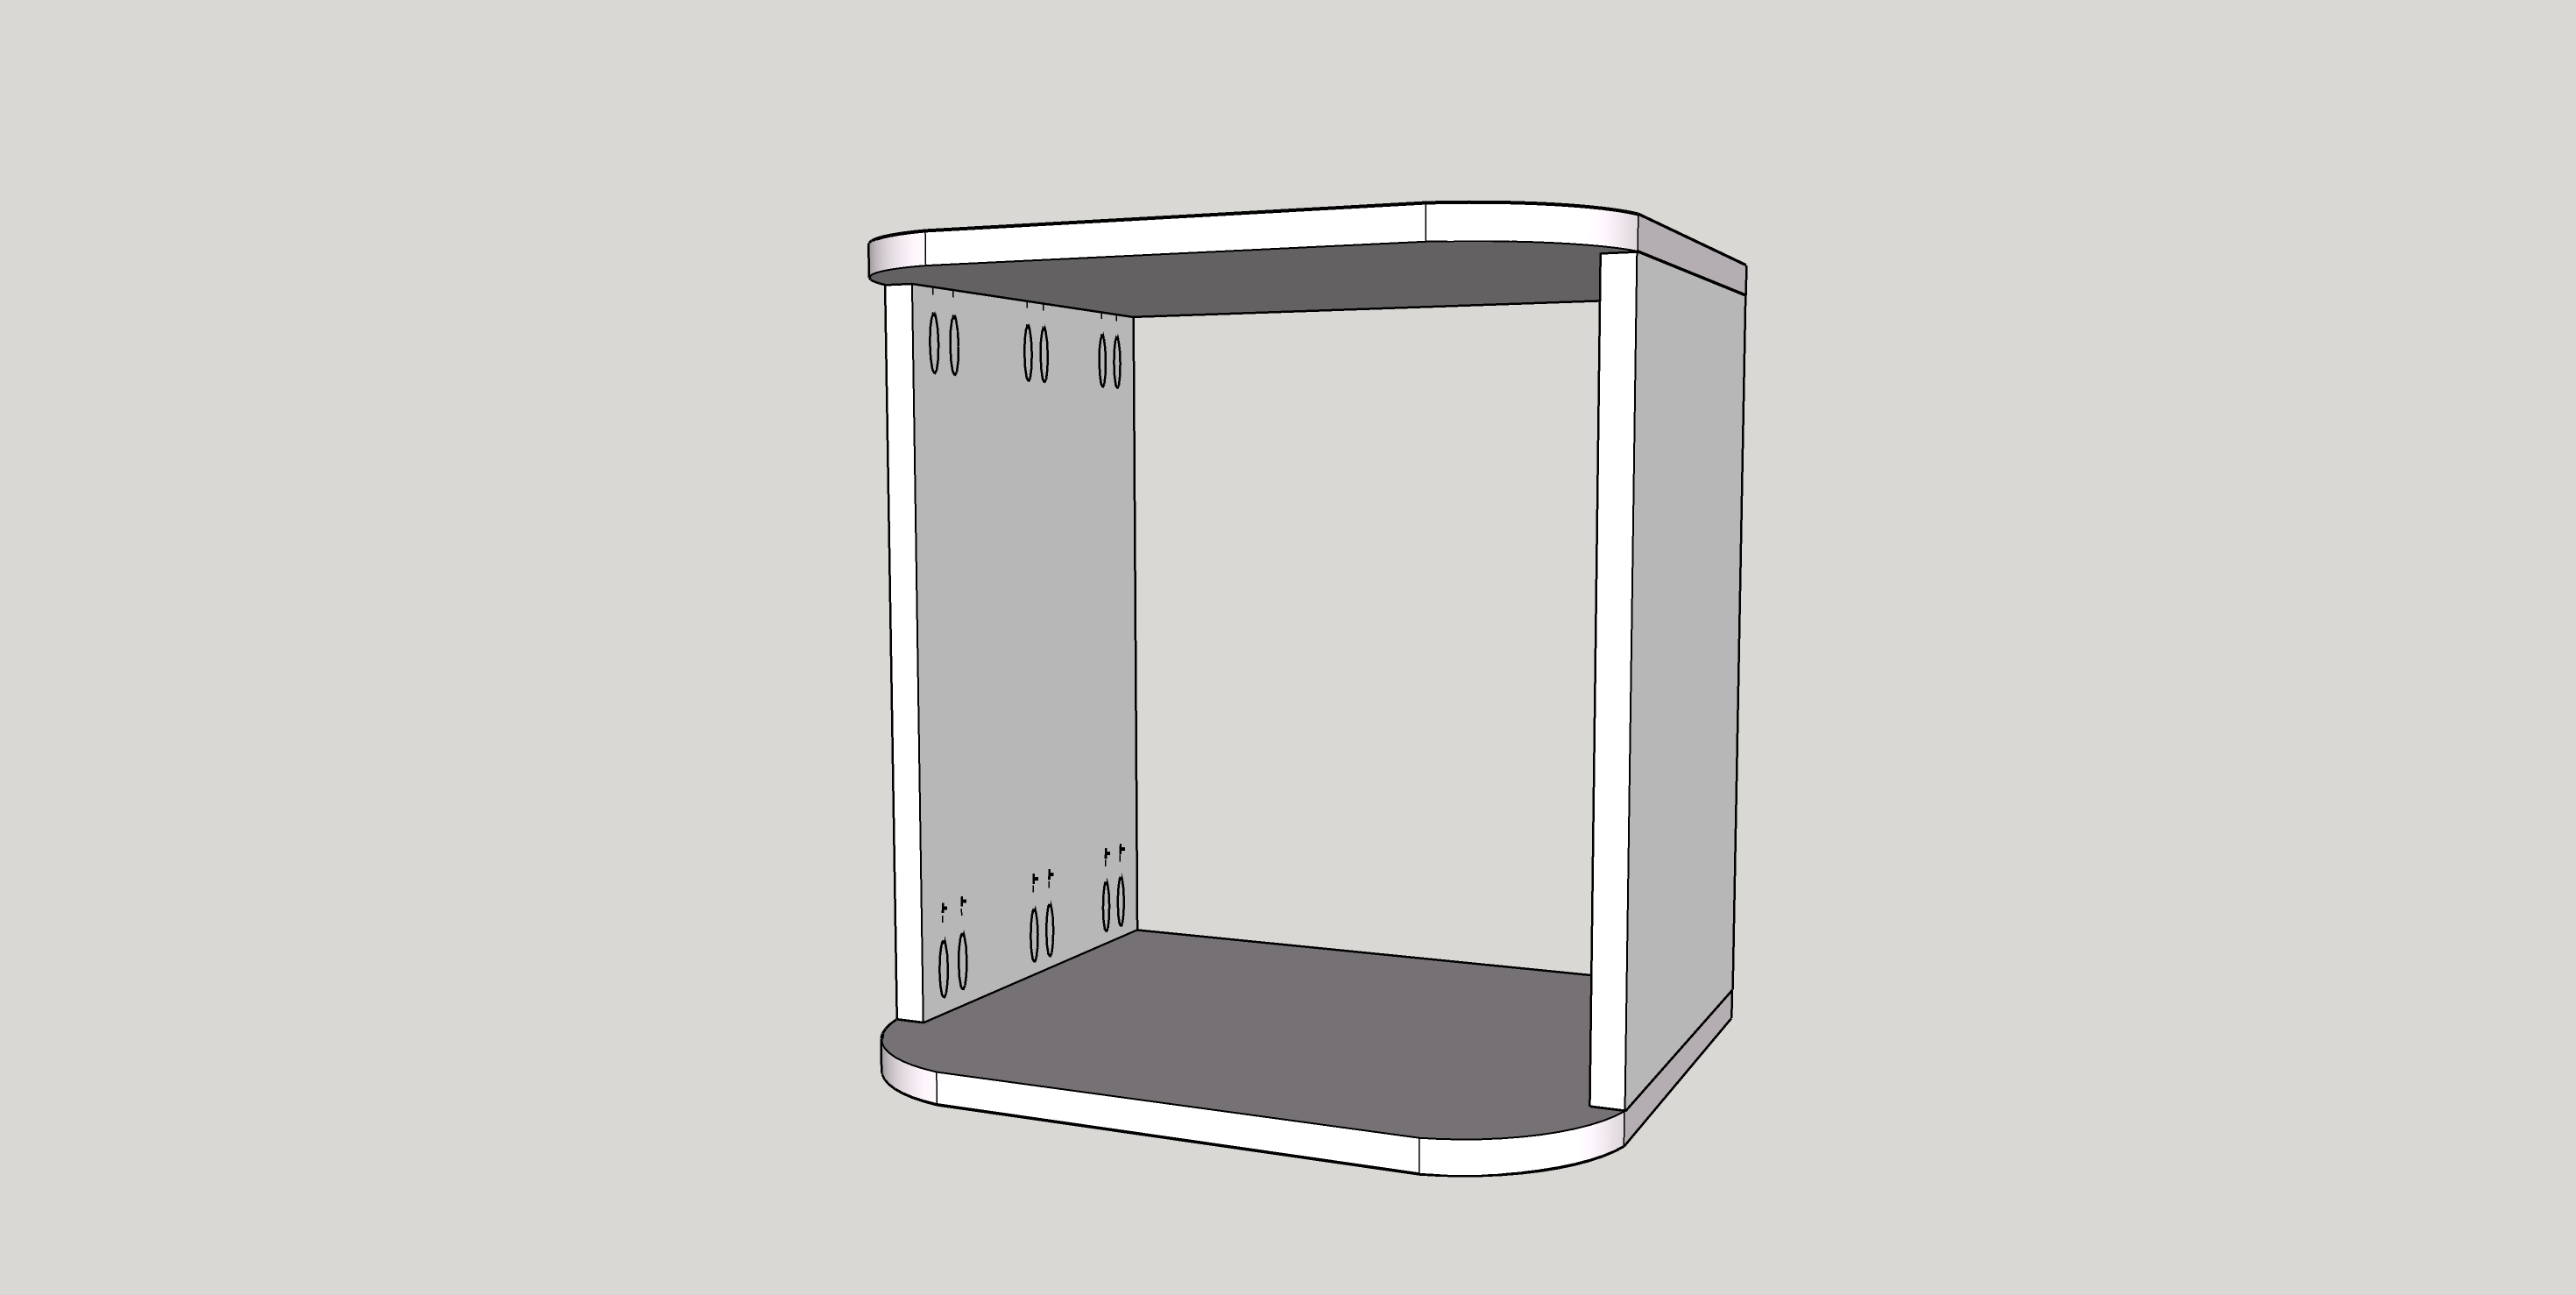
Using your foreman drill the pocket holes at 3/4" and attach the sides to the top. As shown in the diagram, make sure the sides sit flush with the back of the top. Do not curve the top yet.
-
4
Drill 3/4" pocket holes and attach the bottom to the sides as shown in the diagram below. Make sure the sides are flush with the back of the bottom of the nightstand.
-
5
Attach the back with a brad nailer and 1 1/4" brad nails
-
6
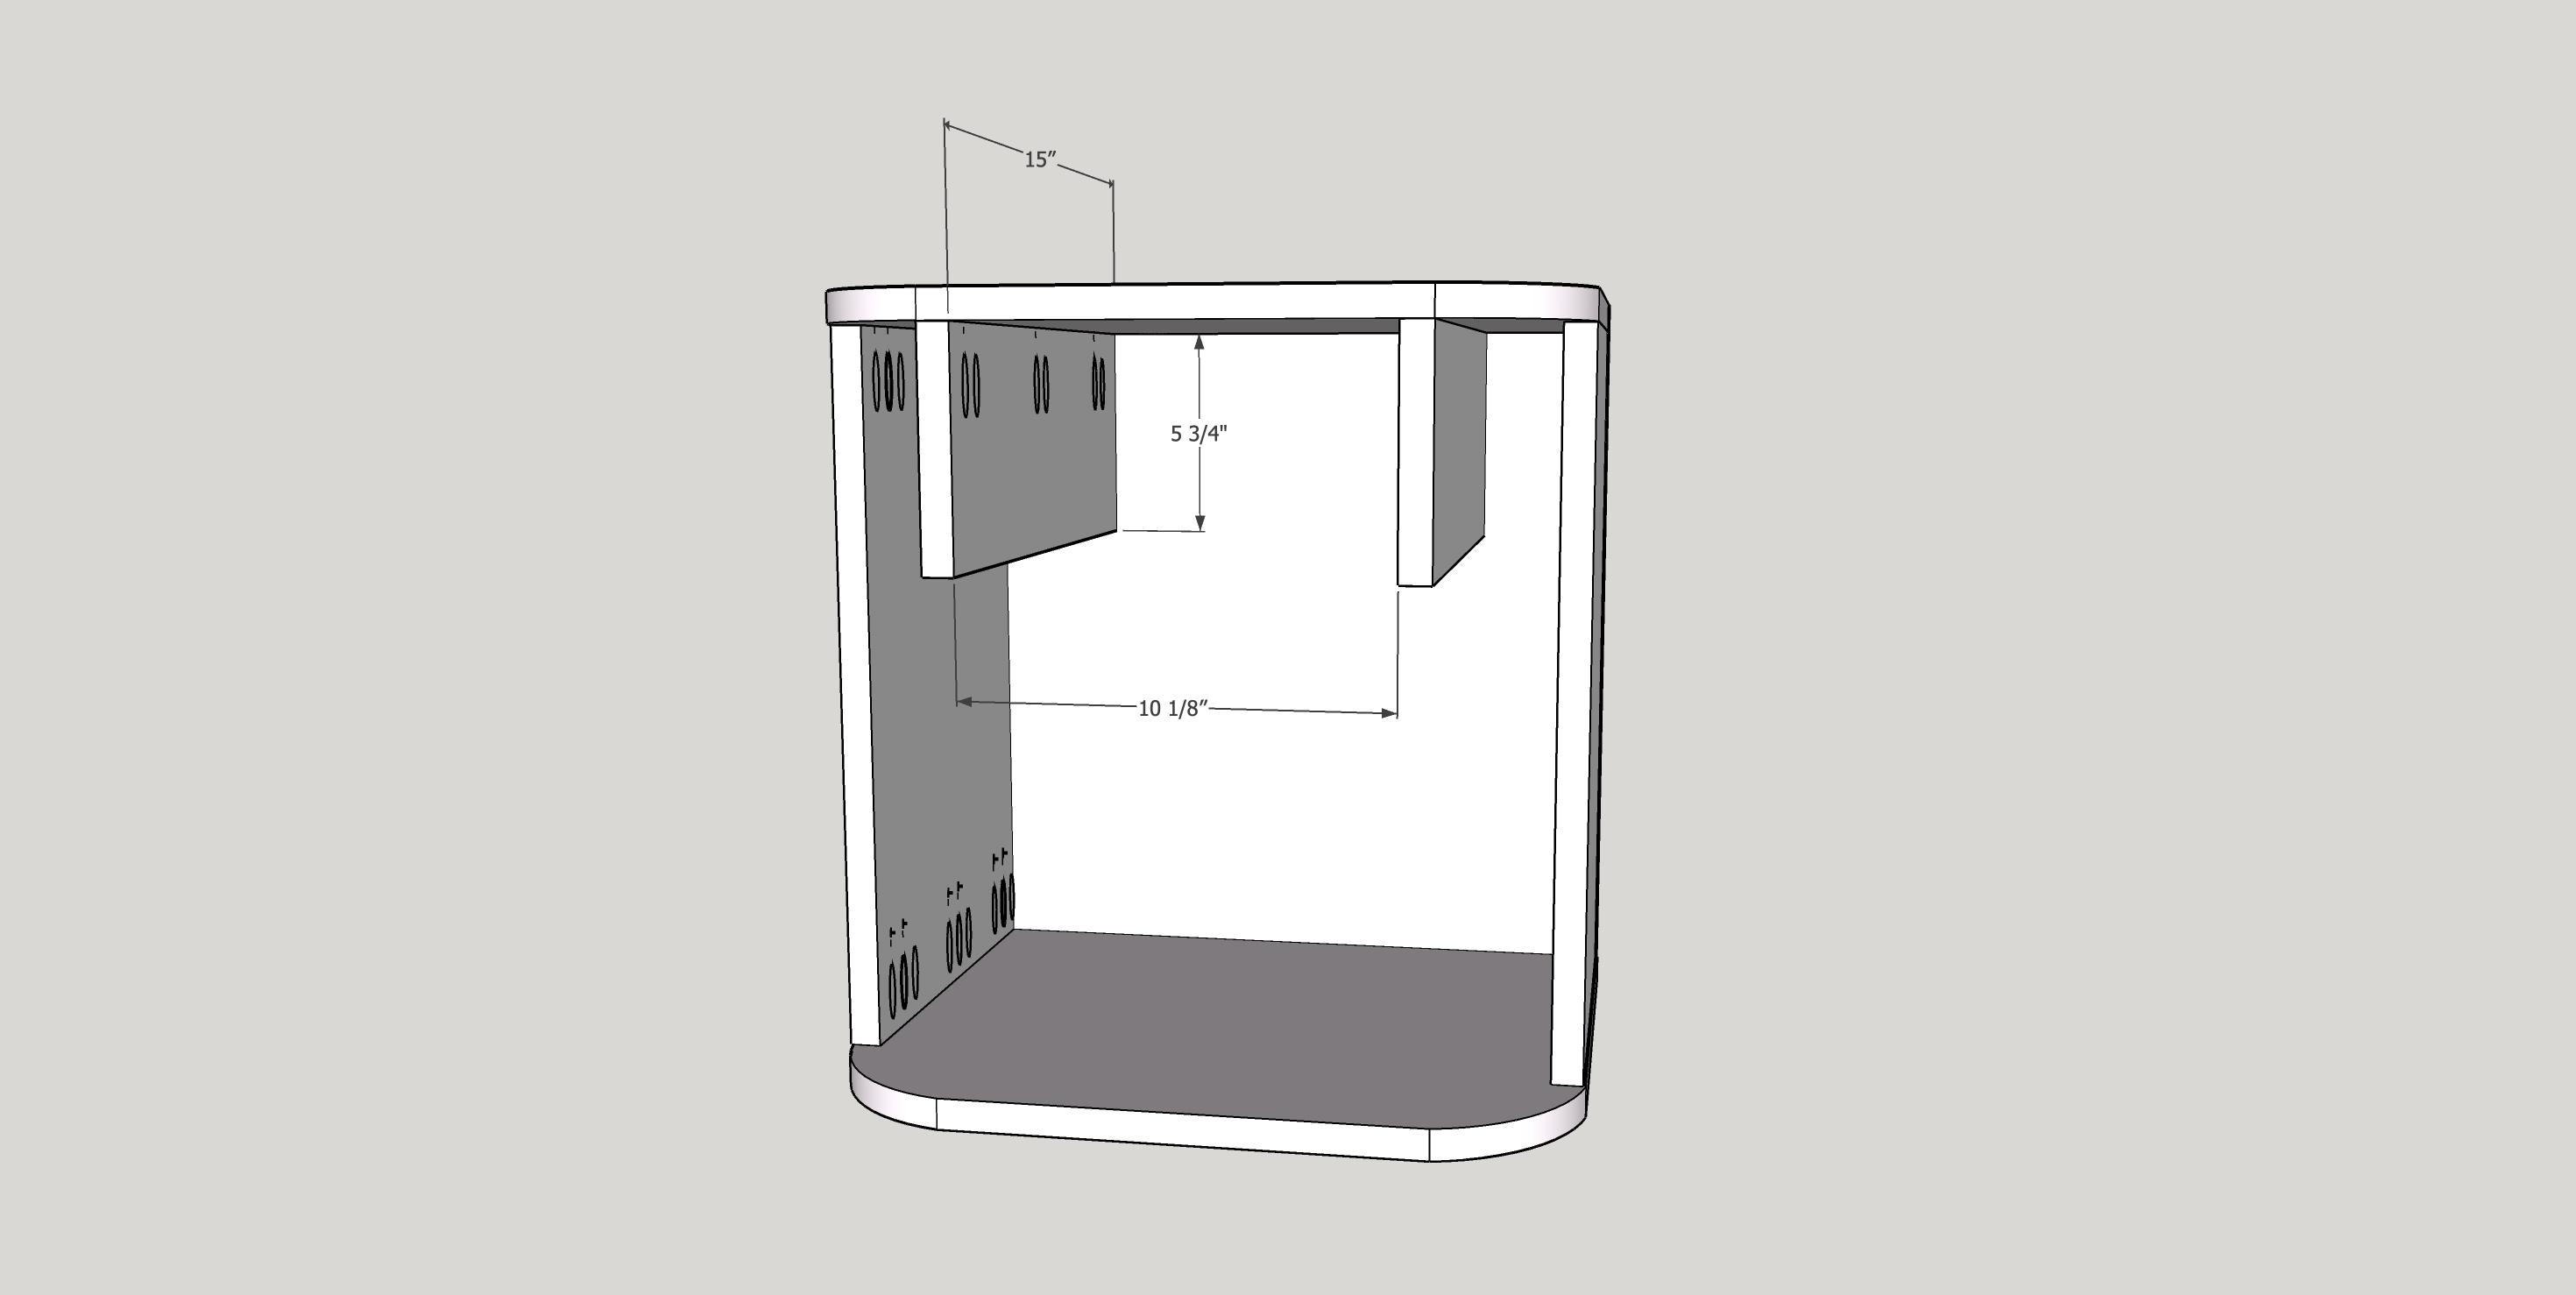
Attach the drawer slide supports with 1 1/4" pocket screws as shown in the diagram below. Make sure they are the correct distance from the sides of the nightstand so the drawer front will fit properly.
-
7
Attach the drawer slides flush with the edge of the front of the drawer slides supports you attached in the previous step.
The drawer slides should sit 1/2" up from the bottom of the drawer sides as shown in the diagram.
-
8
Drill 3/4" pocket holes on the drawer front/back as shown. Attach the drawer box sides to the front/backs as shown in the diagram using wood glue and 1 1/4" pocket screws.
Once the box is complete, attach the drawer bottom using wood glue and 1 1/4" brad nails.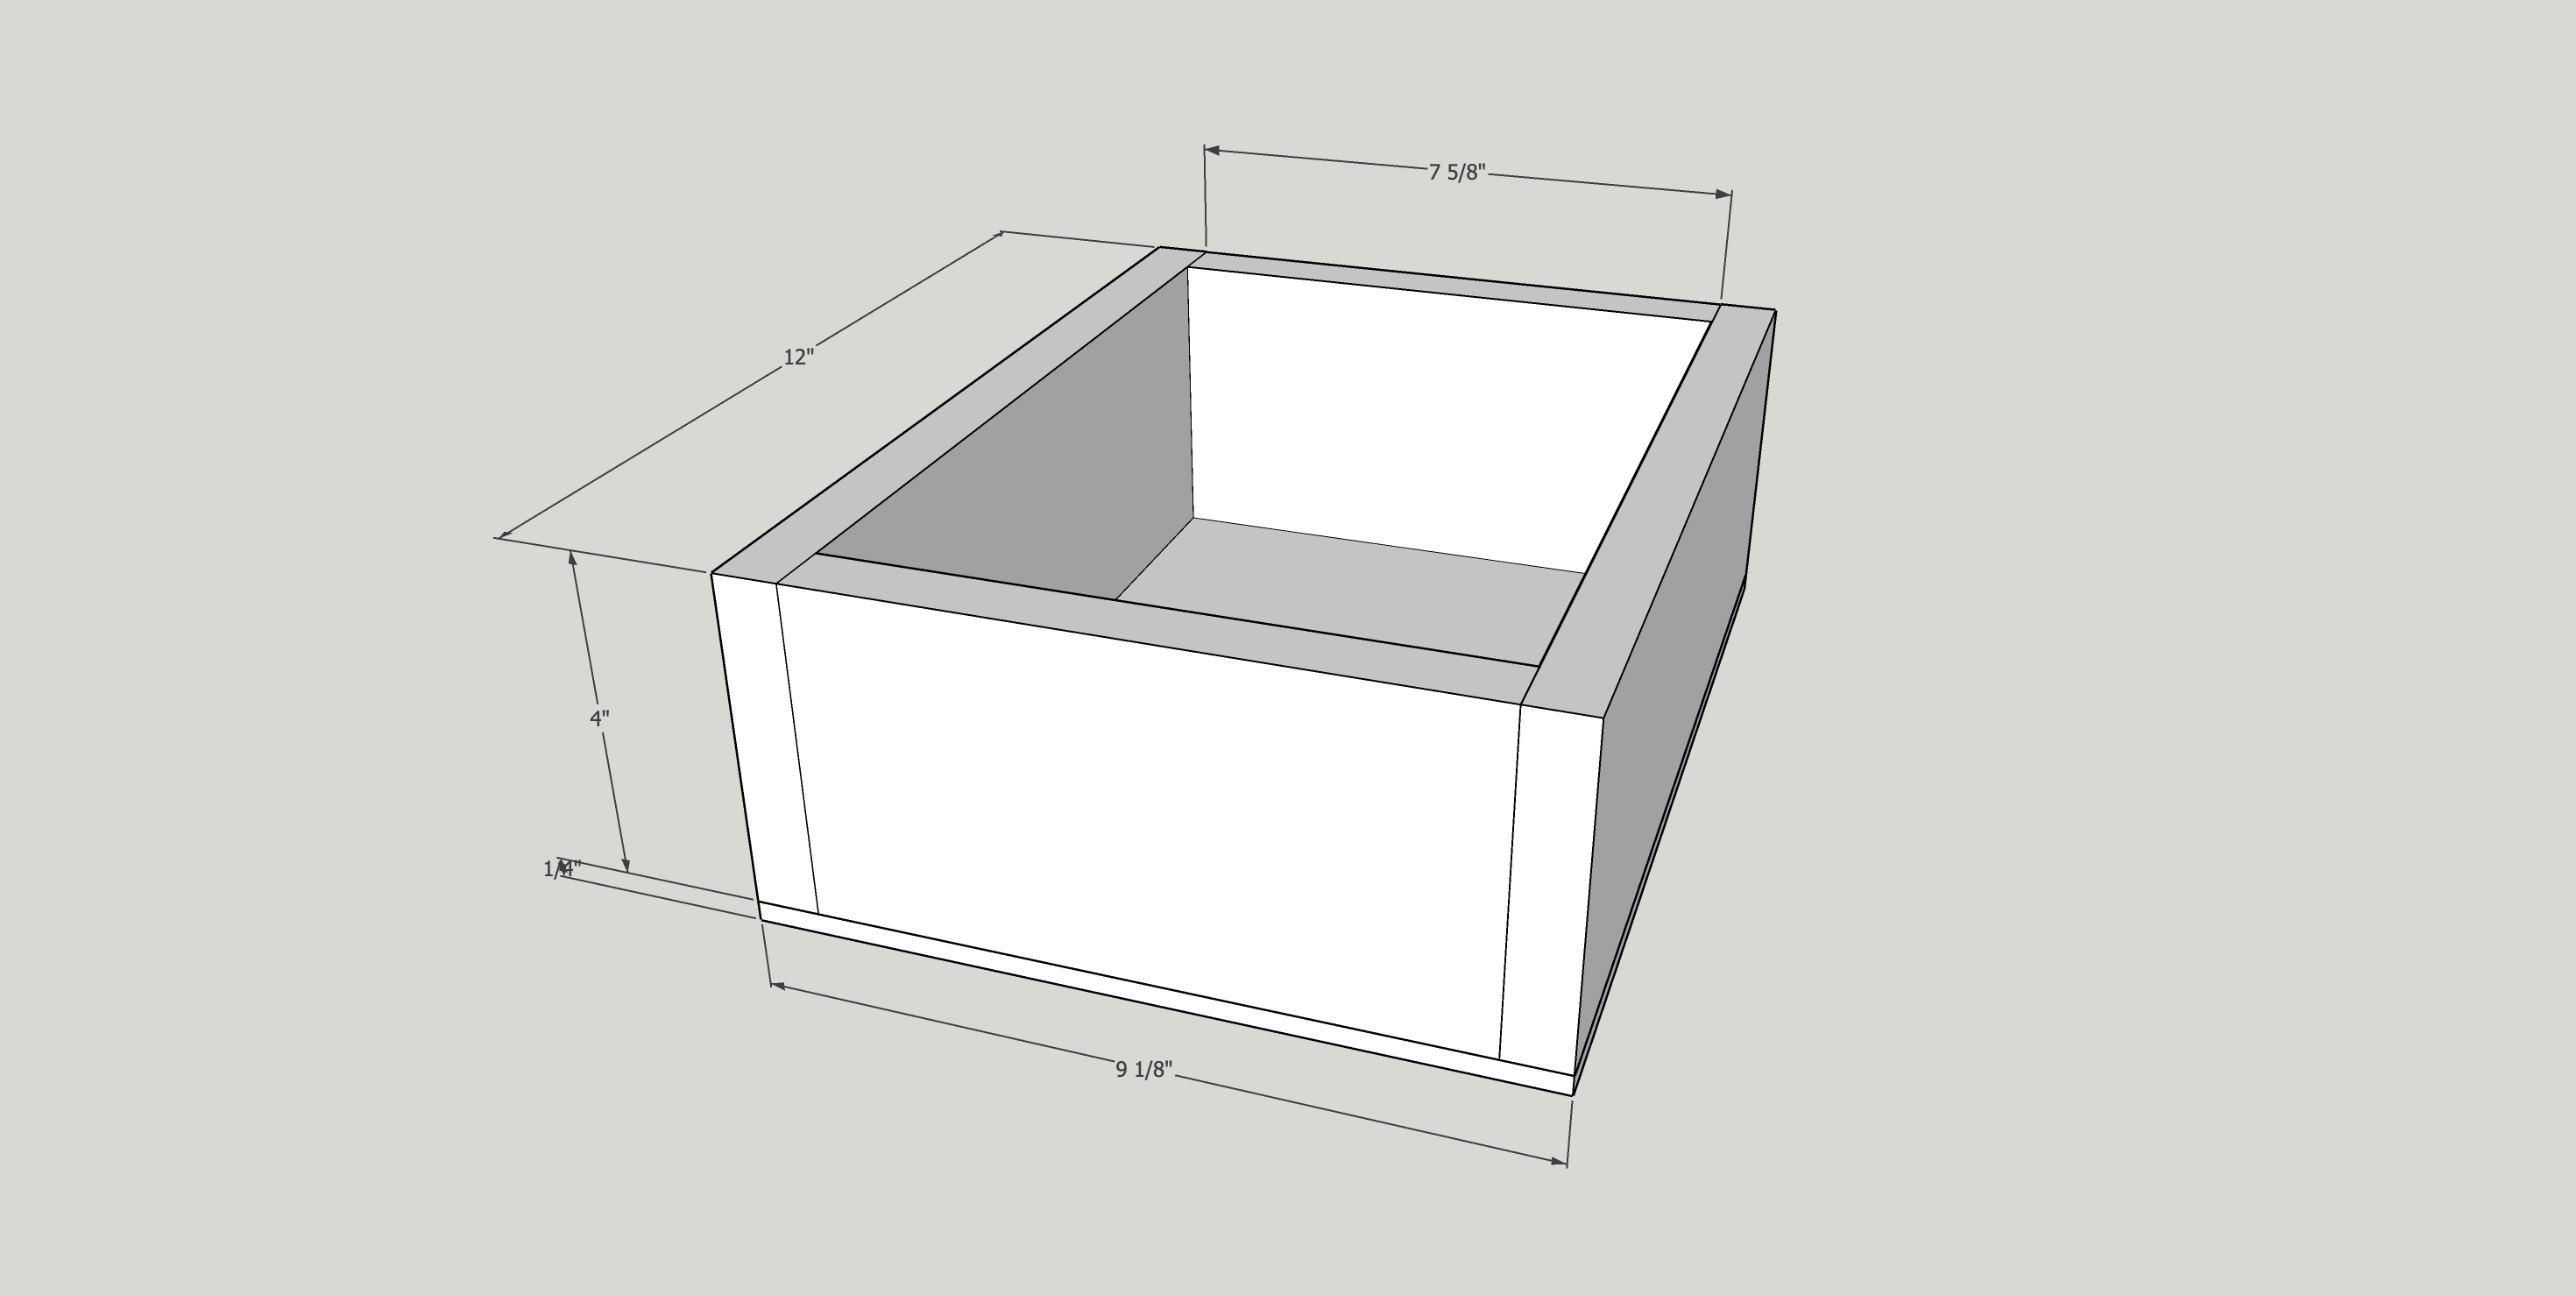
-
9
Using your jigsaw, place the drawer front up to the top of the nightstand. Trace the curve onto the top.
Cut as close as you can to the line with the jigsaw on both the bottom and the top.
Use your router and a flush trim bit, flush the top and bottom to the curved of the drawer front.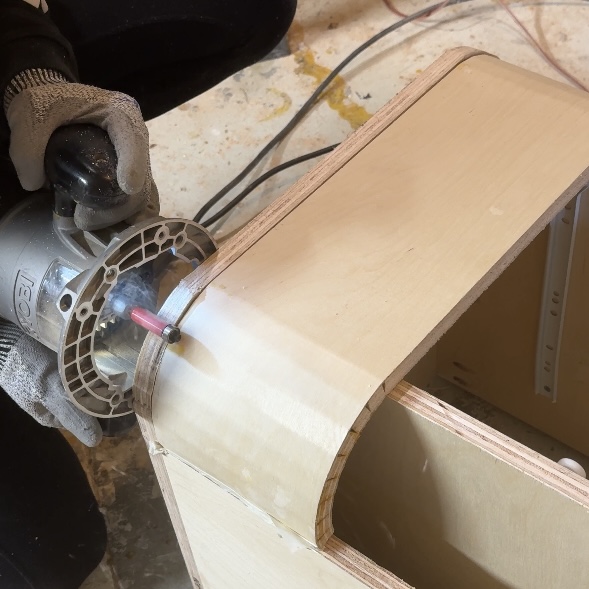
-
10
Using double sided tape, position the drawer front so it sits just under the top of the nightstand with about 1/8" gap.
Using 1 1/4" screws, attach the drawer front from the inside of the drawer box.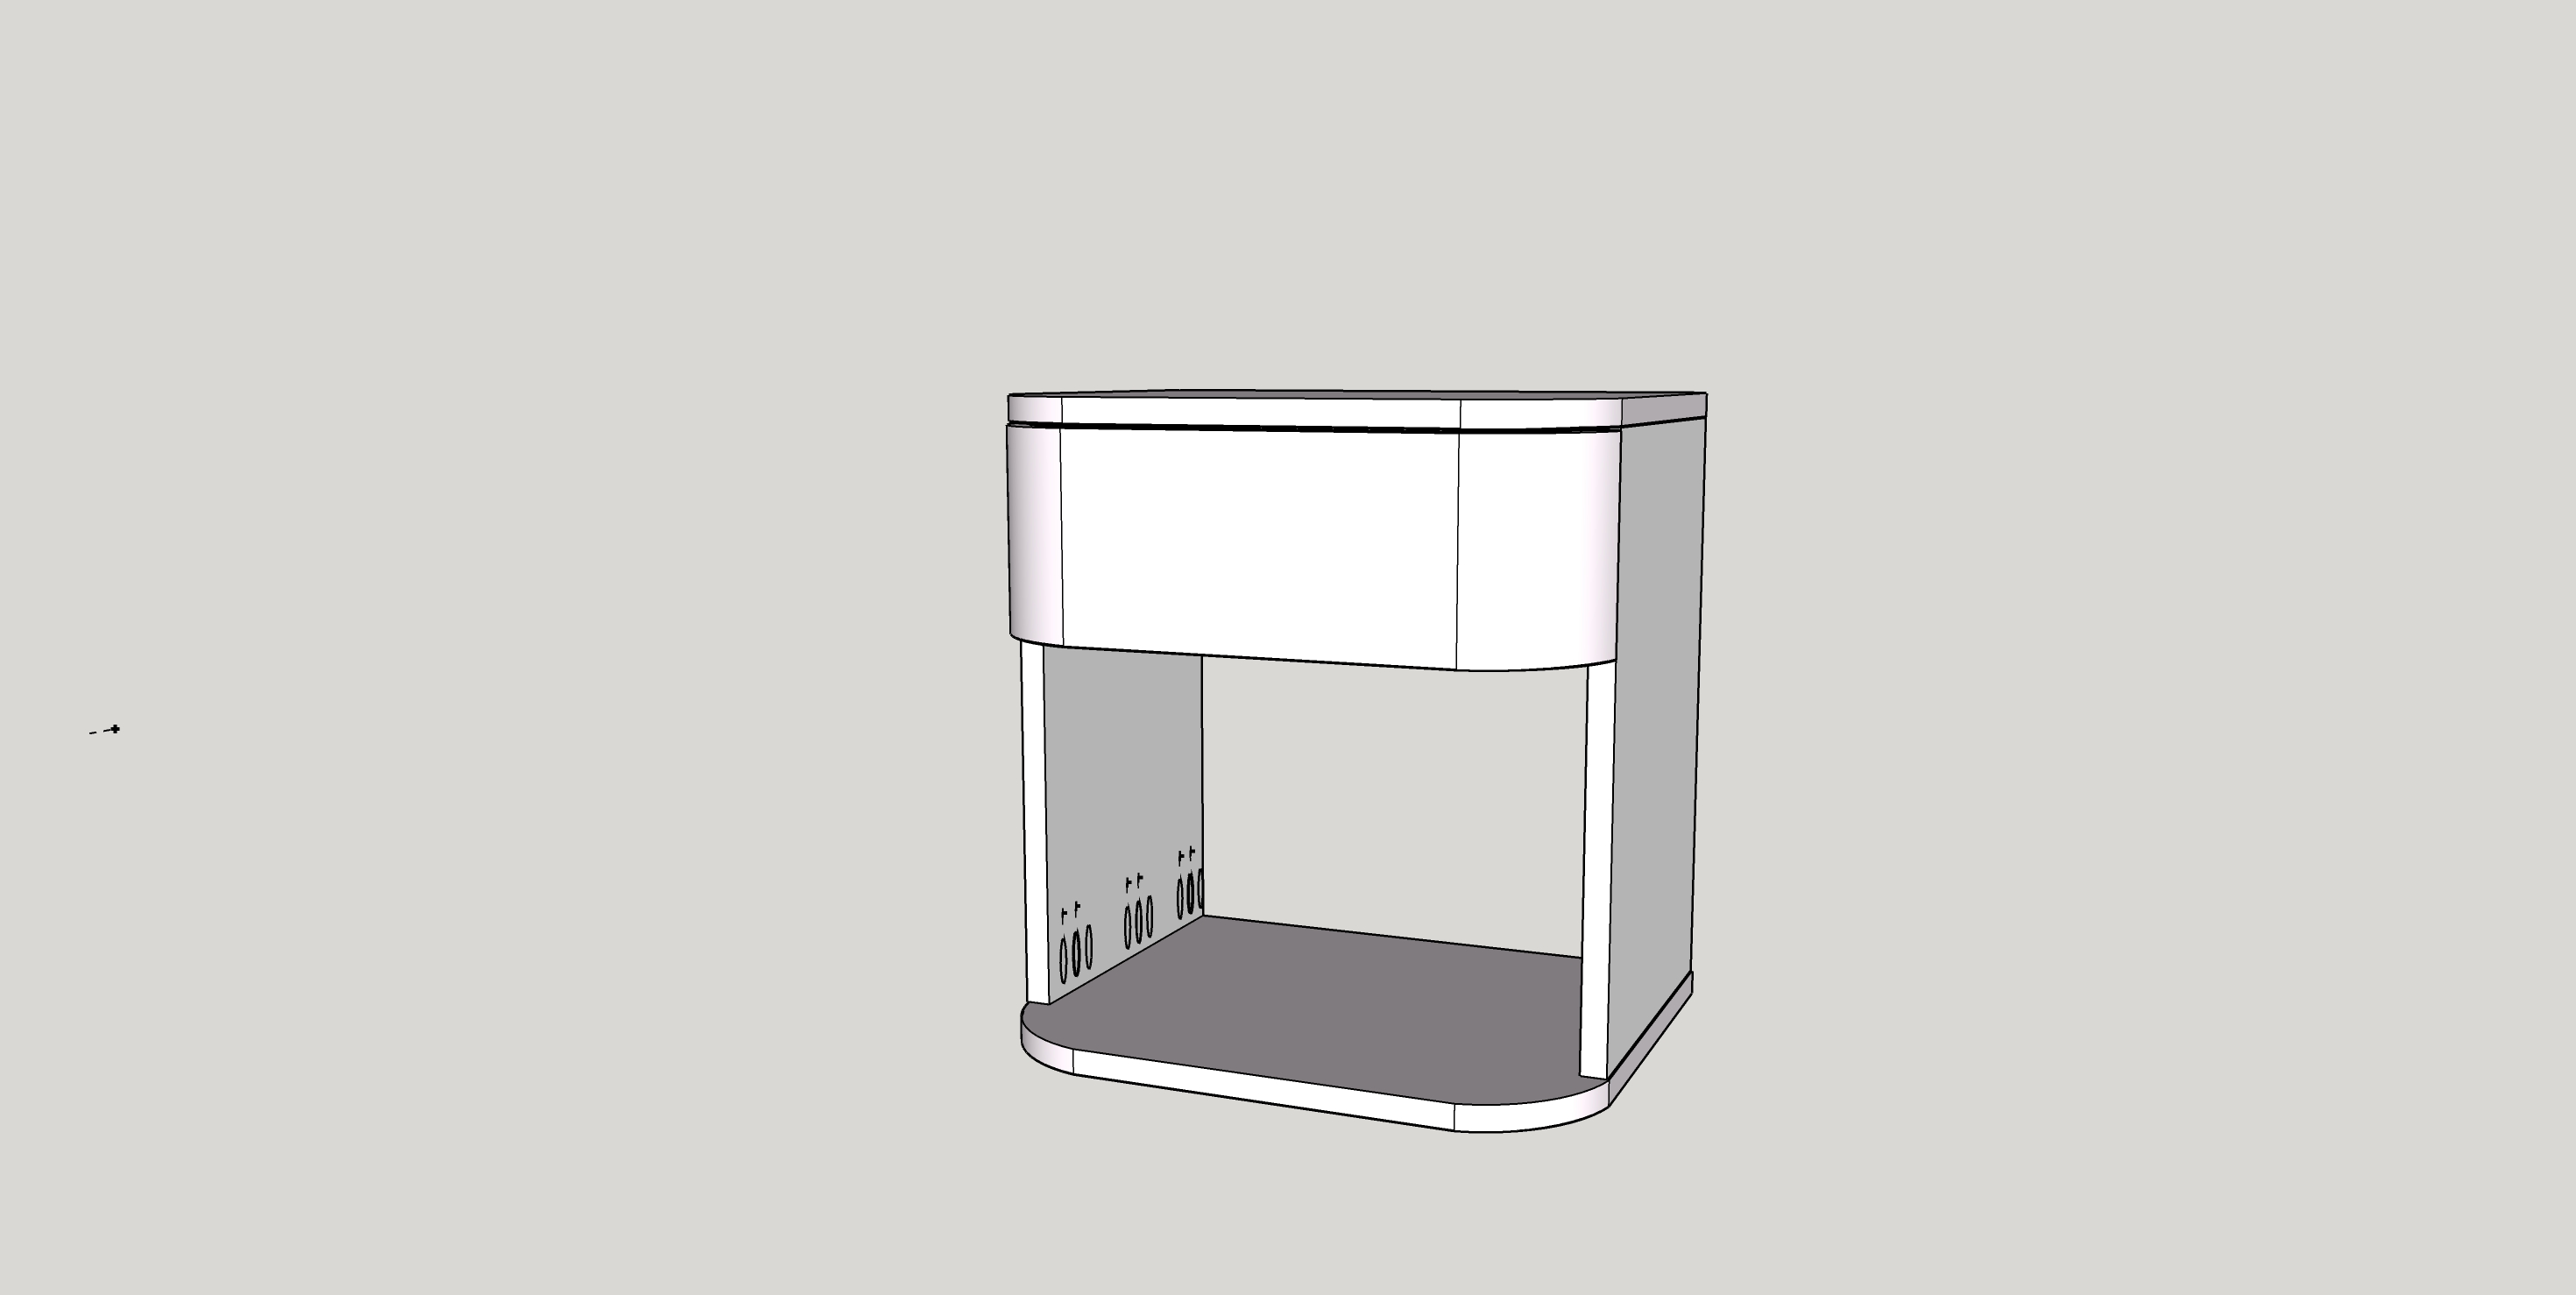
-
11
Add edge banding to the exposed plywood. Sand with 120 grit, followed by 220 grit. Finish as desired with paint or stain.