Toy Box with Easel
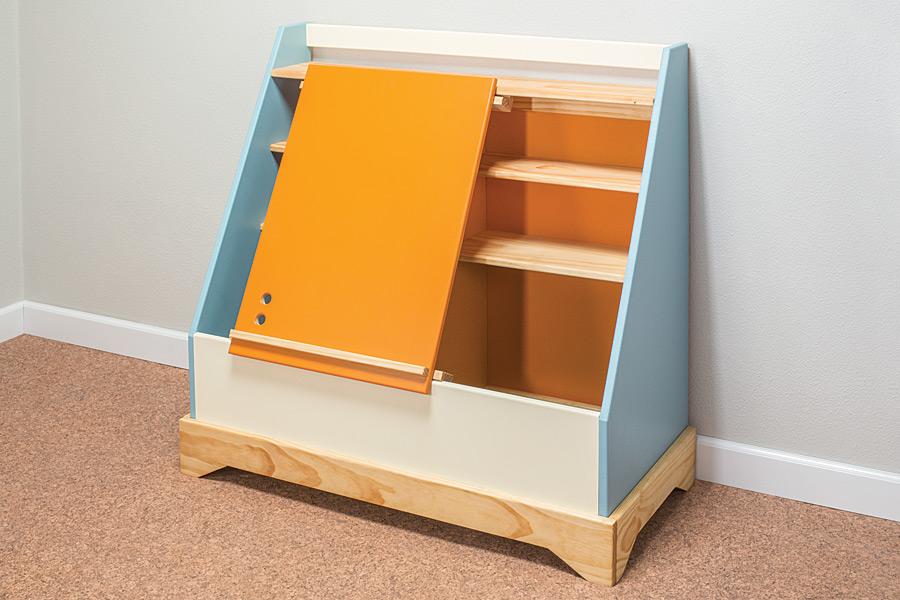
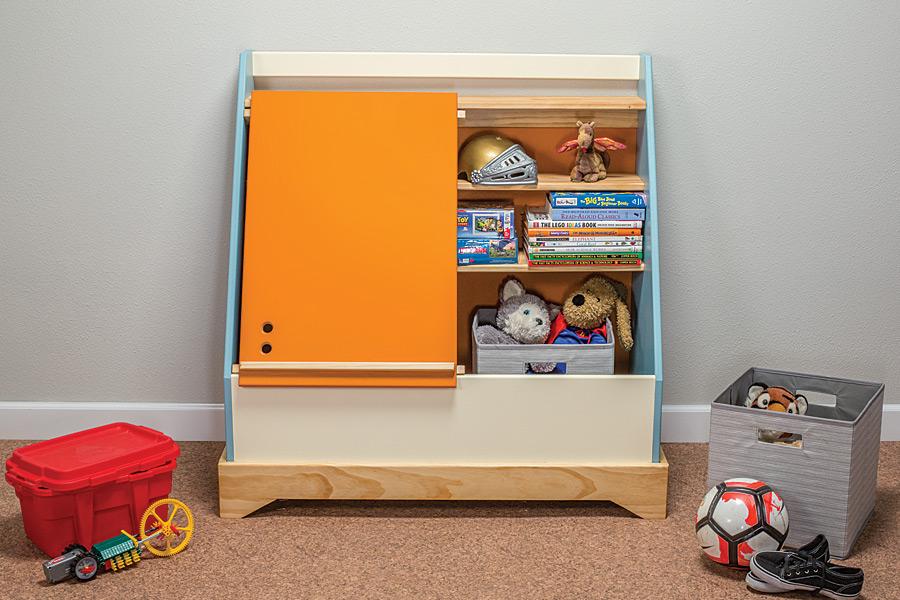
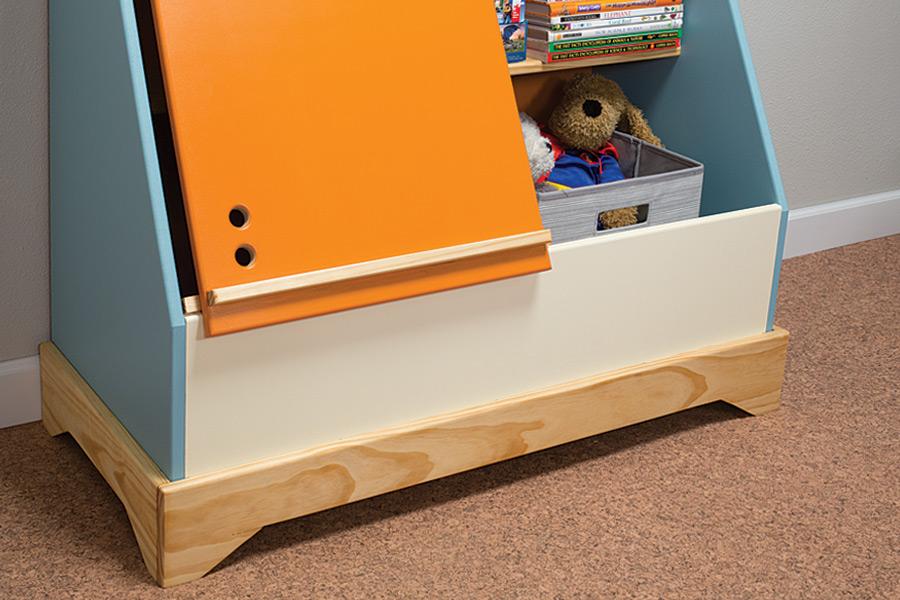
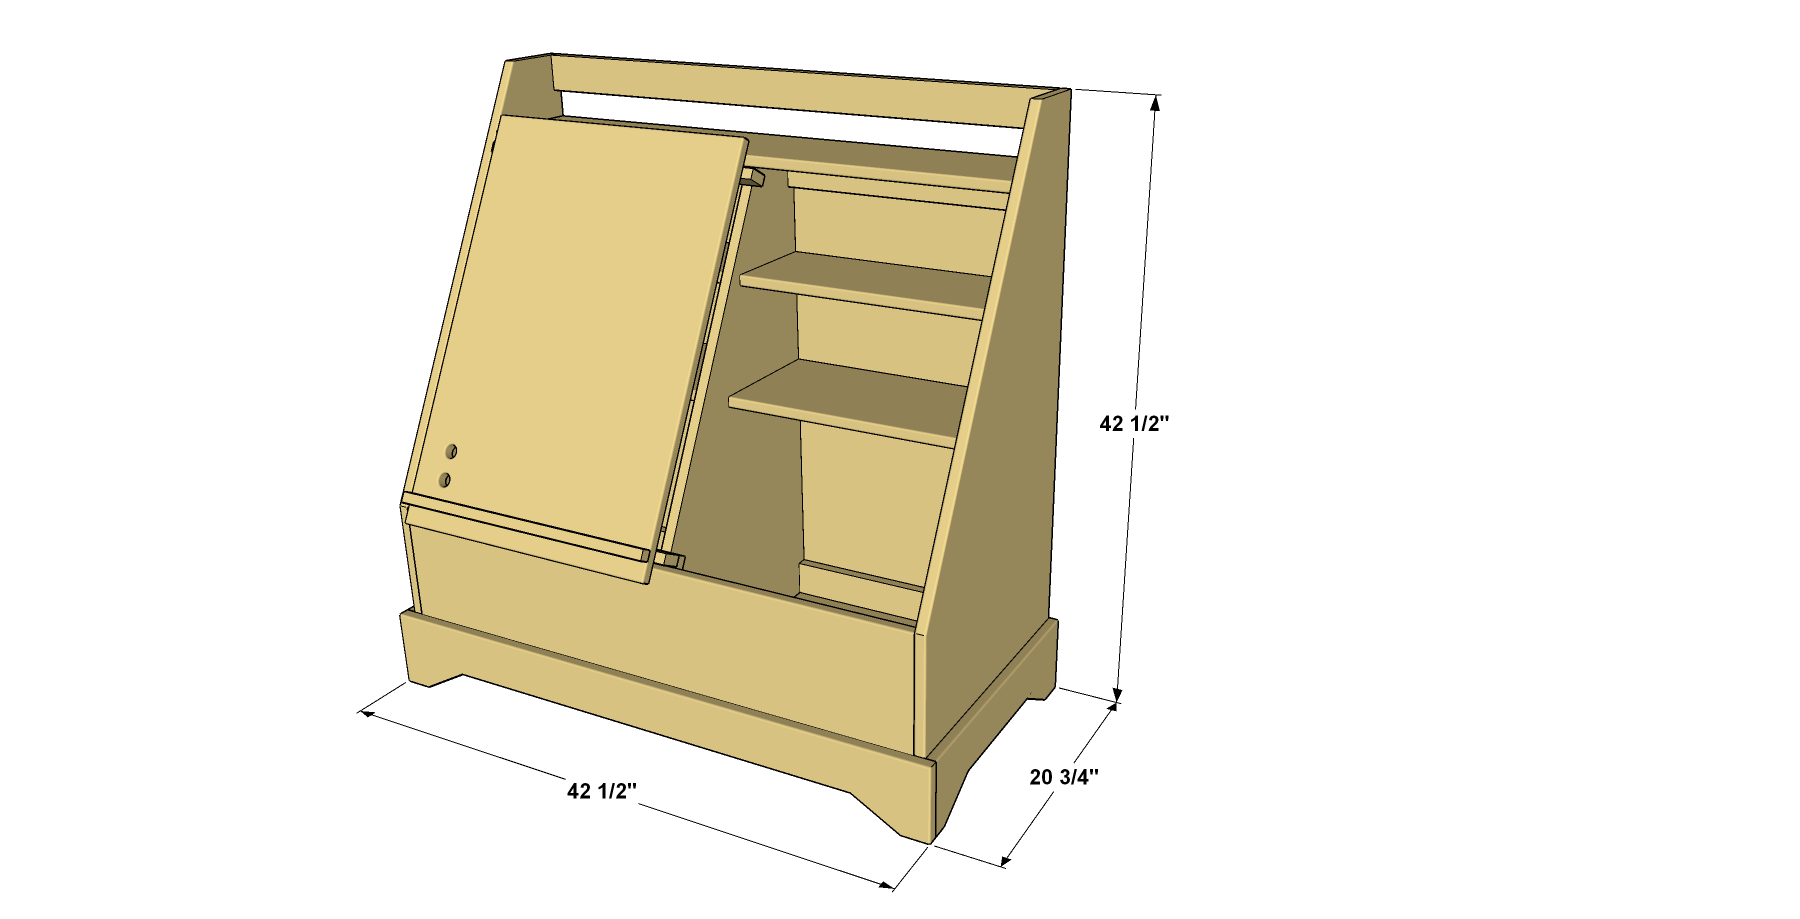
By Kreg ToolHere’s a cool twist on a traditional toy box. This one offers lots of storage space, has shelves inside to help keep things organized, and even a bookshelf on top. Plus, the door doubles as an easel that can support large sheets of paper for drawing and coloring. It’s built from MDF and pine boards.
Directions
-
Create the Outer Case Parts
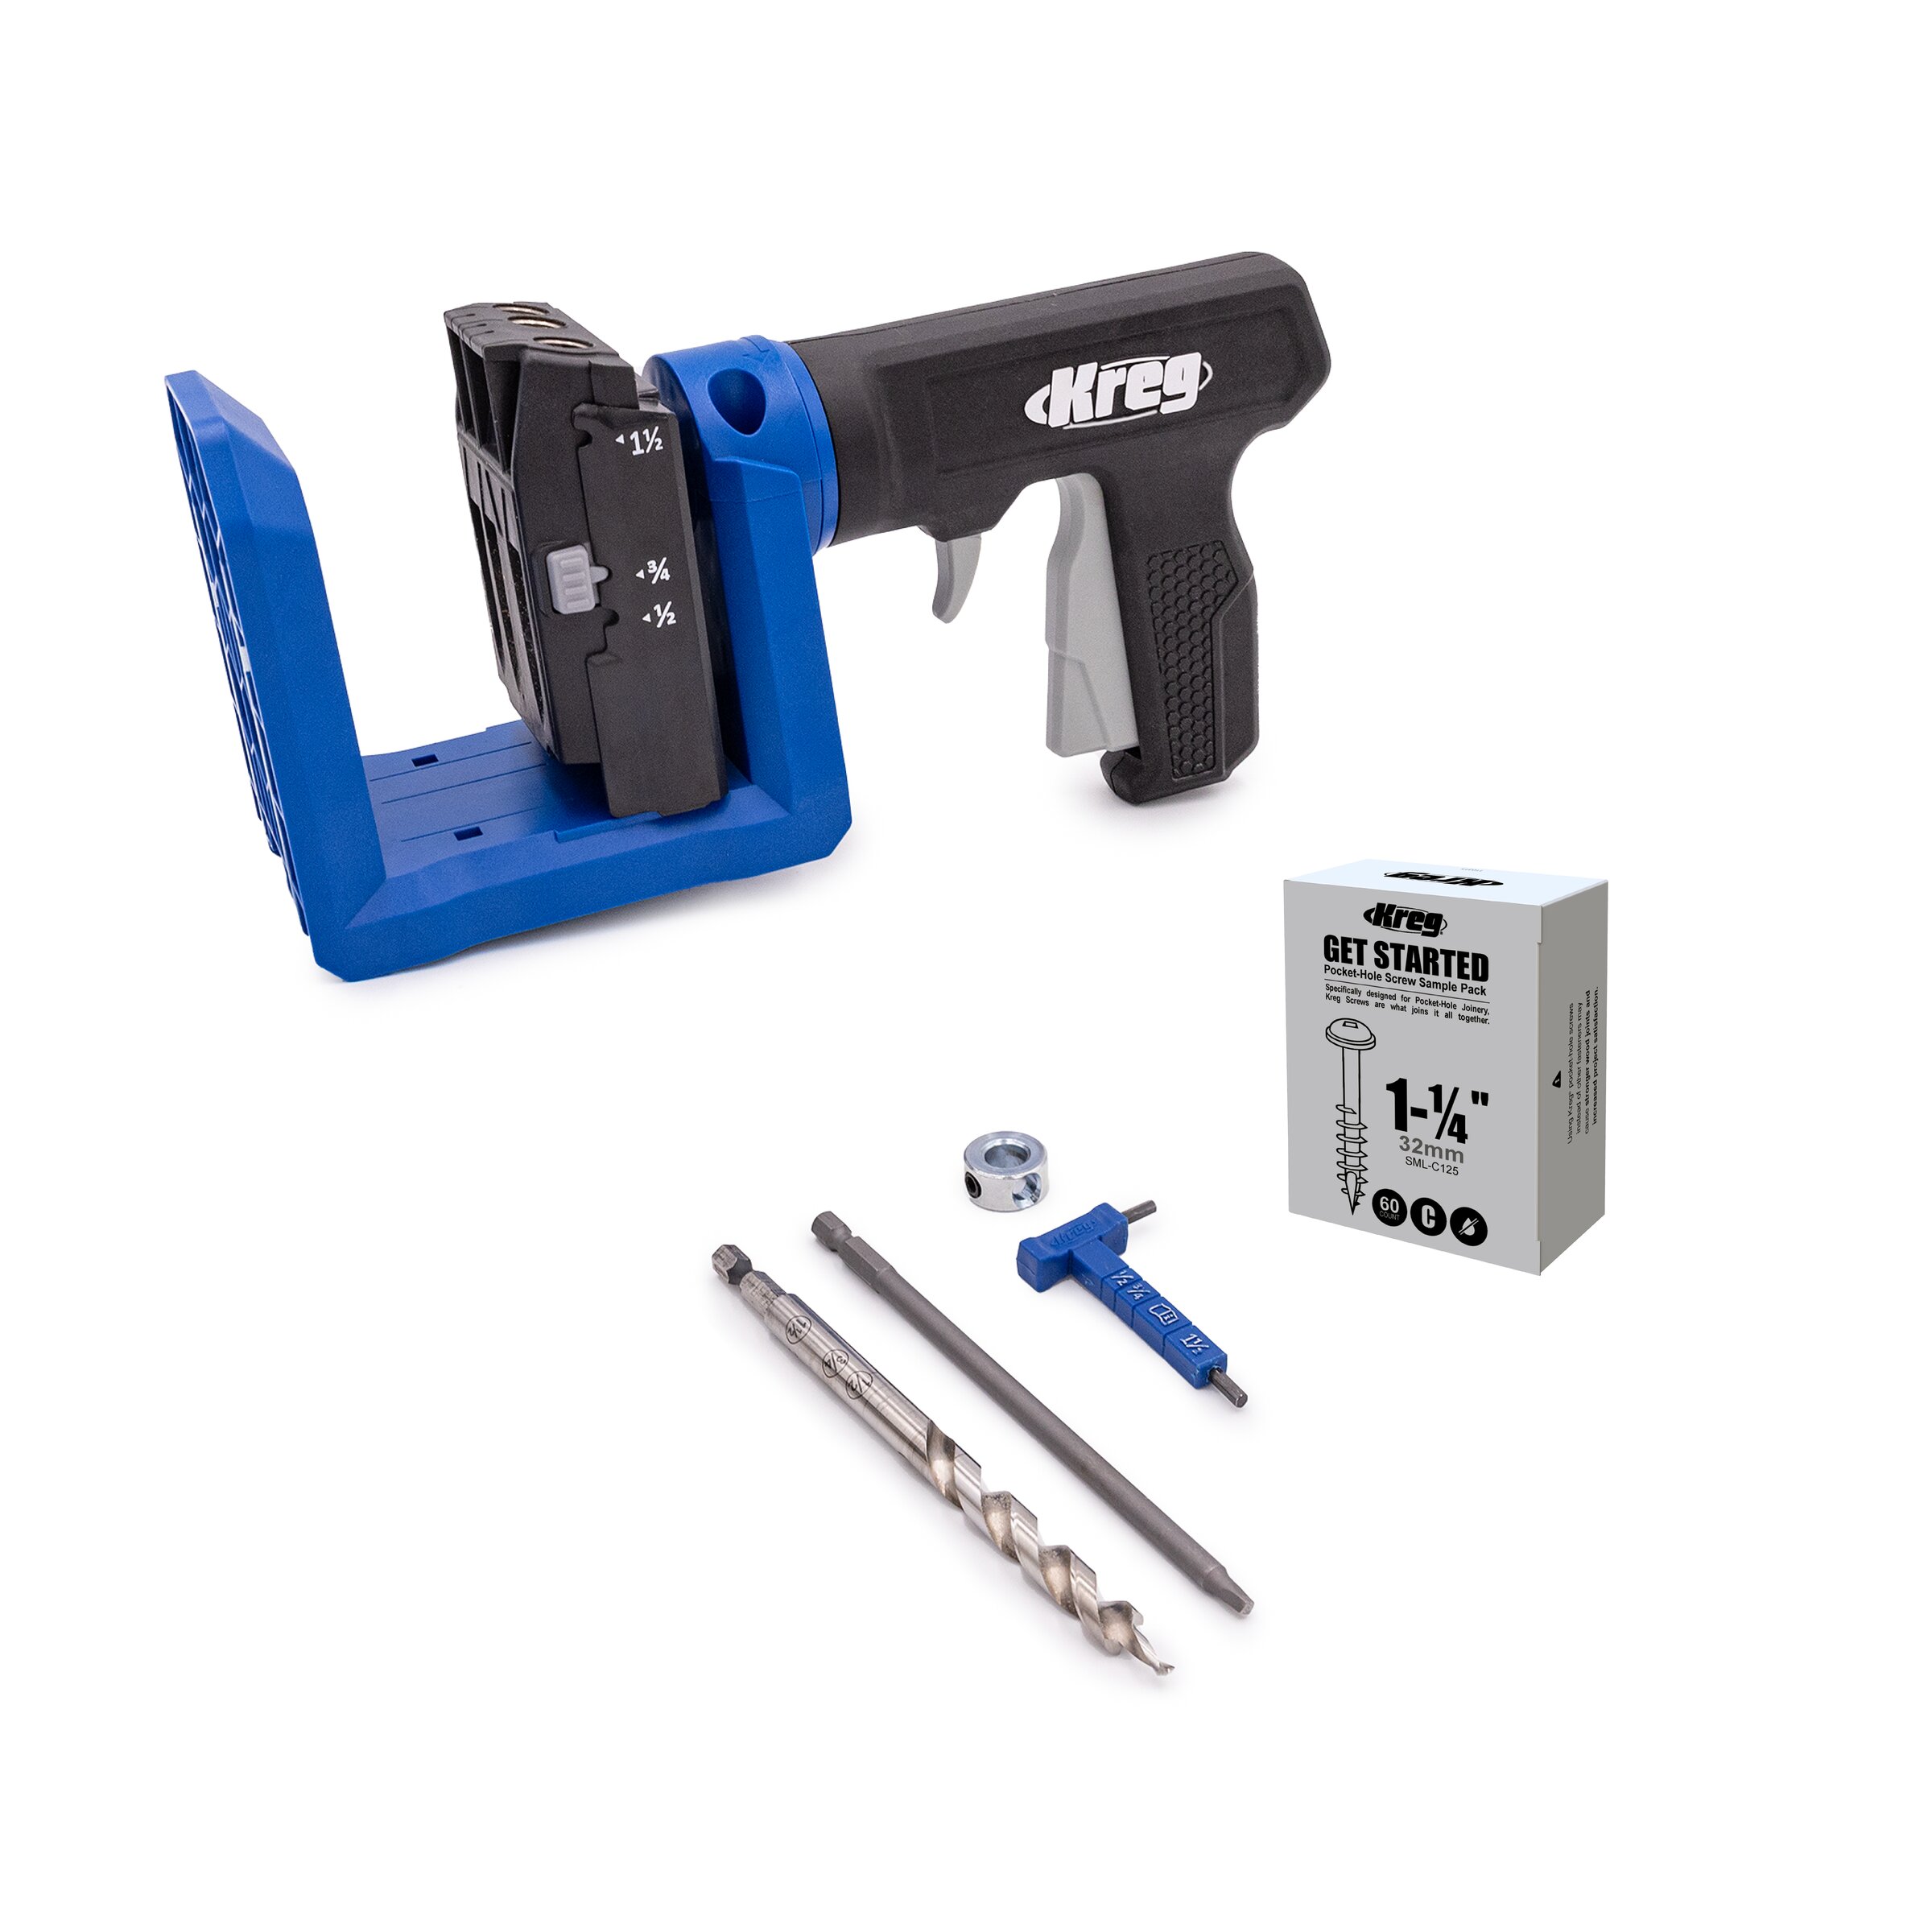
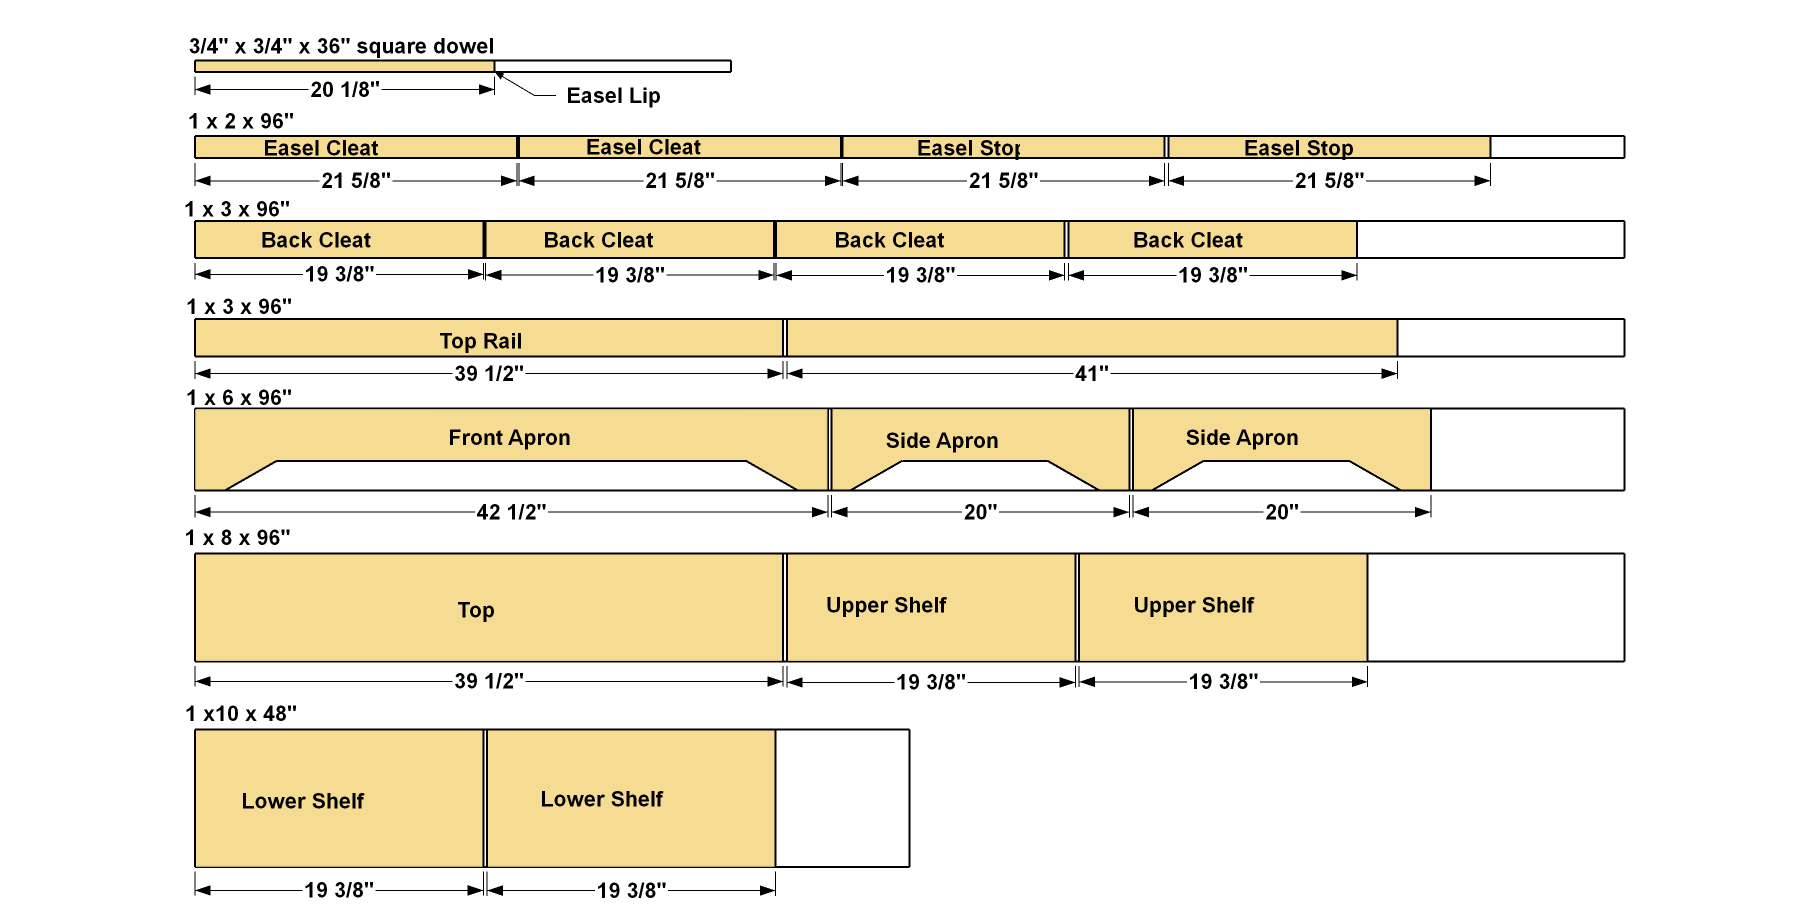
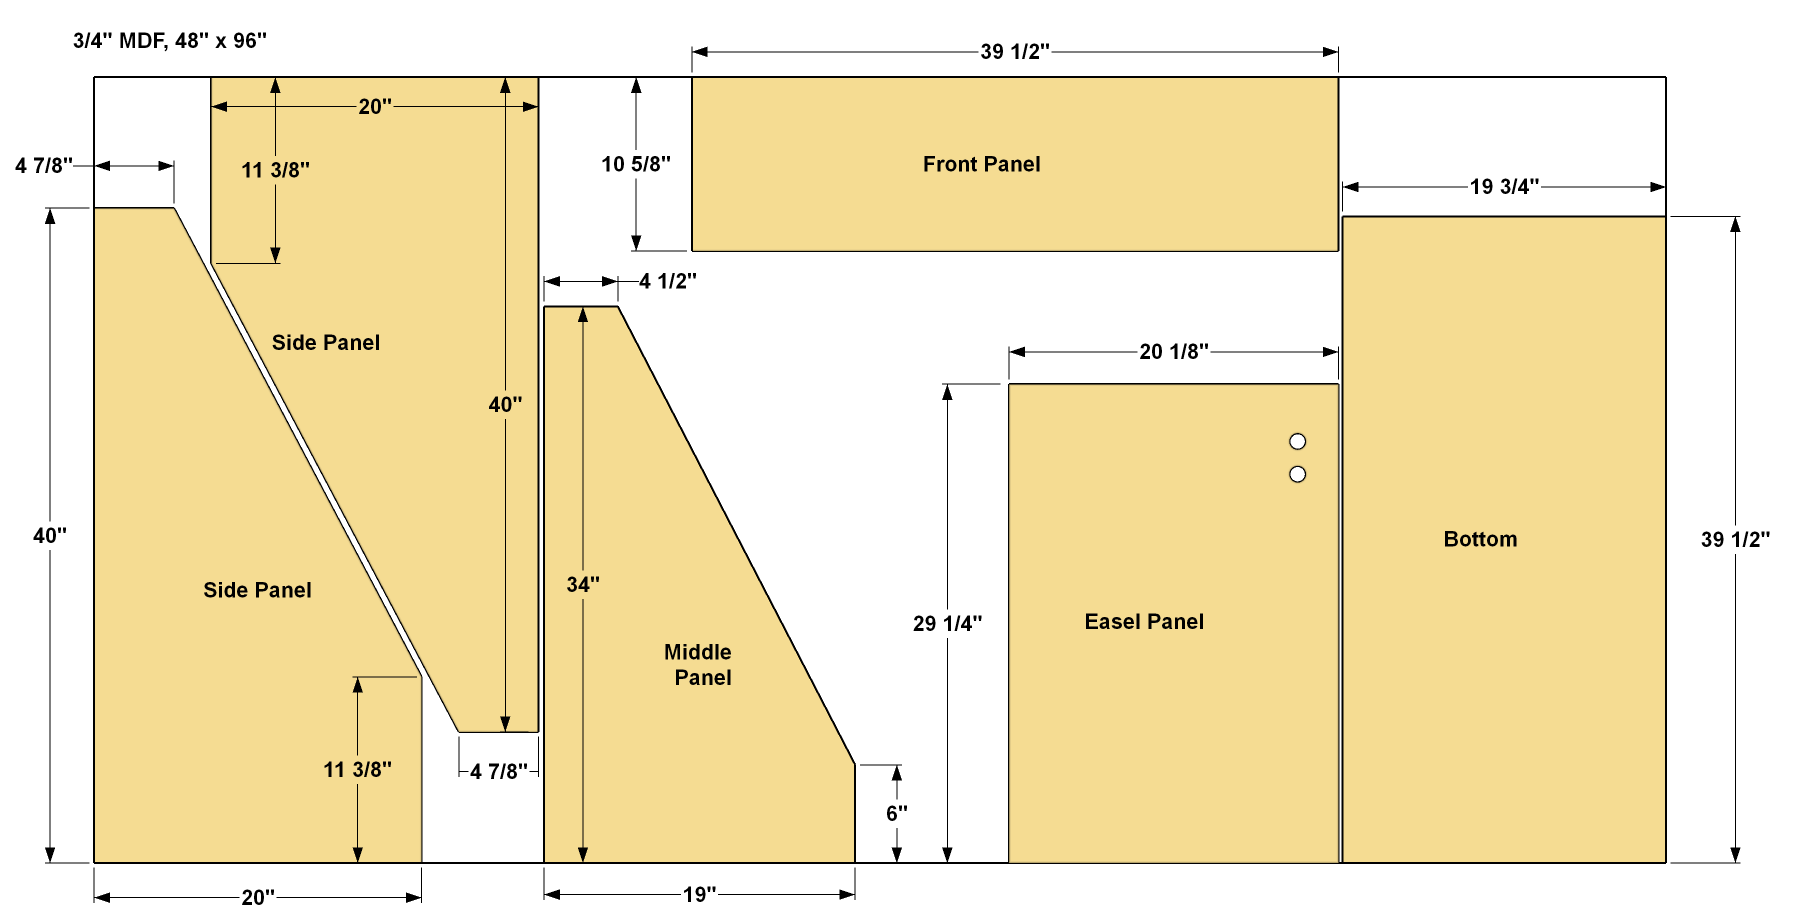
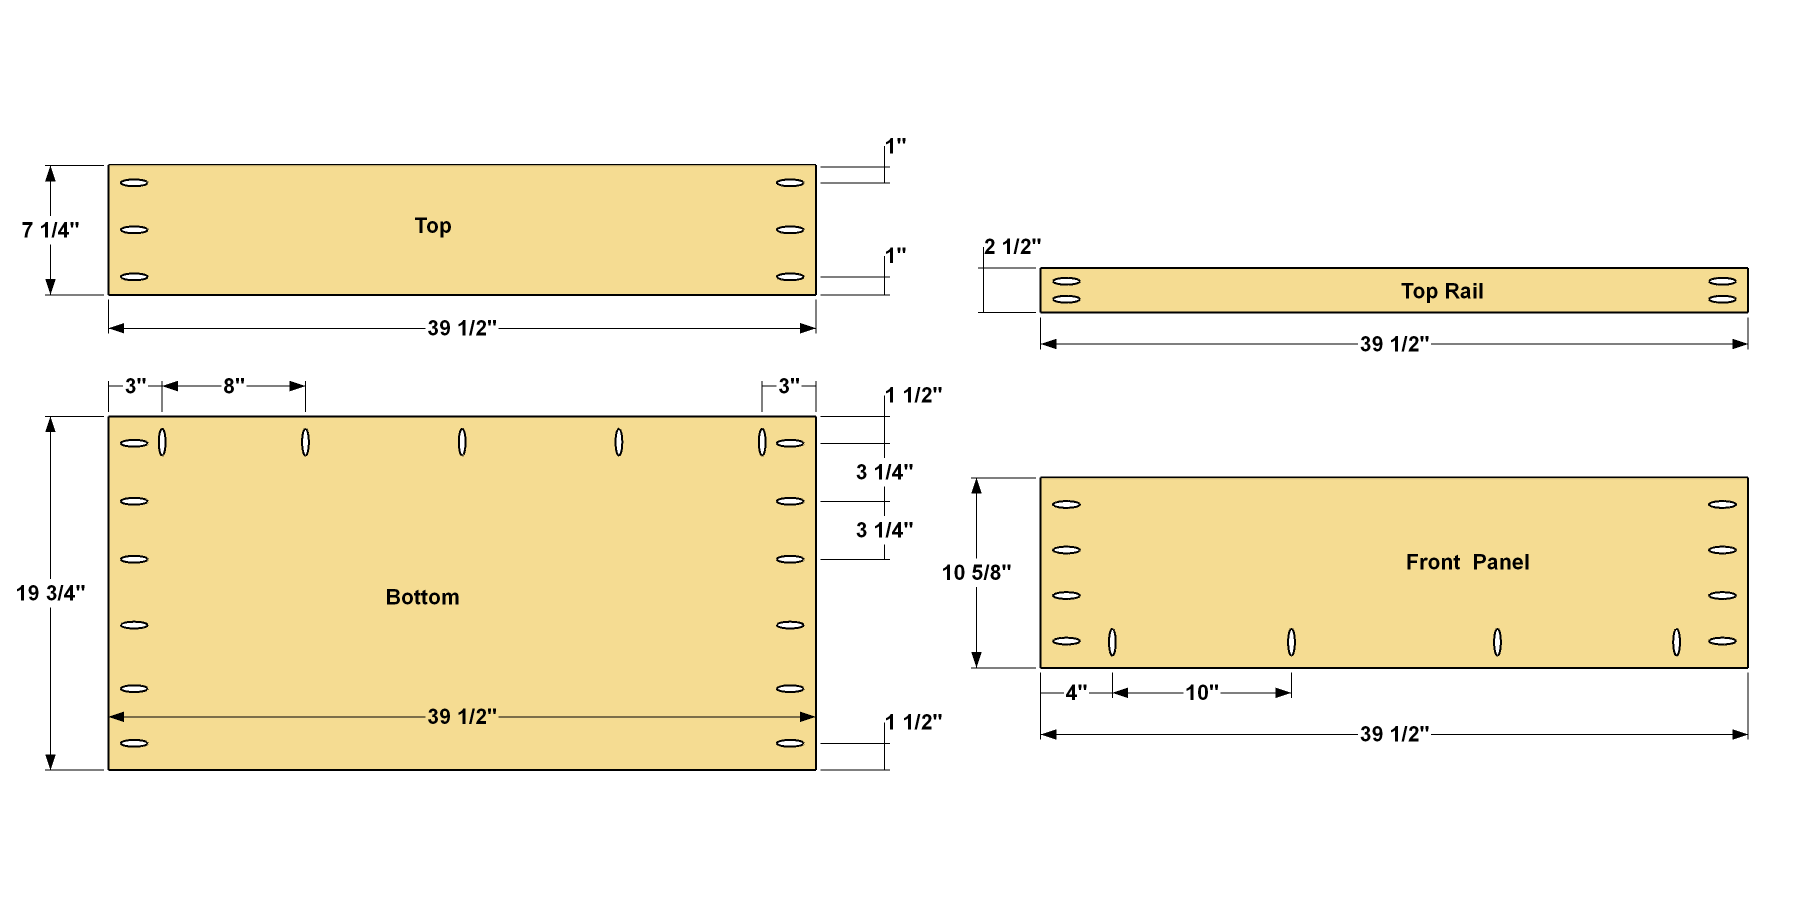
Cut one Bottom, one Front Panel, and two Sides from 3/4" MDF, as shown in the cutting diagram. To cut the angled portions of the sides, you can use a jigsaw, or use a circular saw guided by a straightedge. Also cut one Top from a 1x8 board, and one Top Rail from a 1x3 board, as shown in the cutting diagram. Set your pocket hole jig for 3/4" thick material. You’ll be able to leave the jig set this way for the entire project. Drill pocket holes where shown in the Top, Bottom, Front Panel, and Top Rail. The Sides don’t have any pocket holes.
-
Begin Case Assembly
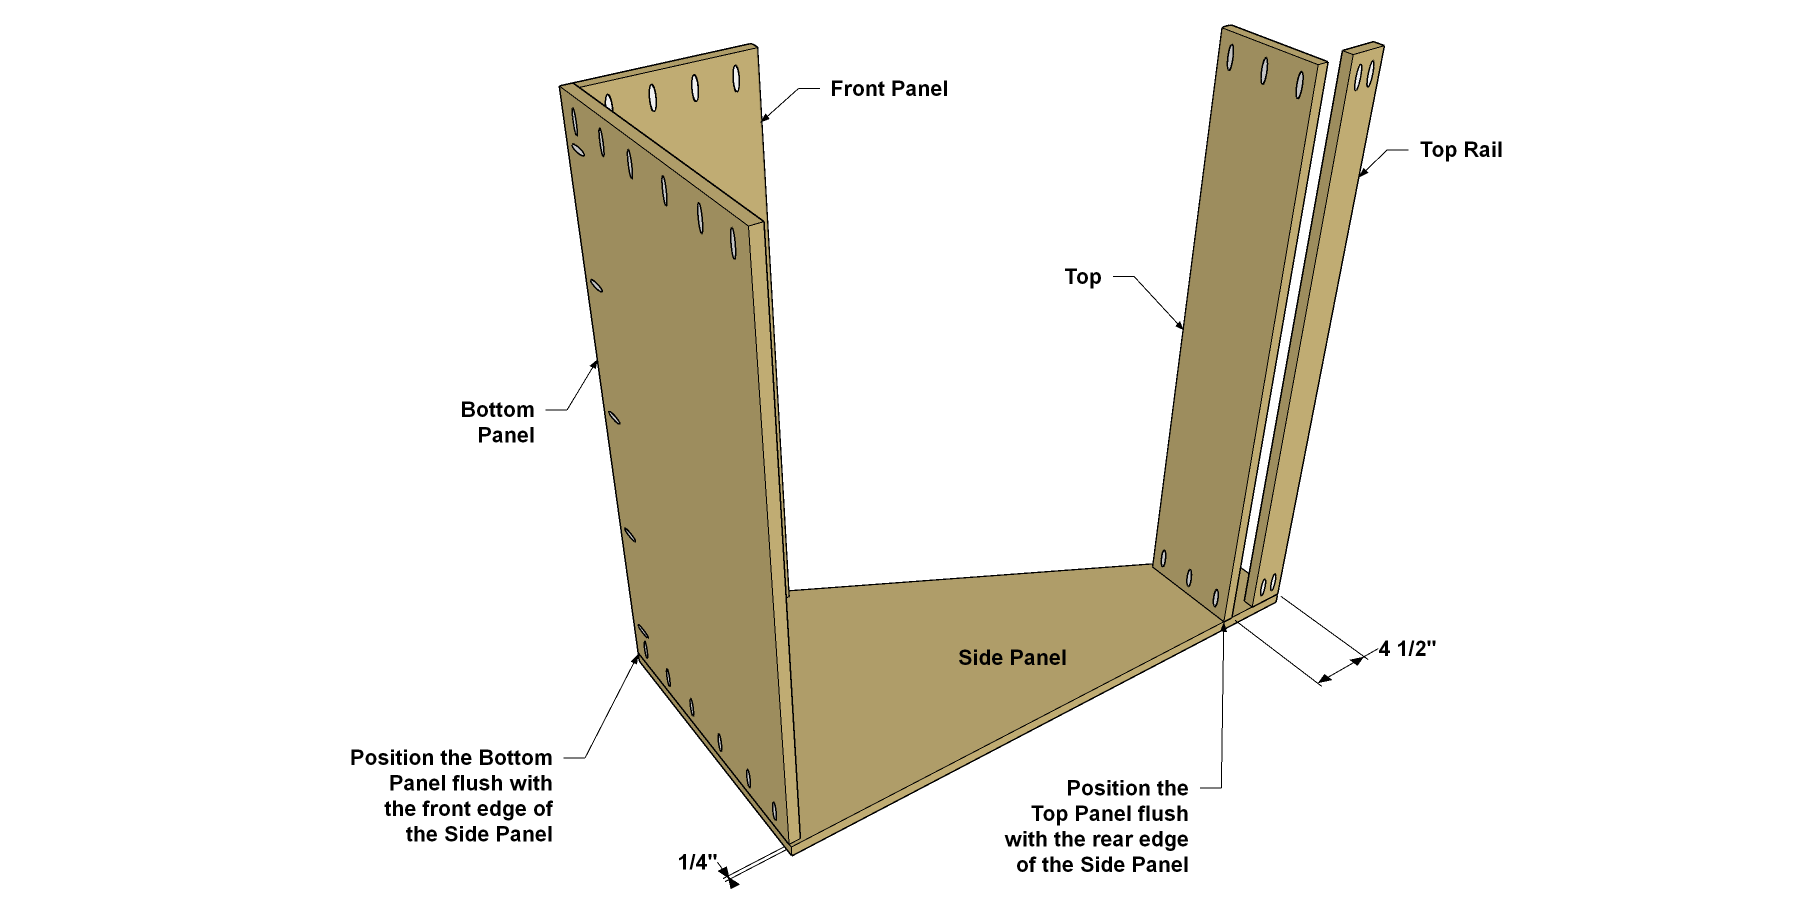
Attach the Bottom, Top, Top Rail, and Front Panel to one Side Panel with 1 1/4" coarse-thread pocket hole screws. Note the Bottom Panel is flush with the front edge of the Side Panel. This leaves a 1/4" gap at the rear to accept the Back Panel you’ll make later. The Top, on the other hand, is mounted flush with the rear edge of the Side.
-
Make the Shelves and Cleats
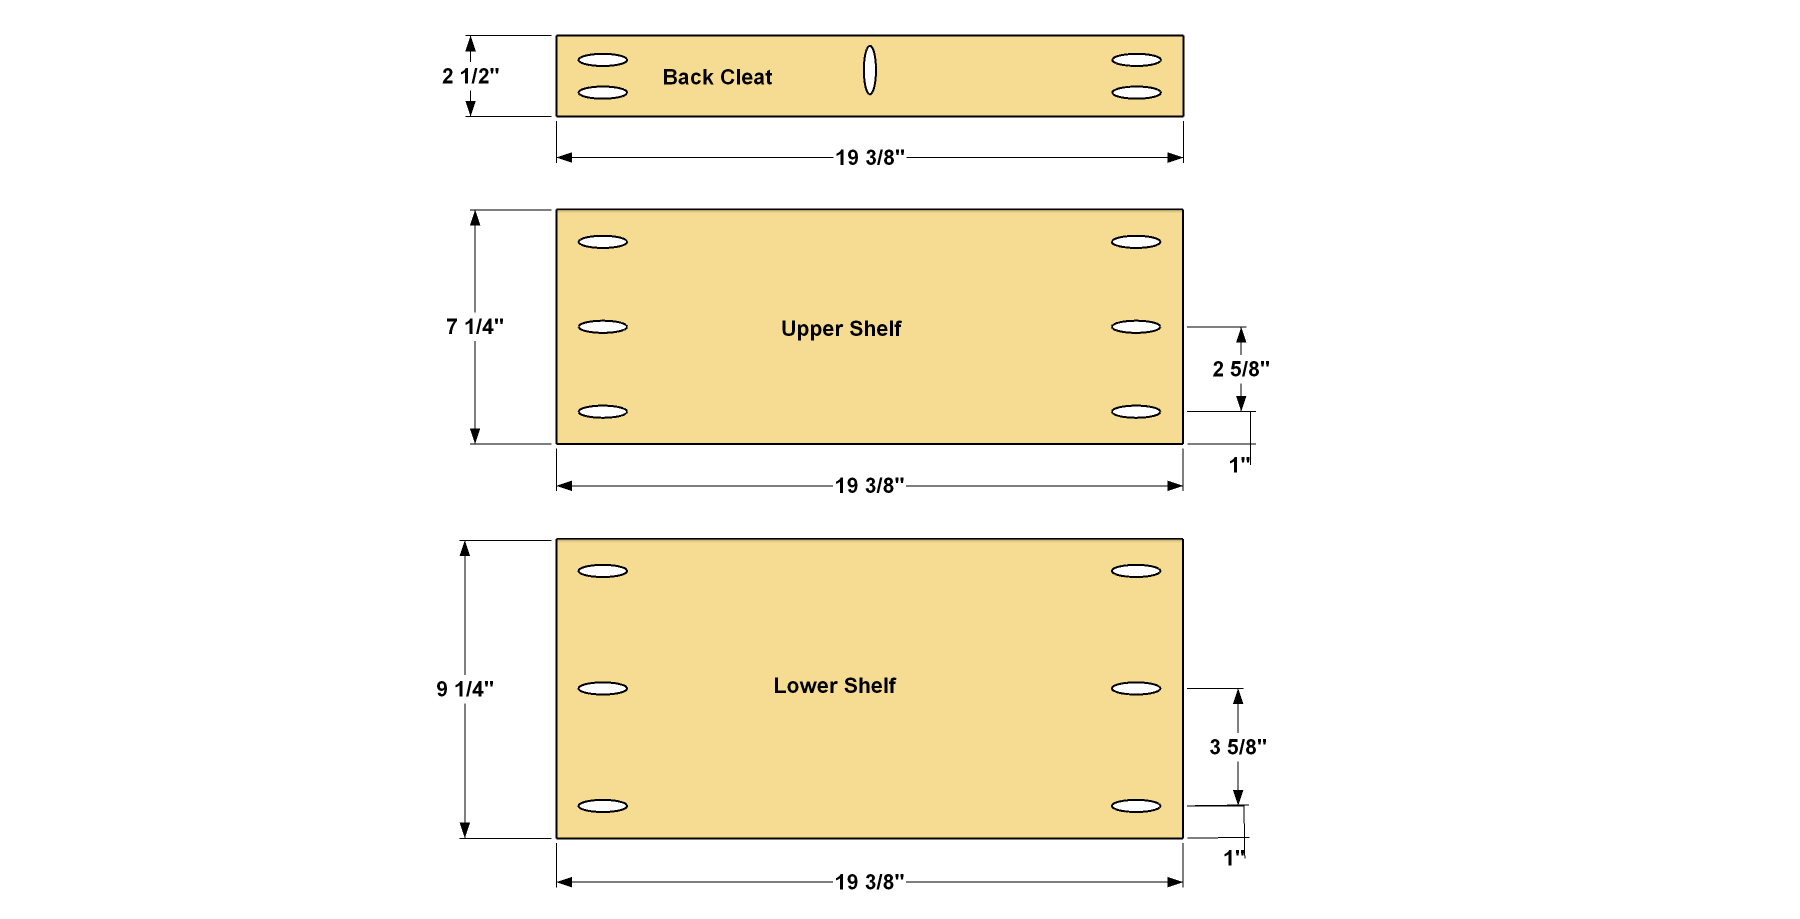
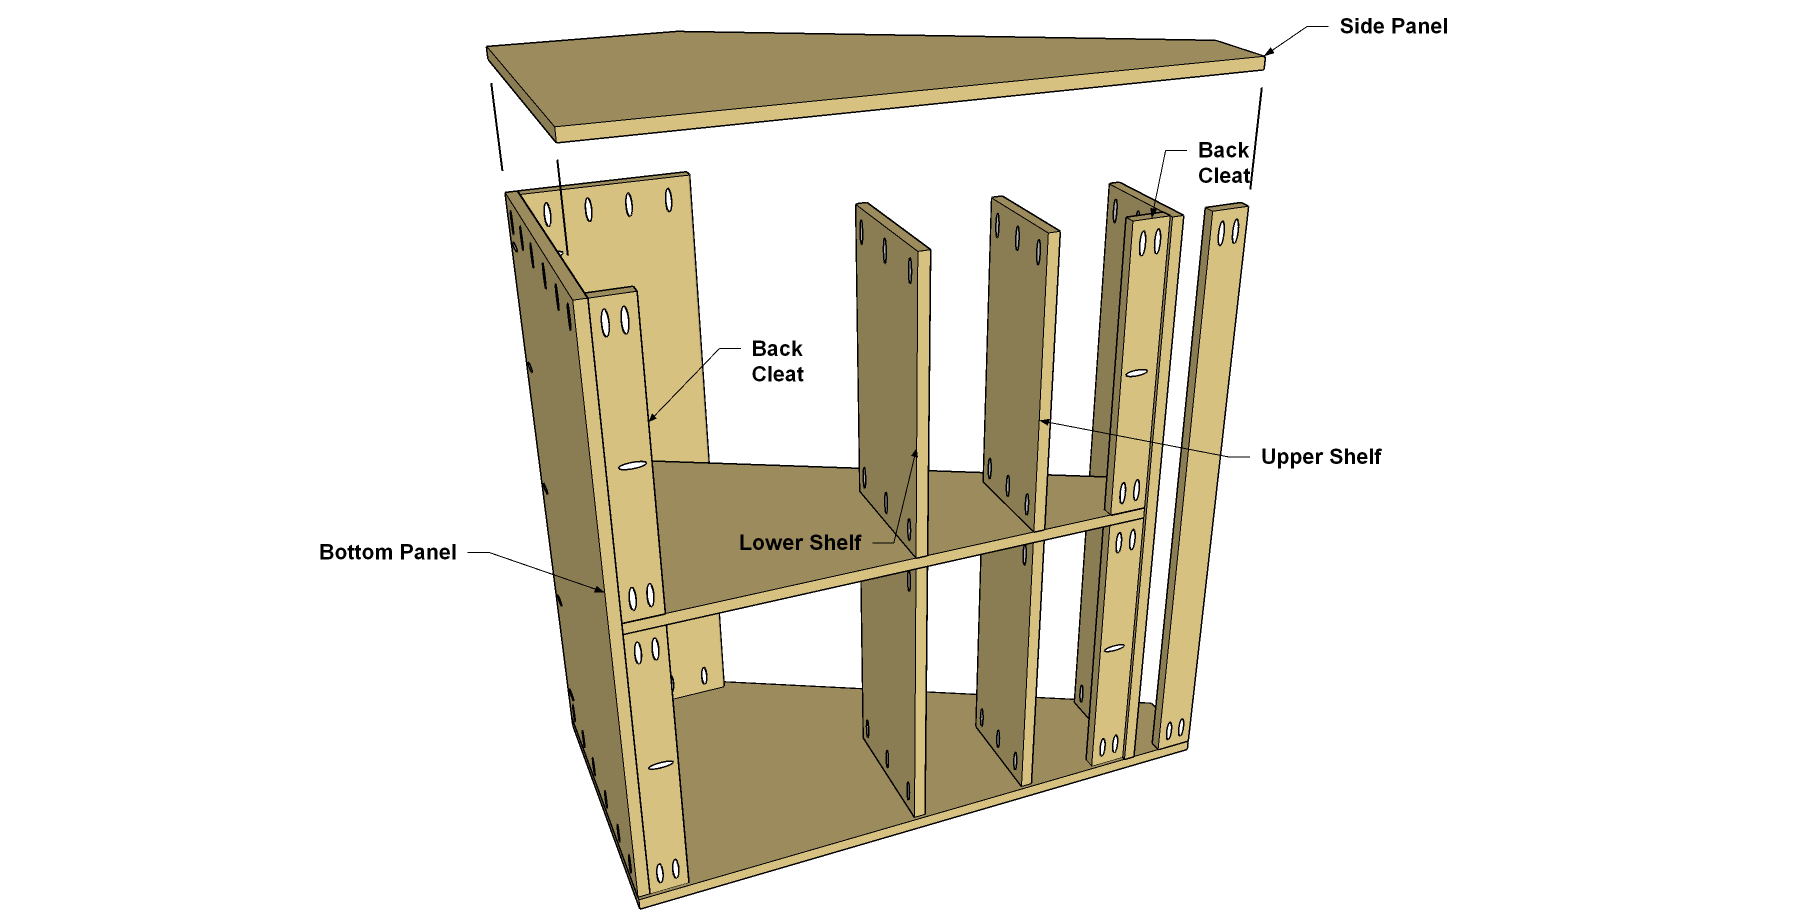
Cut two Upper Shelves to size from a 1x8 board, two Lower Shelves from a 1x10 board, and four Back Cleats from a 1x3 board, as shown in the cutting diagram. Then drill pocket holes in all of these pieces where shown. Sand the edges lightly to soften the sharp corners, and then sand the Shelves and Cleats smooth.
-
Install the First Shelves and Cleats
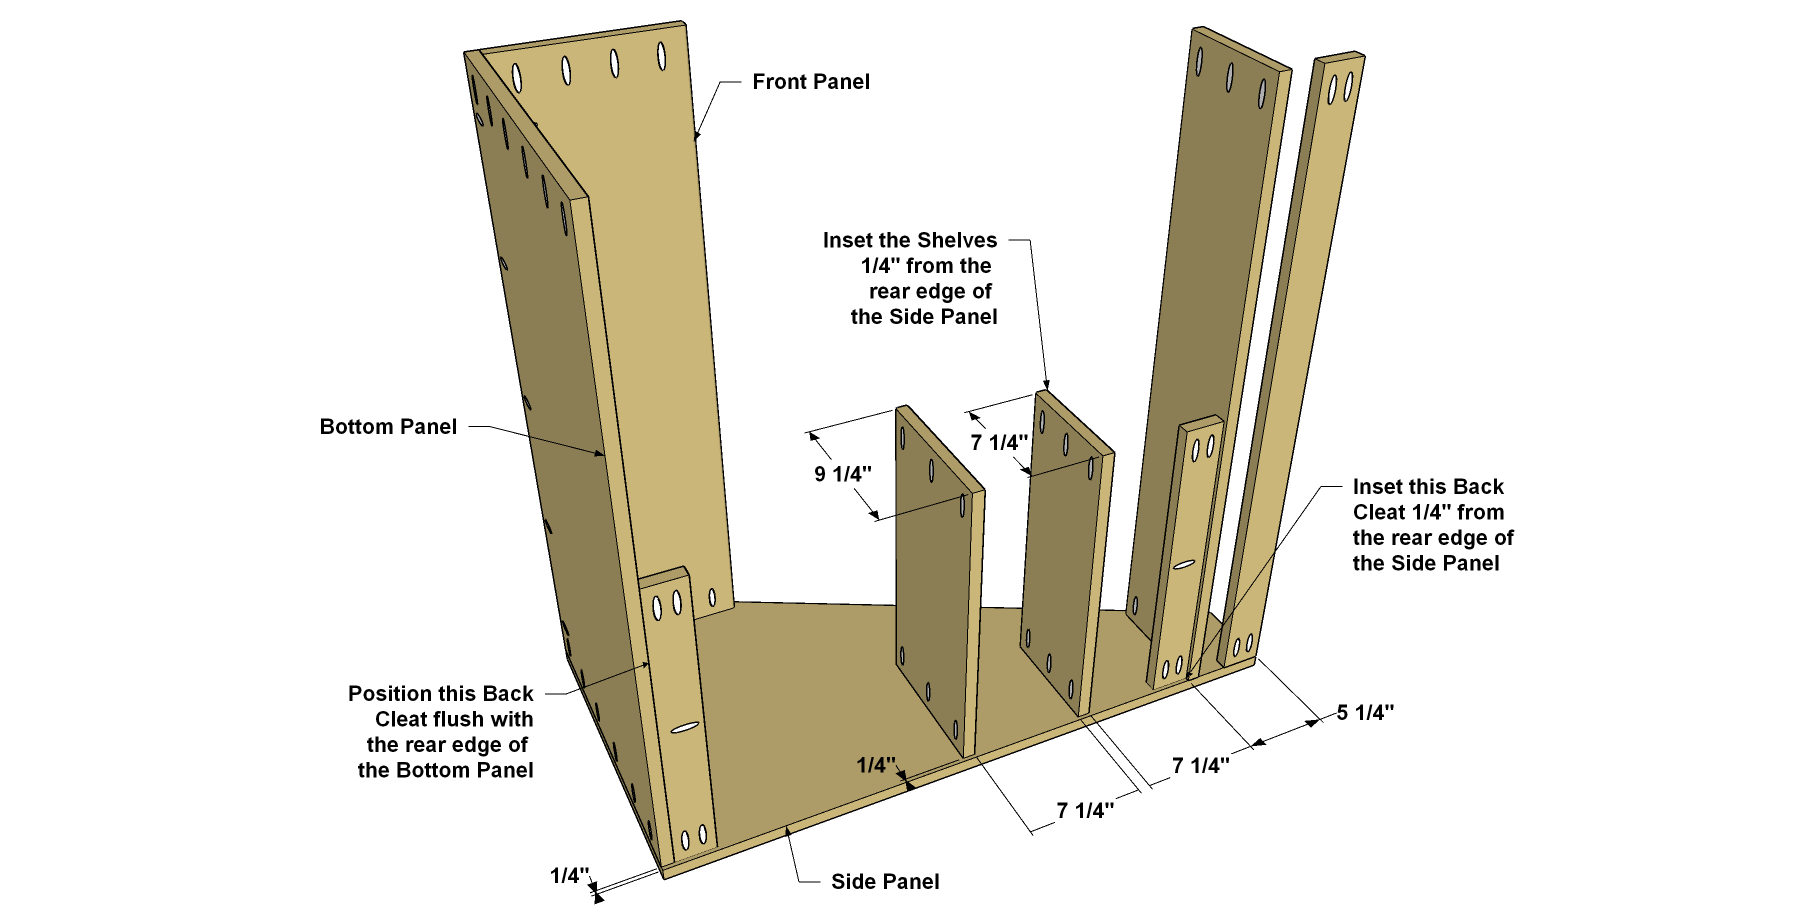
With the case still on its side, attach one Upper Shelf, one Lower Shelf, and two Back Cleats where shown using 1 1/4" coarse-thread pocket hole screws. Note that both Shelves and the Back Cleats are inset 1/4" from the back edge of the Side Panel. That allows the Back Panel, which you’ll make later, to slip into place.
-
Make the Middle Panel
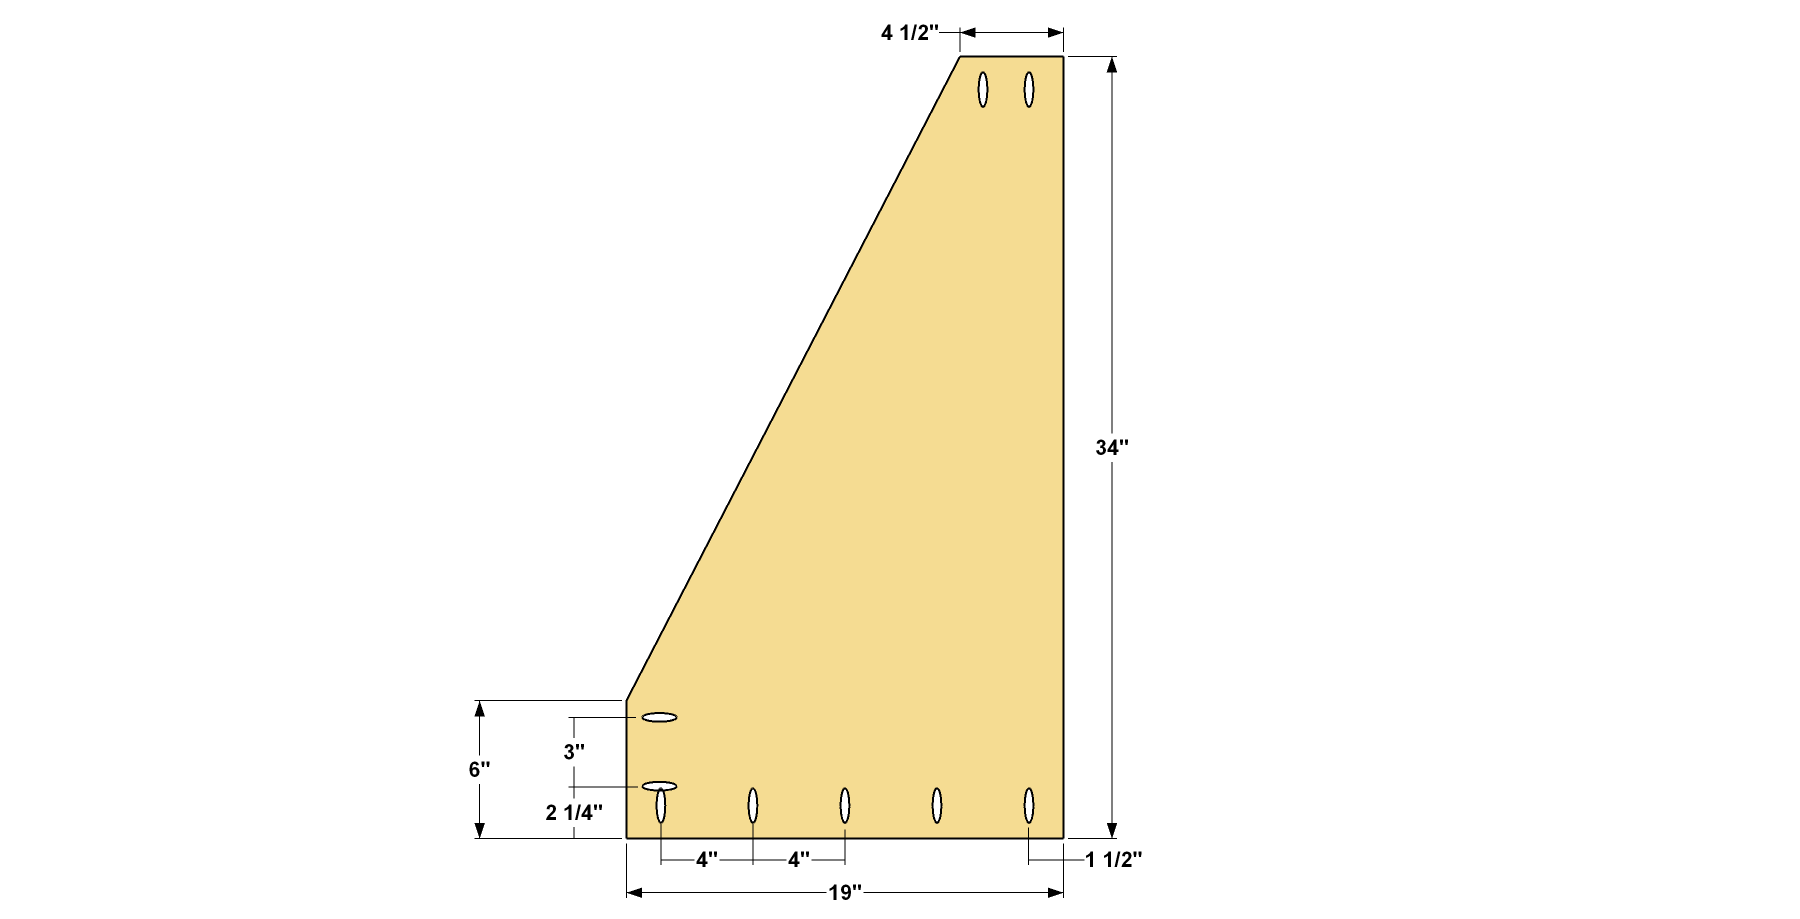
Cut the Middle Panel from 3/4" MDF, as shown in the cutting diagram. To cut the angled portion, you can use a jigsaw, or use a circular saw guided by a straightedge. Drill pocket holes in the Middle Panel where shown.
-
Install the Middle Panel
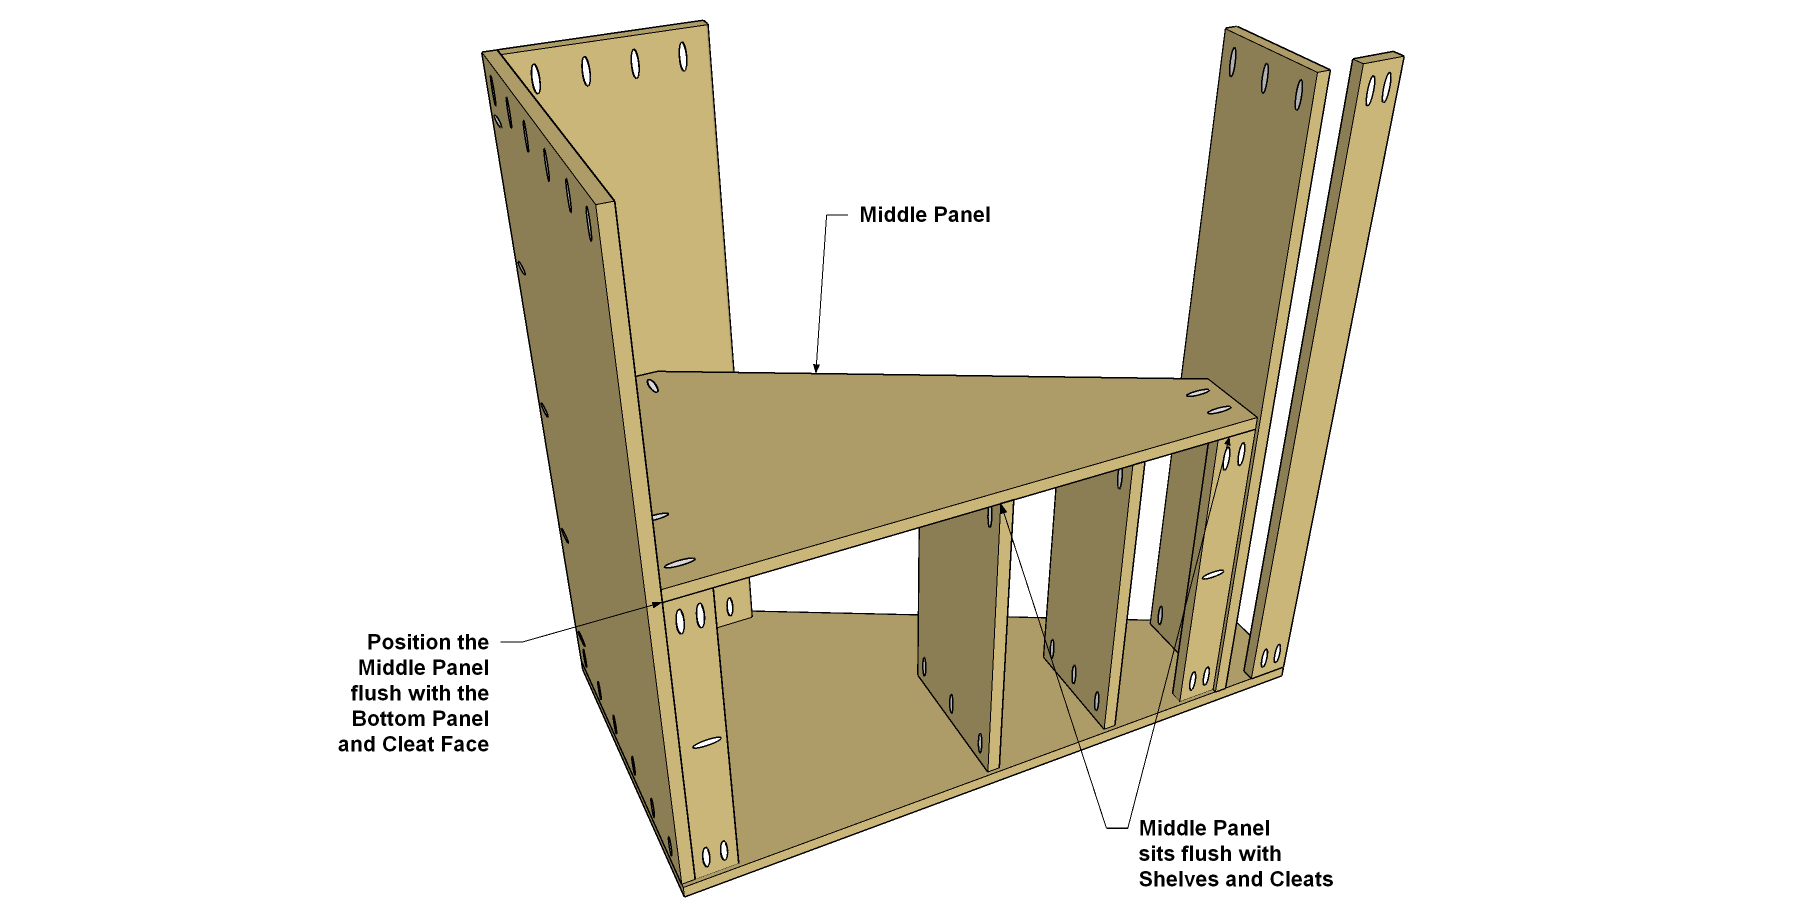
Rest the Middle Panel on the Shelves and Cleats so that the Middle Panel is flush with the rear edges of the shelves and the face of the Back Cleats. Secure the Panel with 1 1/4" coarse-thread pocket hole screws.
-
Complete the Case Assembly
Install the second set of Shelves and Back Cleats in the same manner as the first set, using 1 1/4" coarse-thread pocket hole screws. Then install the second Side Panel, making sure that it’s aligned properly, and that the overall case assembly is square.
-
Make the Apron Parts
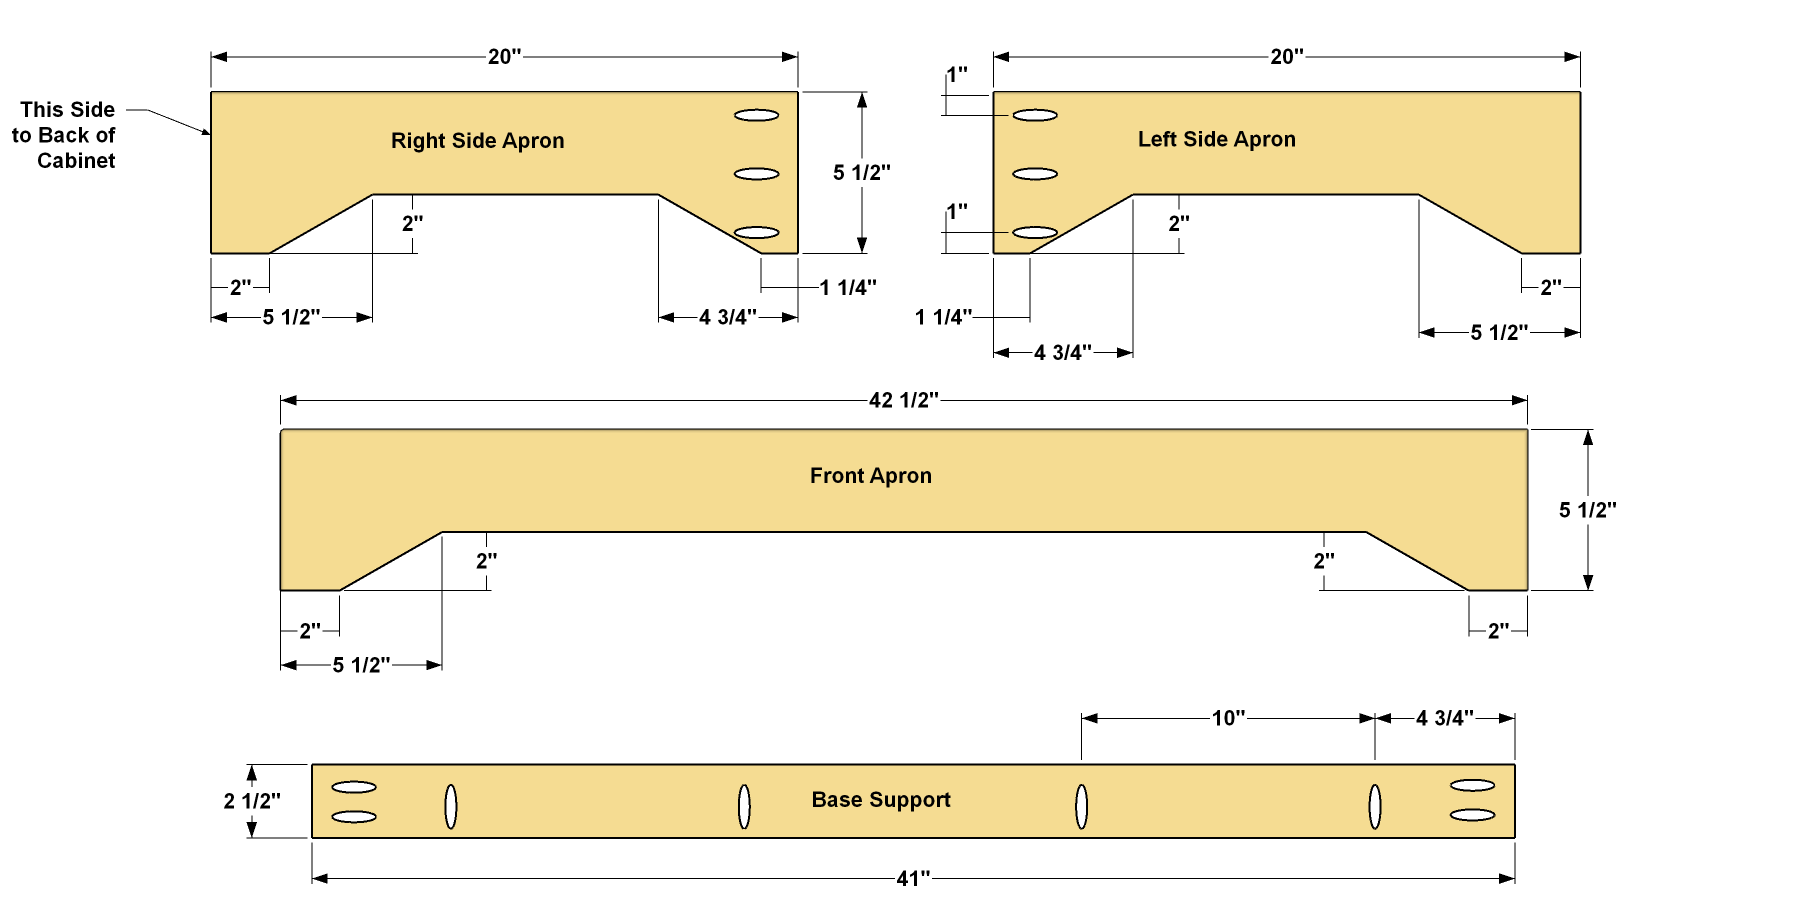
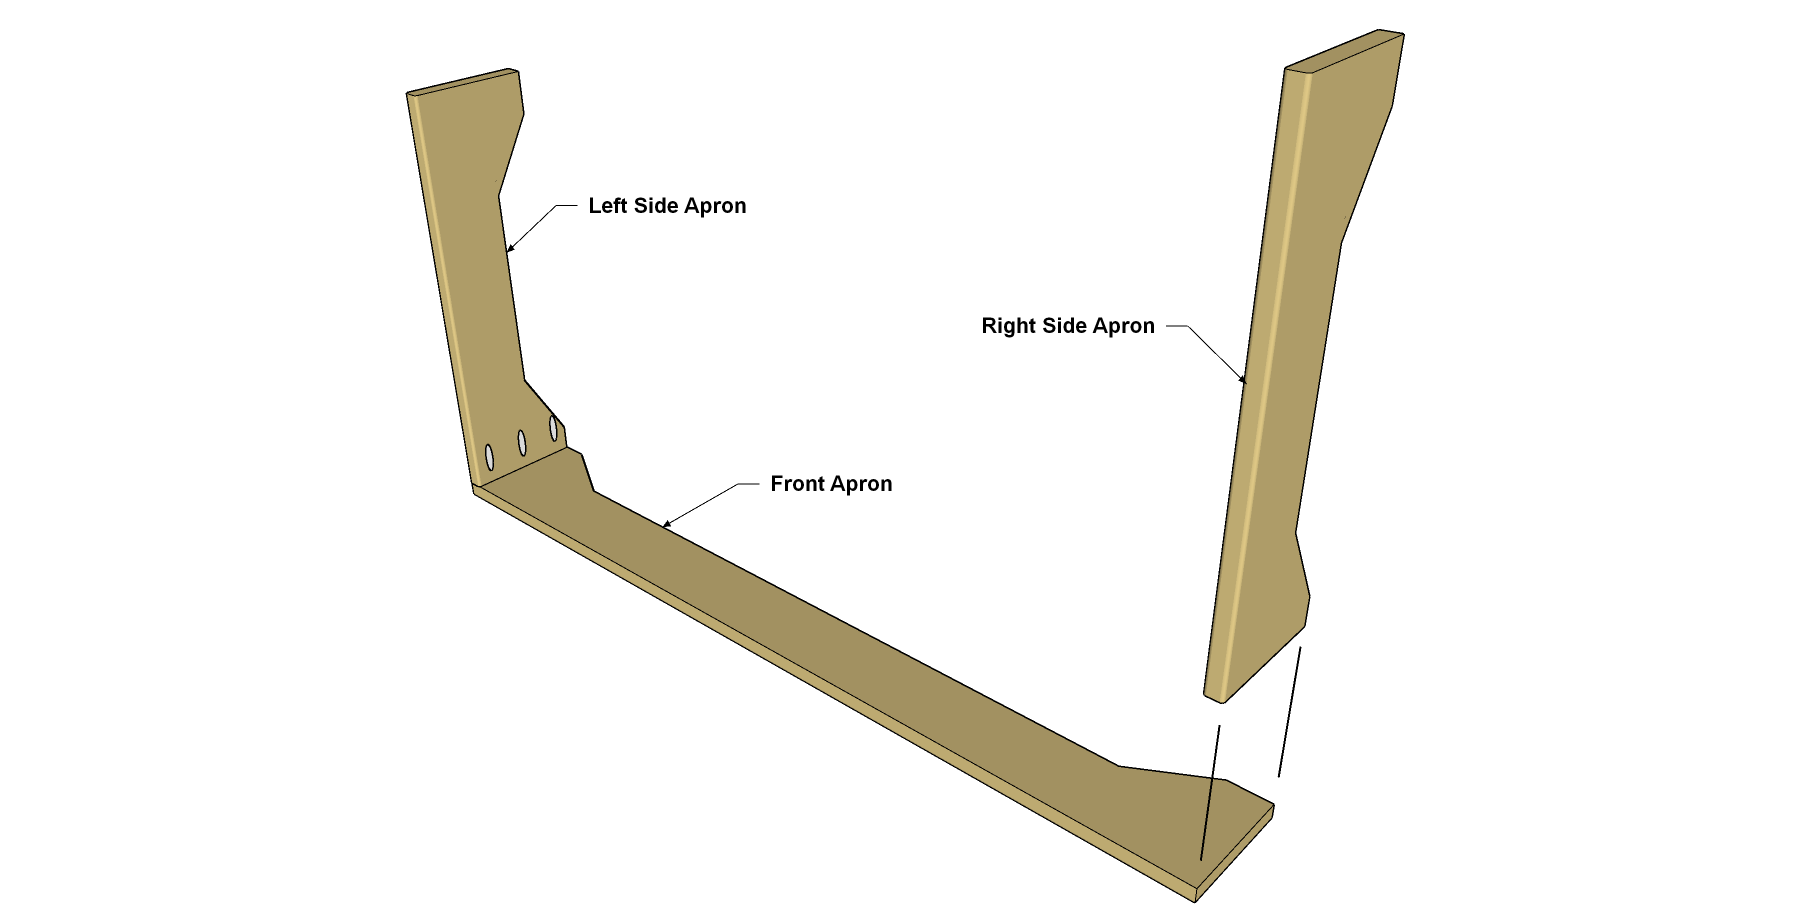
Cut one Front Apron, one Left Side Apron, and one Right Side apron to length from a 1x6 board, as shown in the cutting diagram. Lay out the angled cutout in each of these pieces. Cut the shape using a jigsaw, staying just outside the lines. Then sand the cut edges smooth. Now cut the Base Support to length from a 1x3 board. Drill pocket holes in all of these parts where shown.
-
Assemble the Apron
Secure the Left Side Apron and the Right Side Apron to the Front Apron using 1 1/4" coarse-thread pocket hole screws. Make sure the Side Aprons are flush with the outside edge of the Front Apron.
-
Attach the Apron to the Case
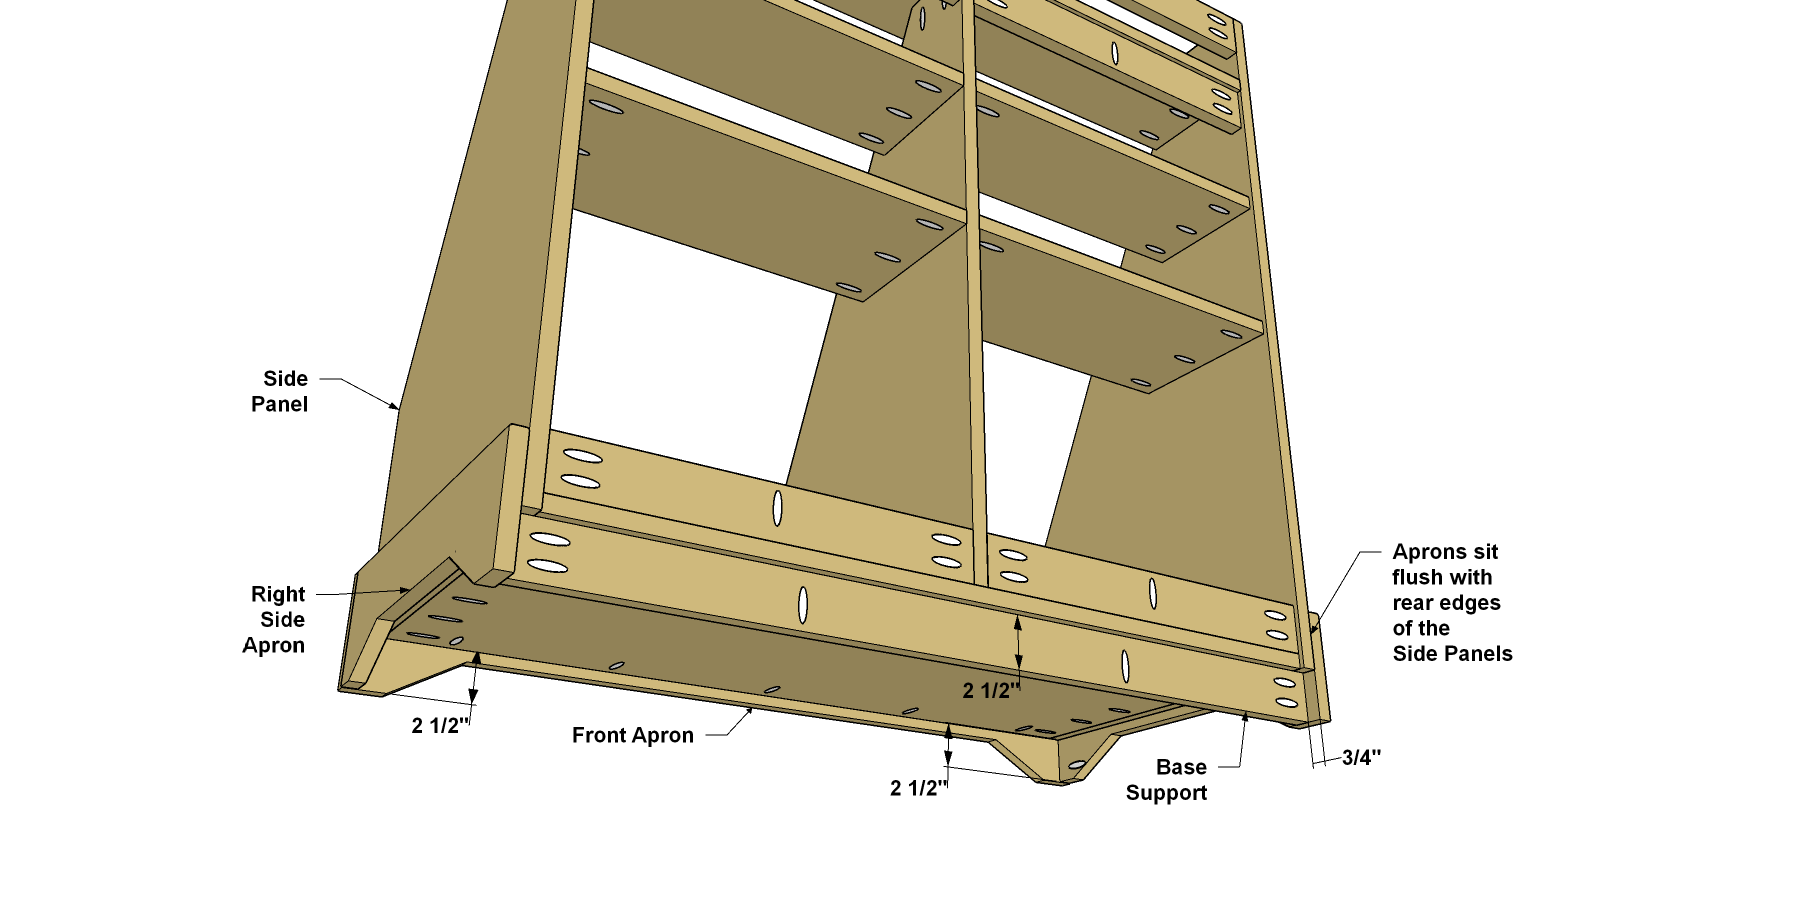
Position the Base Support so it’s inset 3/4" from the rear edge of the Side Panel, and then secure the Base Support with 1 1/4" coarse-thread pocket hole screws. Next, slide the apron assembly in place so it hangs down 2 1/2" below the Bottom Panel. You can use a scrap of 1x3 to do this. Make sure that the Side Aprons are flush with the lower edge of the Base Support, as well. Then attach the apron assembly using 1 1/4" coarse-thread pocket hole screws.
-
Make the Easel Panel
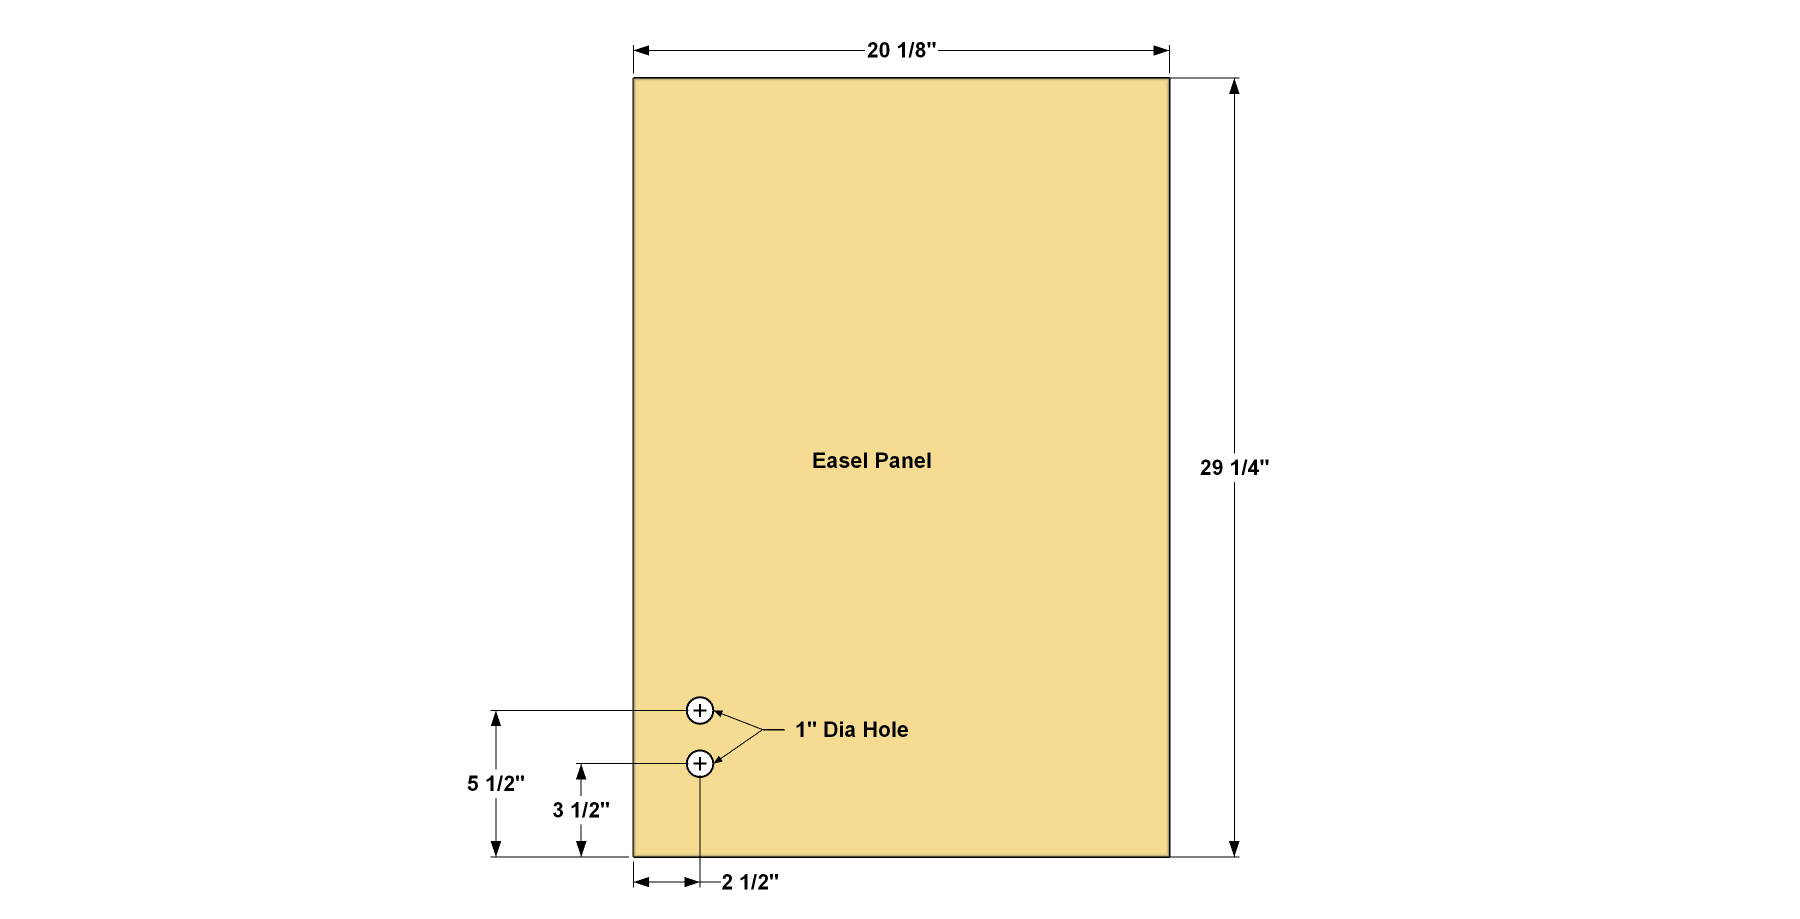
Cut the Easel Panel to size from 3/4" MDF, as shown in the cutting diagram. Then drill two finger holes where shown using a 1"-diameter spade bit or Forstner bit.
-
Make Easel Cleats and Stops
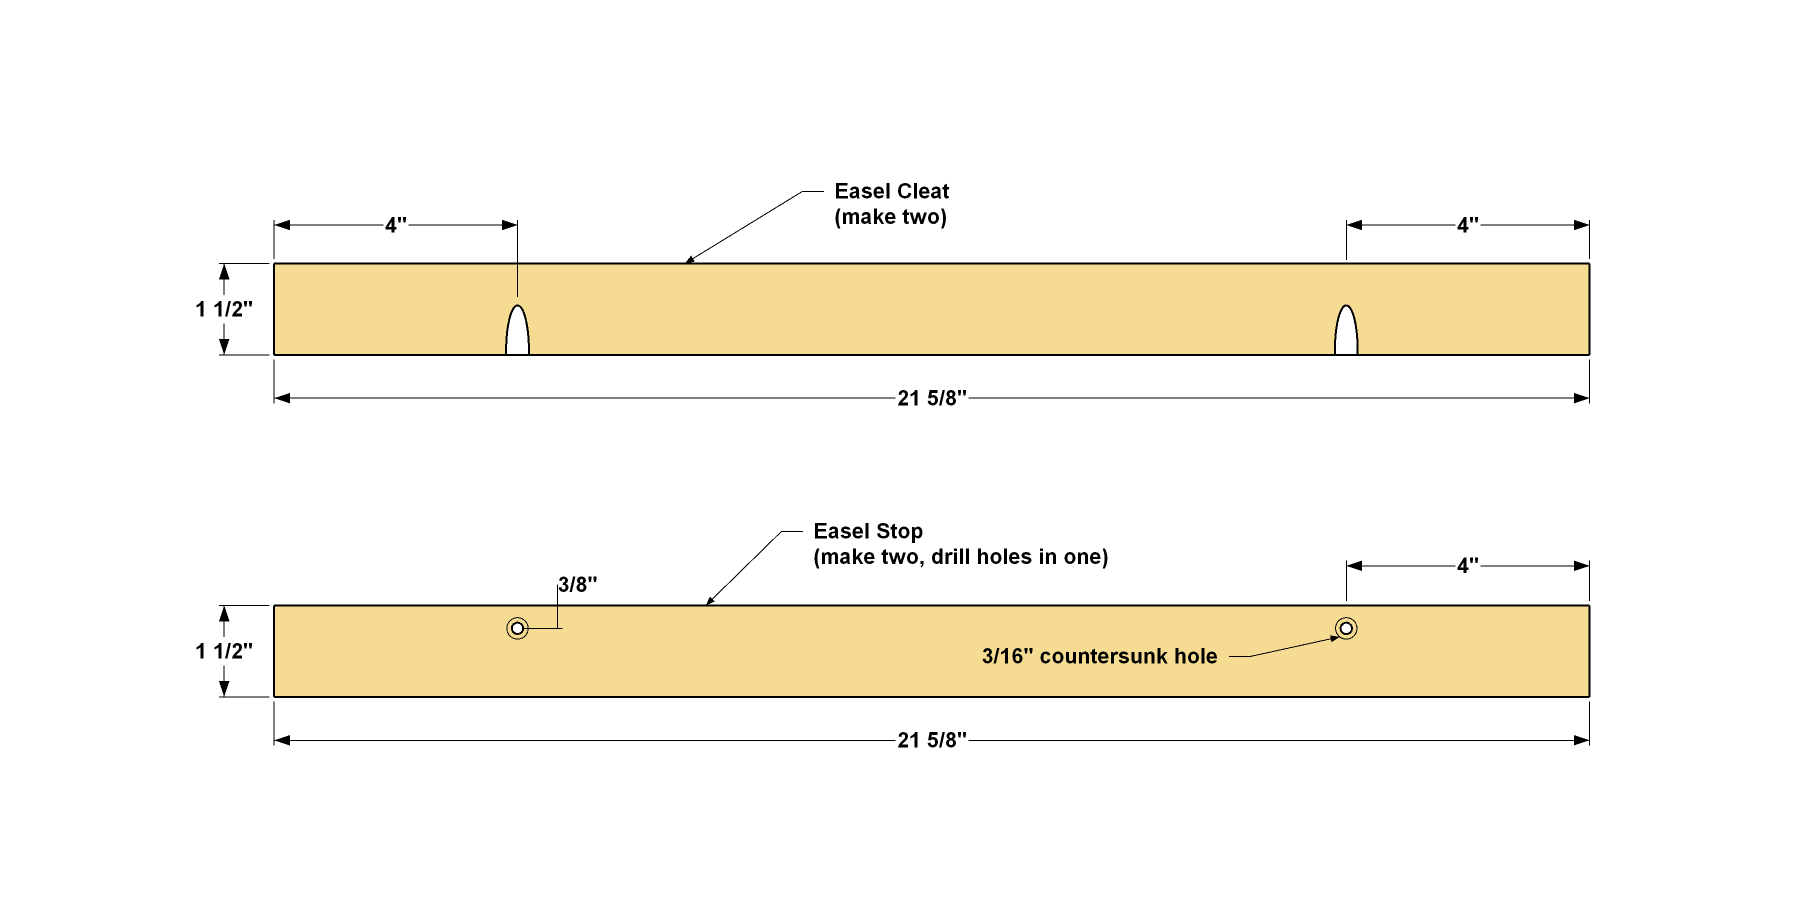
Cut two Easel Cleats and two Easel Stops to length from a 1x2 board, as shown in the cutting diagram. Drill pocket holes where shown in the Easel Cleats.
-
Start Assembling the Easel
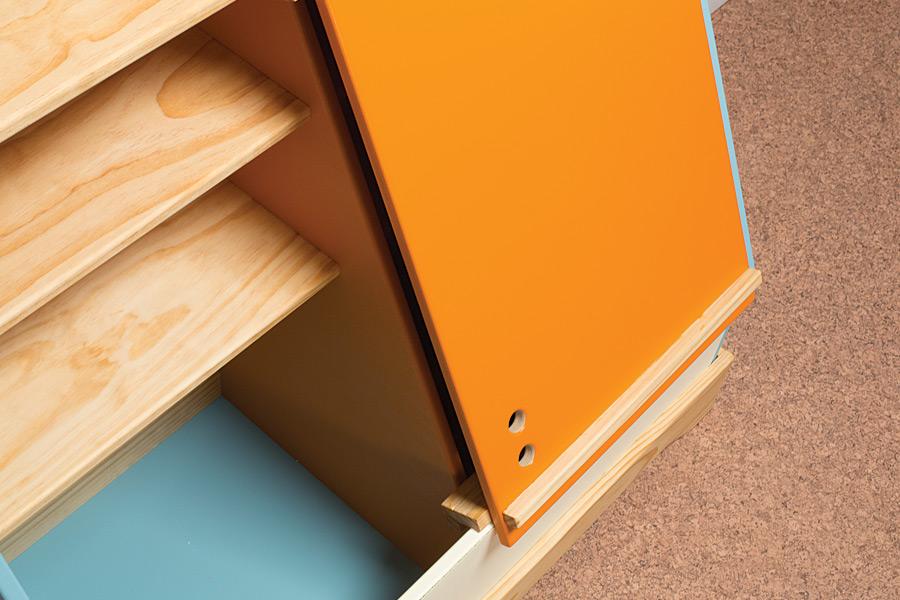
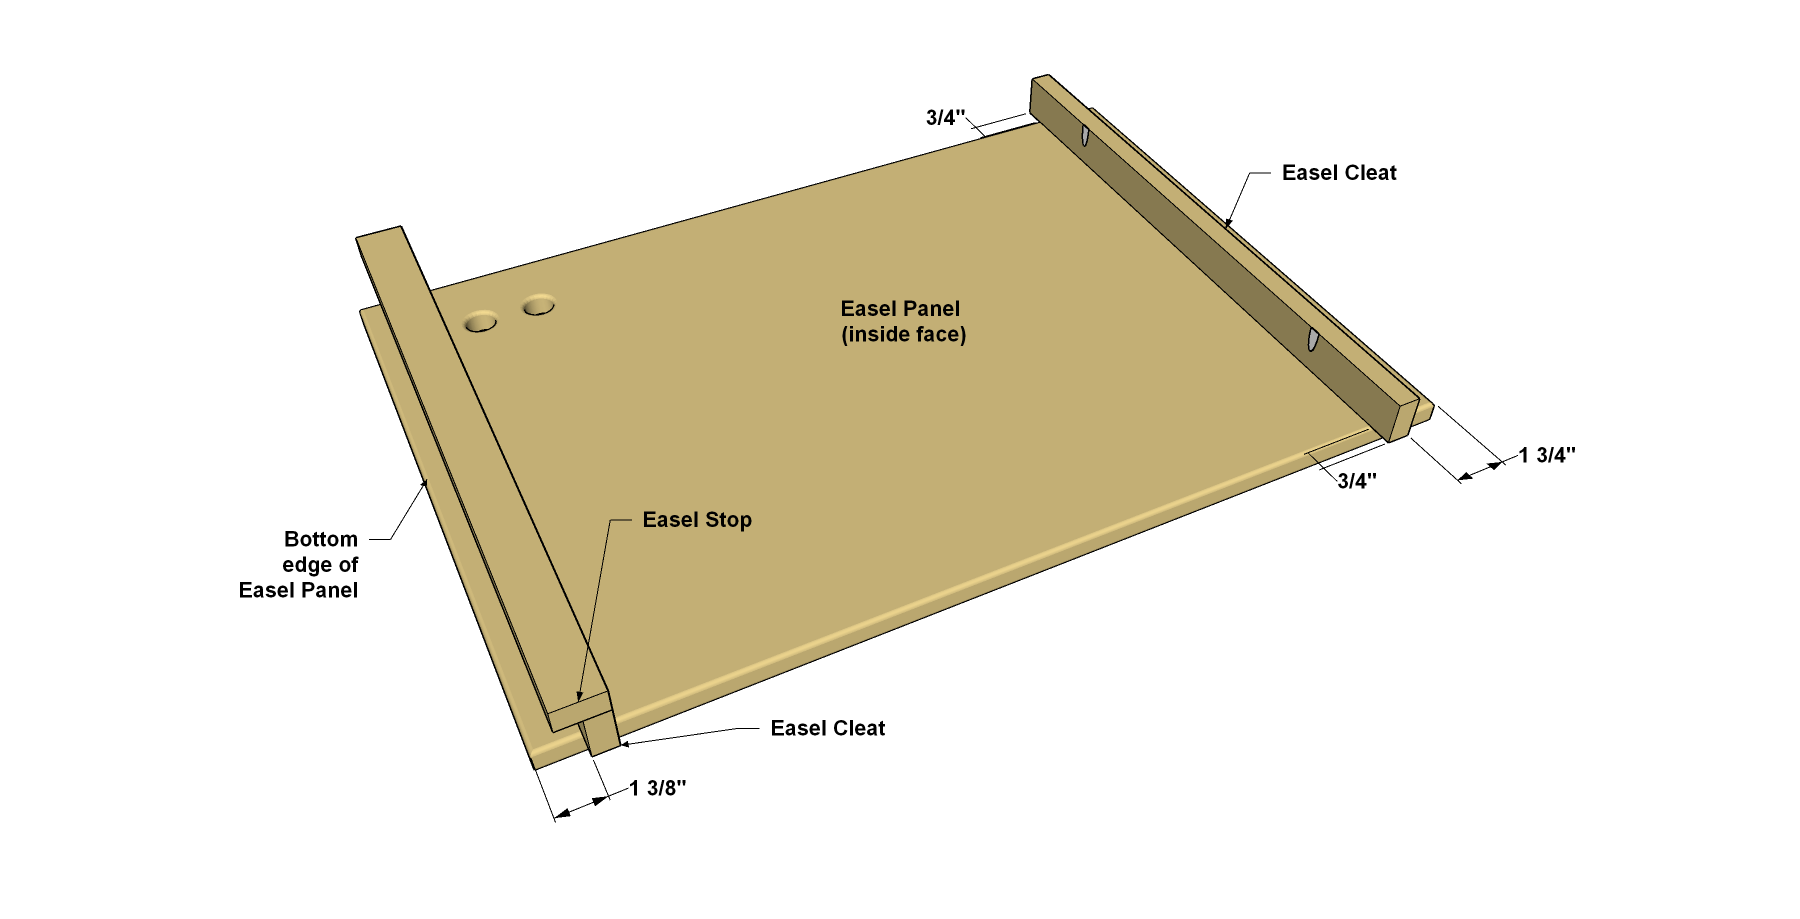
Position the Easel Cleats on the inside face of the Easel Panel as shown. The lower Cleat should sit 1 3/8" from the lower edge of the Easel Panel, and the upper Cleat should sit 1 3/4" from the upper edge of the Easel Panel. The Cleats overhang 3/4" on each side. This creates gaps that reduce the chance of fingers getting pinched when sliding the Easel from side to side. Attach these two Cleats using glue and 1 1/4" coarse-thread pocket hole screws. Next, attach one more Easel Stop to the lower Easel Cleat using just glue. Clamp the Stop in position while the glue sets. Don’t install the final cleat. It gets added later, after the easel gets positioned in the case.
-
Add the Easel Lip
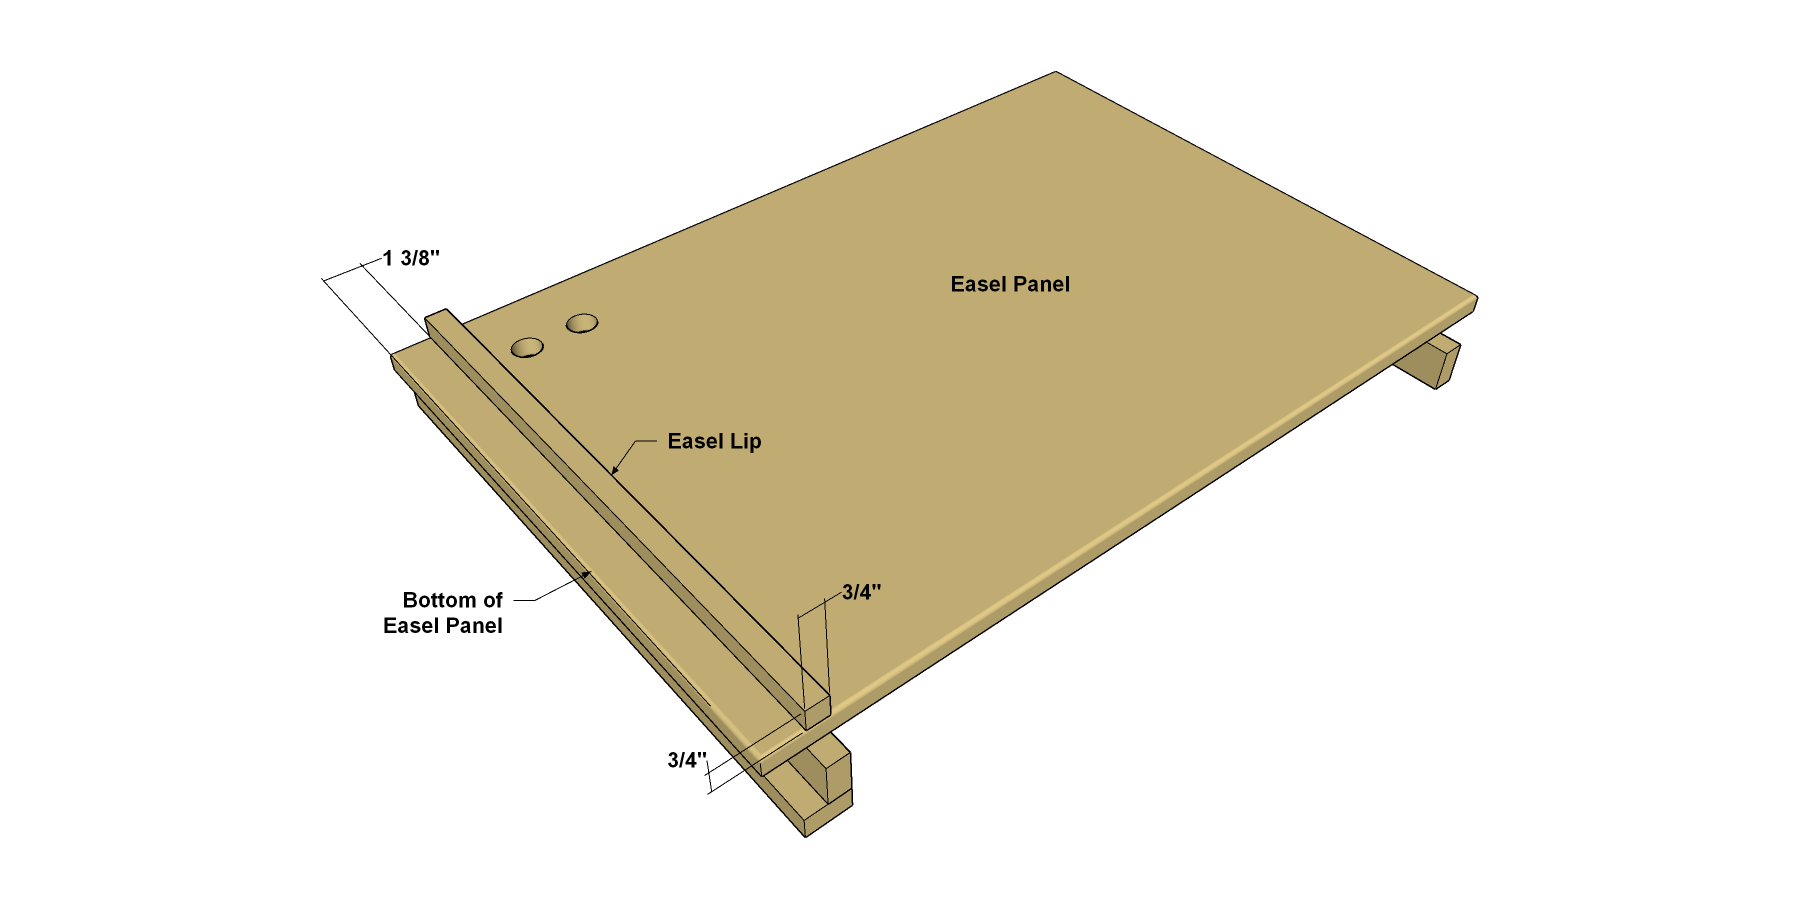
From a 3/4" square dowel, cut the Easel Lip to length, as shown in the cutting diagram. Position the Easel Lip where shown, and glue it in place. Clamp the Easel Lip to the Easel until the glue sets.
-
Make a Back Panel
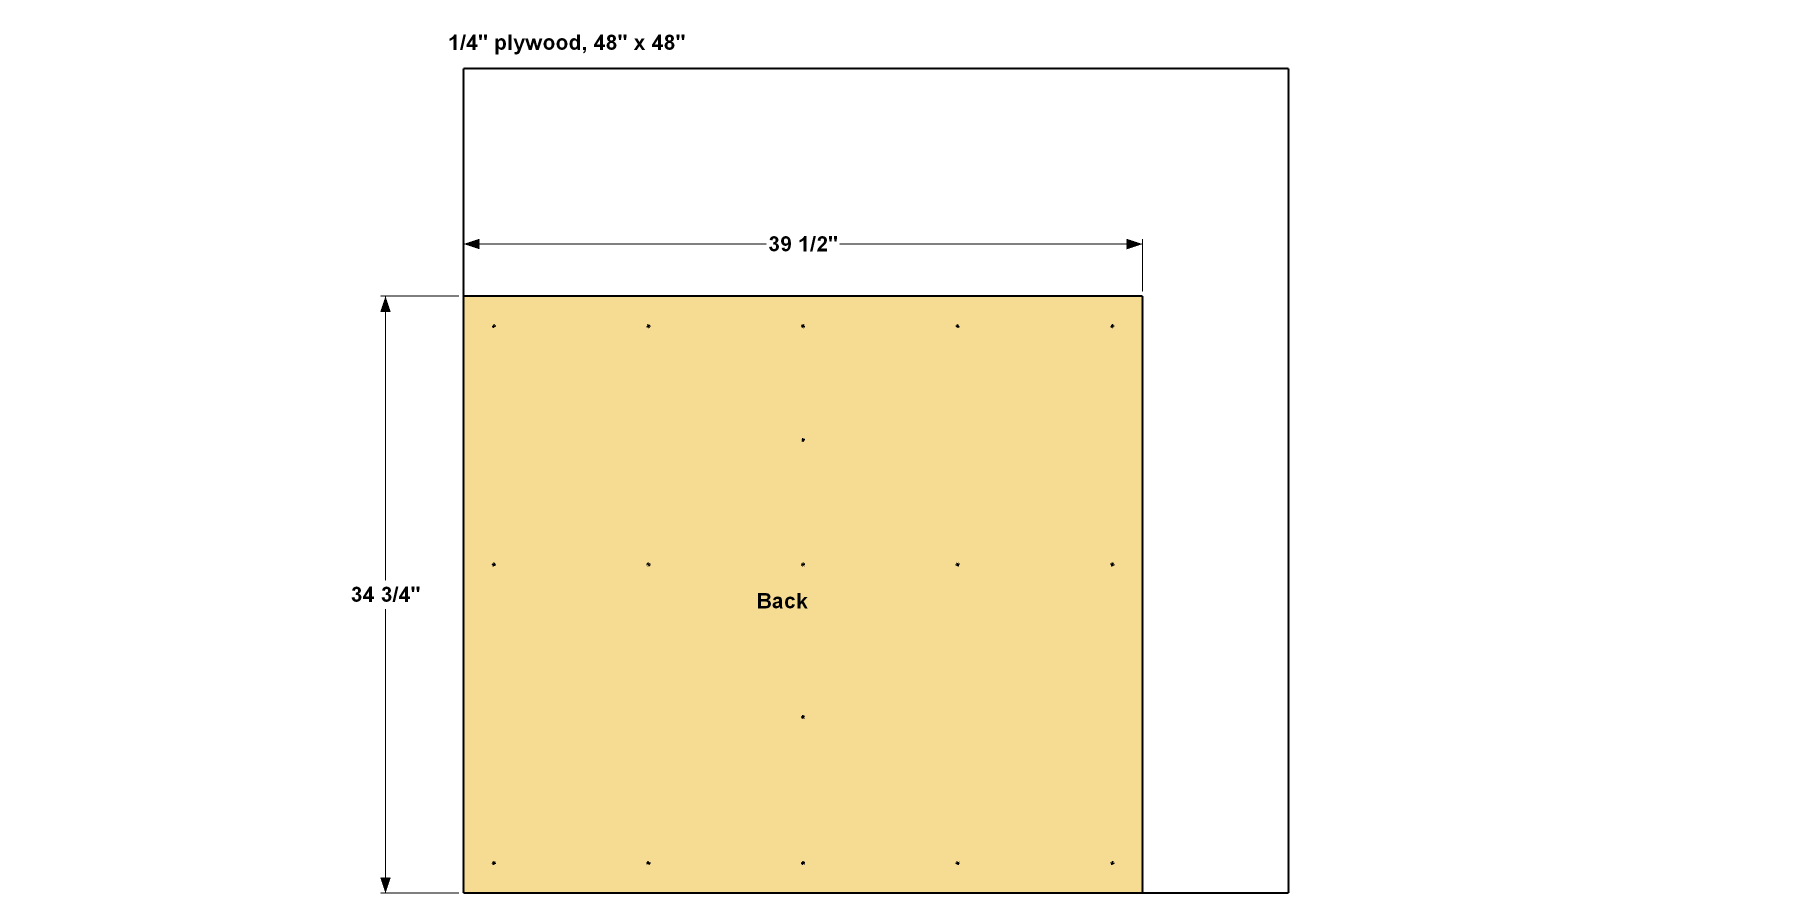
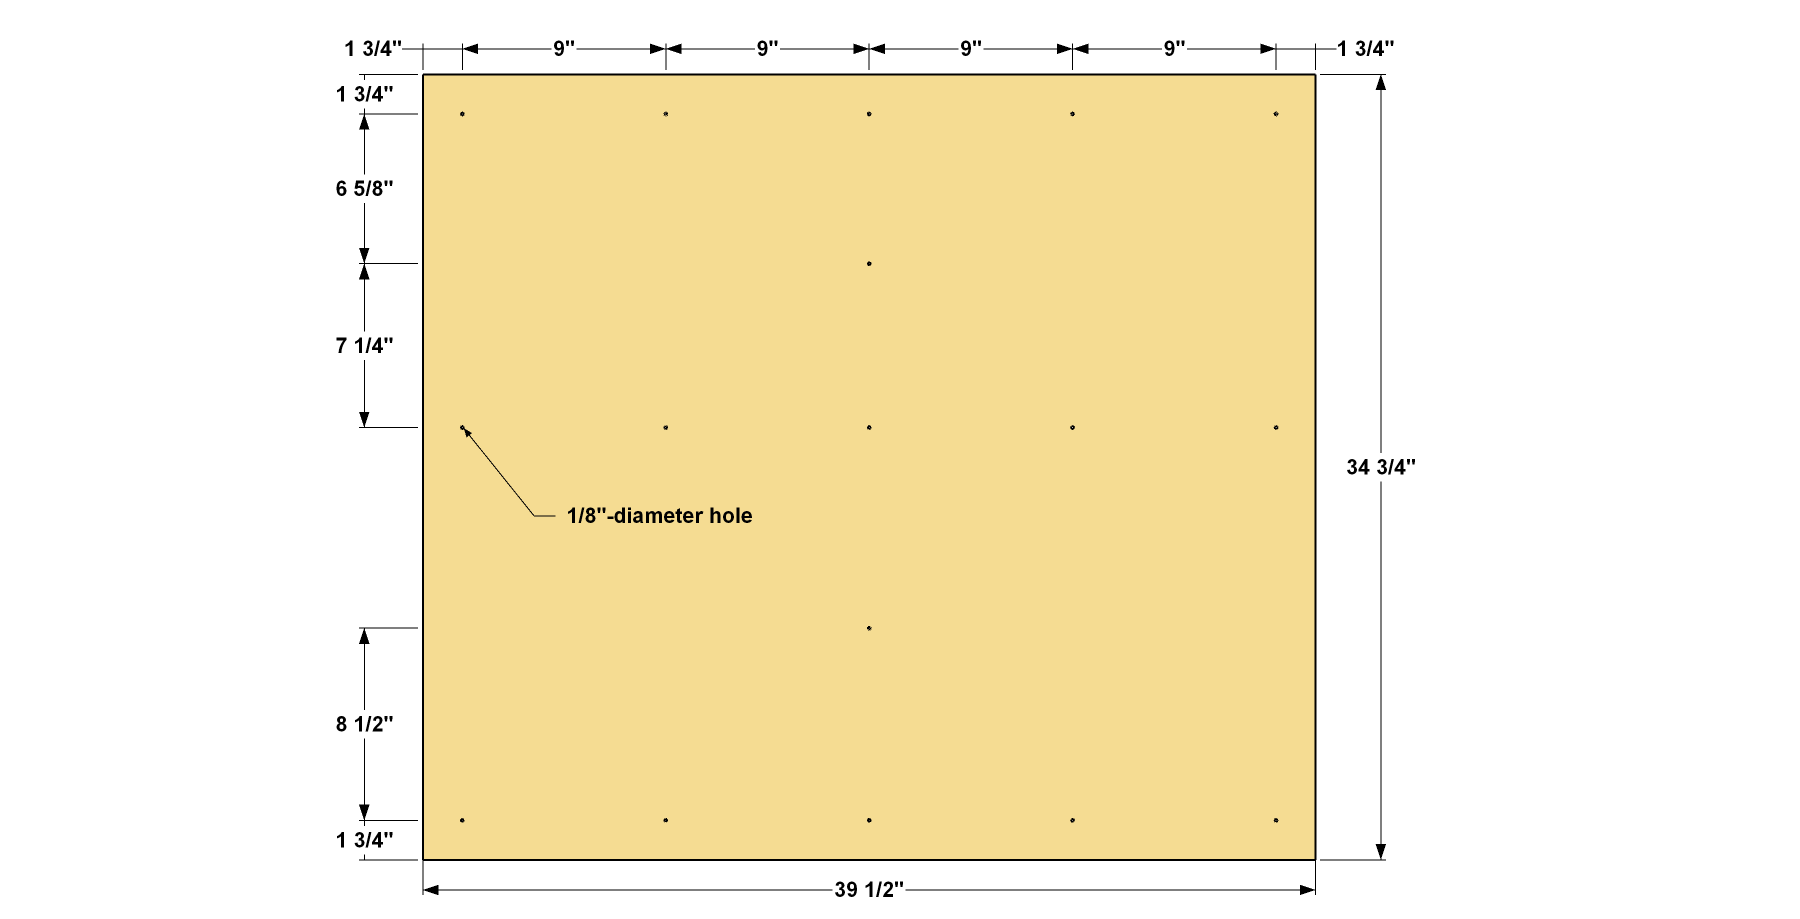
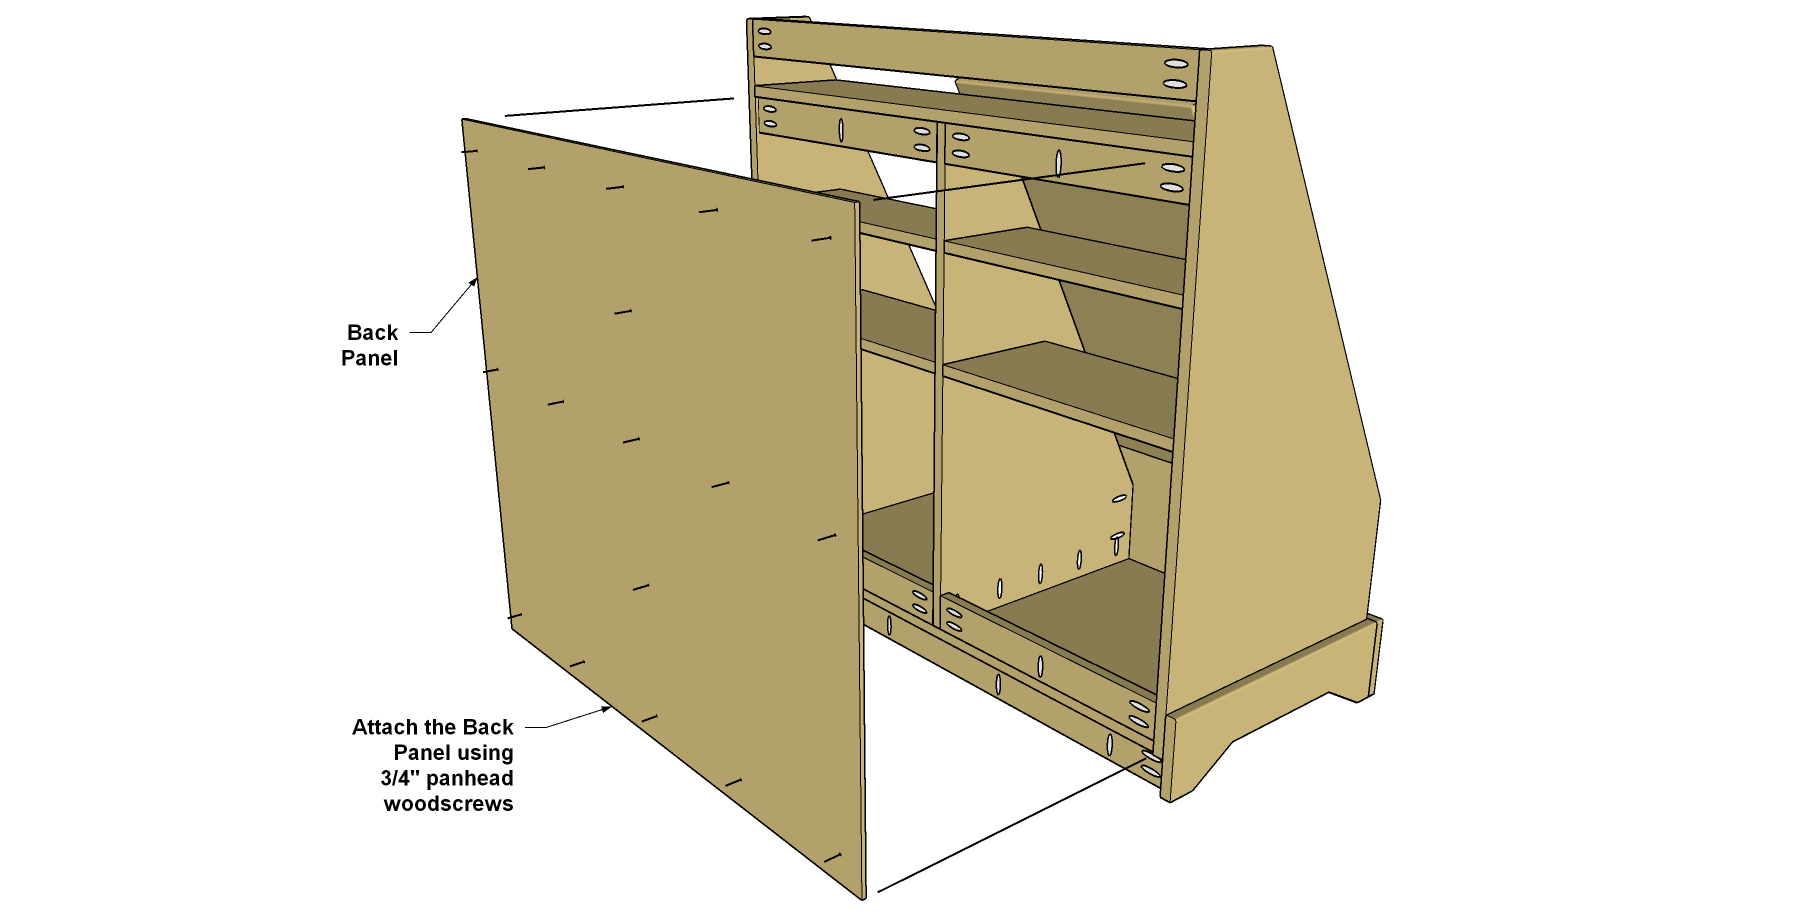
Cut a Back Panel to size from 1/4" plywood, as shown in the cutting diagram. Then lay out and drill 1/8 holes where shown. These will be used for screws that will attach the back panel later.
-
Sand and Prepare for Finish
Before you proceed to final assembly, this is a good time to give the project a final sanding and prepare for finishing. It’s a lot easier to get to everything now, before the Back Panel and the easel assembly go on. Start by easing all of the sharp edged. You can do that by sanding with 120-grit paper. You’ll want to sand all of the forward-facing edges on the case, the shelves, divider, and the easel. Then you can paint or finish your toy box to suit your tastes.
-
Install the Easel
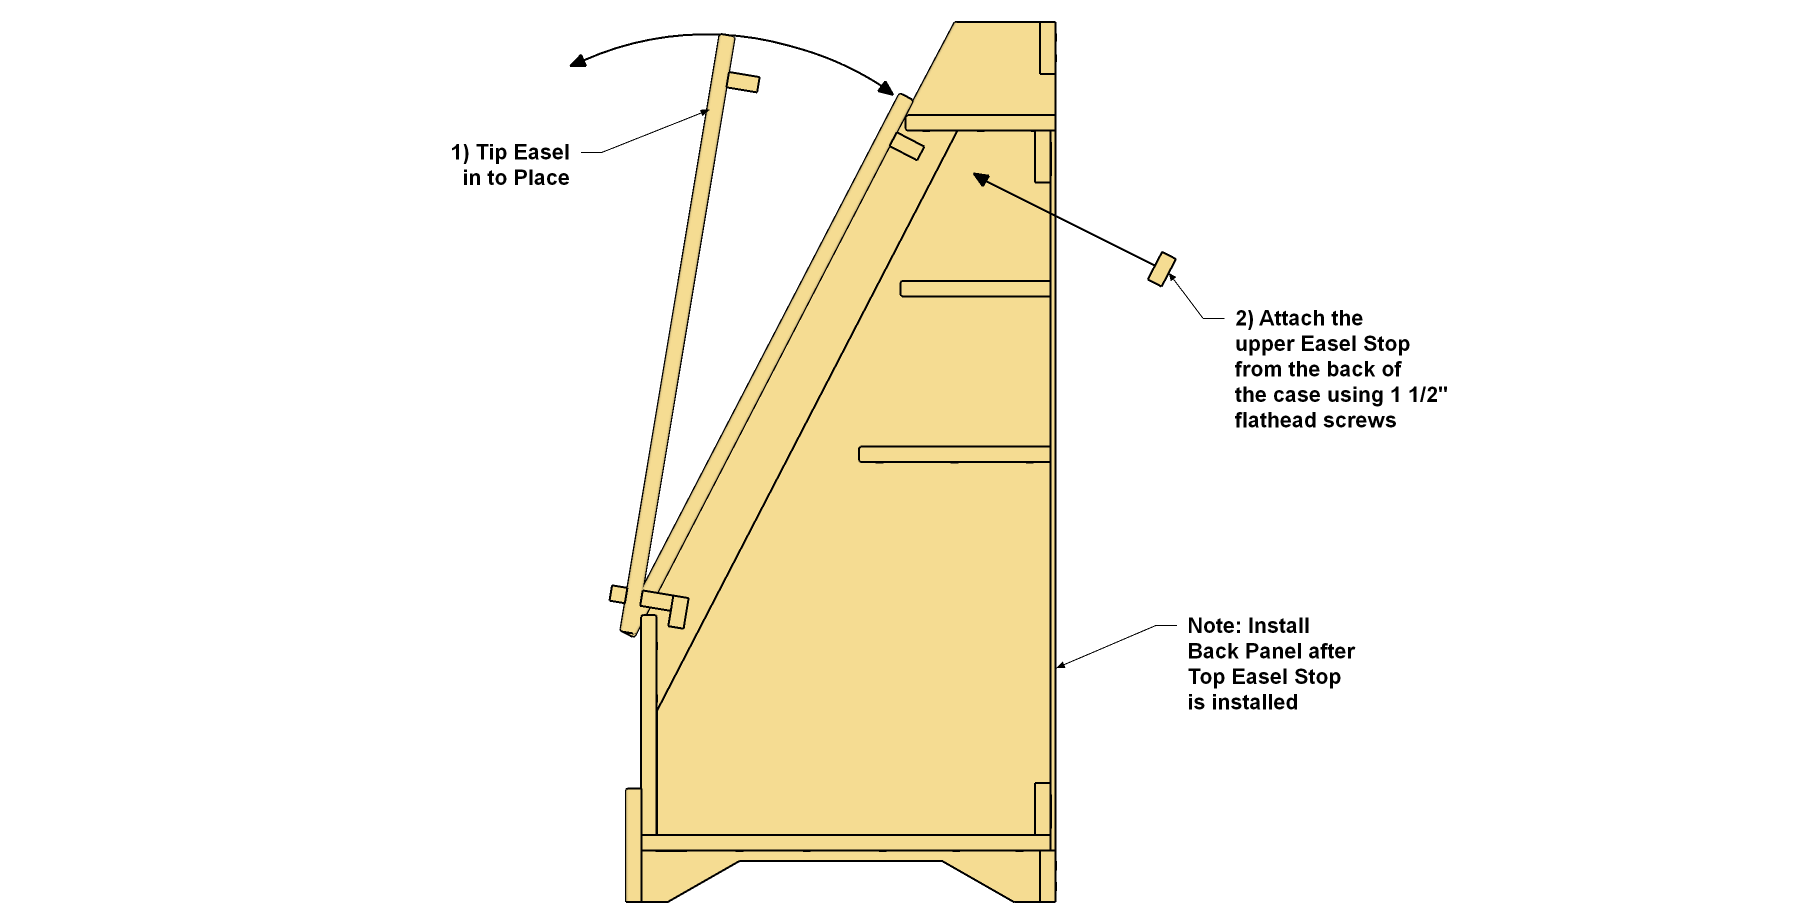
Now it’s time to install the easel assembly. First, rub wax on the lower Easel Cleat to help it slide easily. Set the assembly in place so that the lower Cleat rides on the edge of the Front Panel, and then tip the easel into place. Then add the final Easel Stop. It keeps the easel from tipping out of the toy box. Hold the final Easel Stop in position against the upper Easel Cleat (so it sticks up above the Cleat), and use the holes in it to drill pilot holes in the Easel Cleat. Attach the Stop using two #8 x 1 1/2" flathead woodscrews. Don’t use glue here, so you can remove the easel if you ever need to.
-
Add the Back Panel
Now you can add the Back Panel. Hold it in position, and then drive #8 x 3/4" screws through the panel and into the case. Since the Back Panel is held in with screws and no glue, it can be removed if you ever need to.


