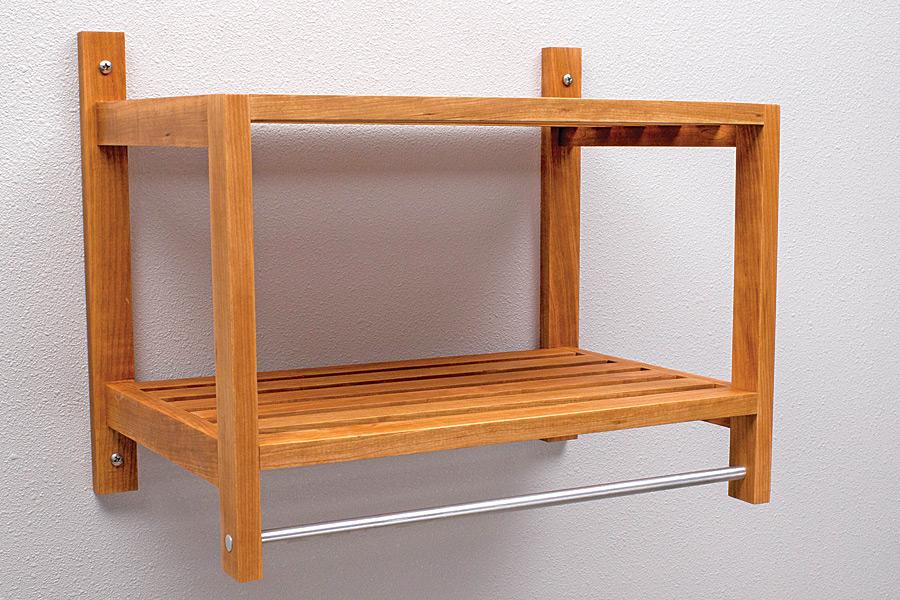


Just about everybody needs more bathroom storage space, but it’s one of the most-challenging rooms to fit another item into. This wall-mounted shelf makes a perfect addition because it’s small, but with two shelves and a towel bar, it packs a lot into a little space. Plus, it looks great. We made our shelf from cherry, though you could choose a different species to match the style of your bathroom.
Tools
Kreg Tools
Other Tools
-
drill/driver

-
miter saw
-
sander
Materials
Wood Products
- 4 Cherry board , 1x2 x 96"
Hardware & Supplies
- 60 1 1/4" fine-thread Kreg Pocket-Hole Screws
- 16 Kreg Pocket-Hole Plugs
- 4 #12 x 2 1/2" panhead stainless-steel sheet metal screws
- 1 1/2" x 36" aluminum rod
- 4 Medium-duty wall anchors
- 1 Epoxy adhesive
- 1 #0000 steel wool
Cut List & Parts
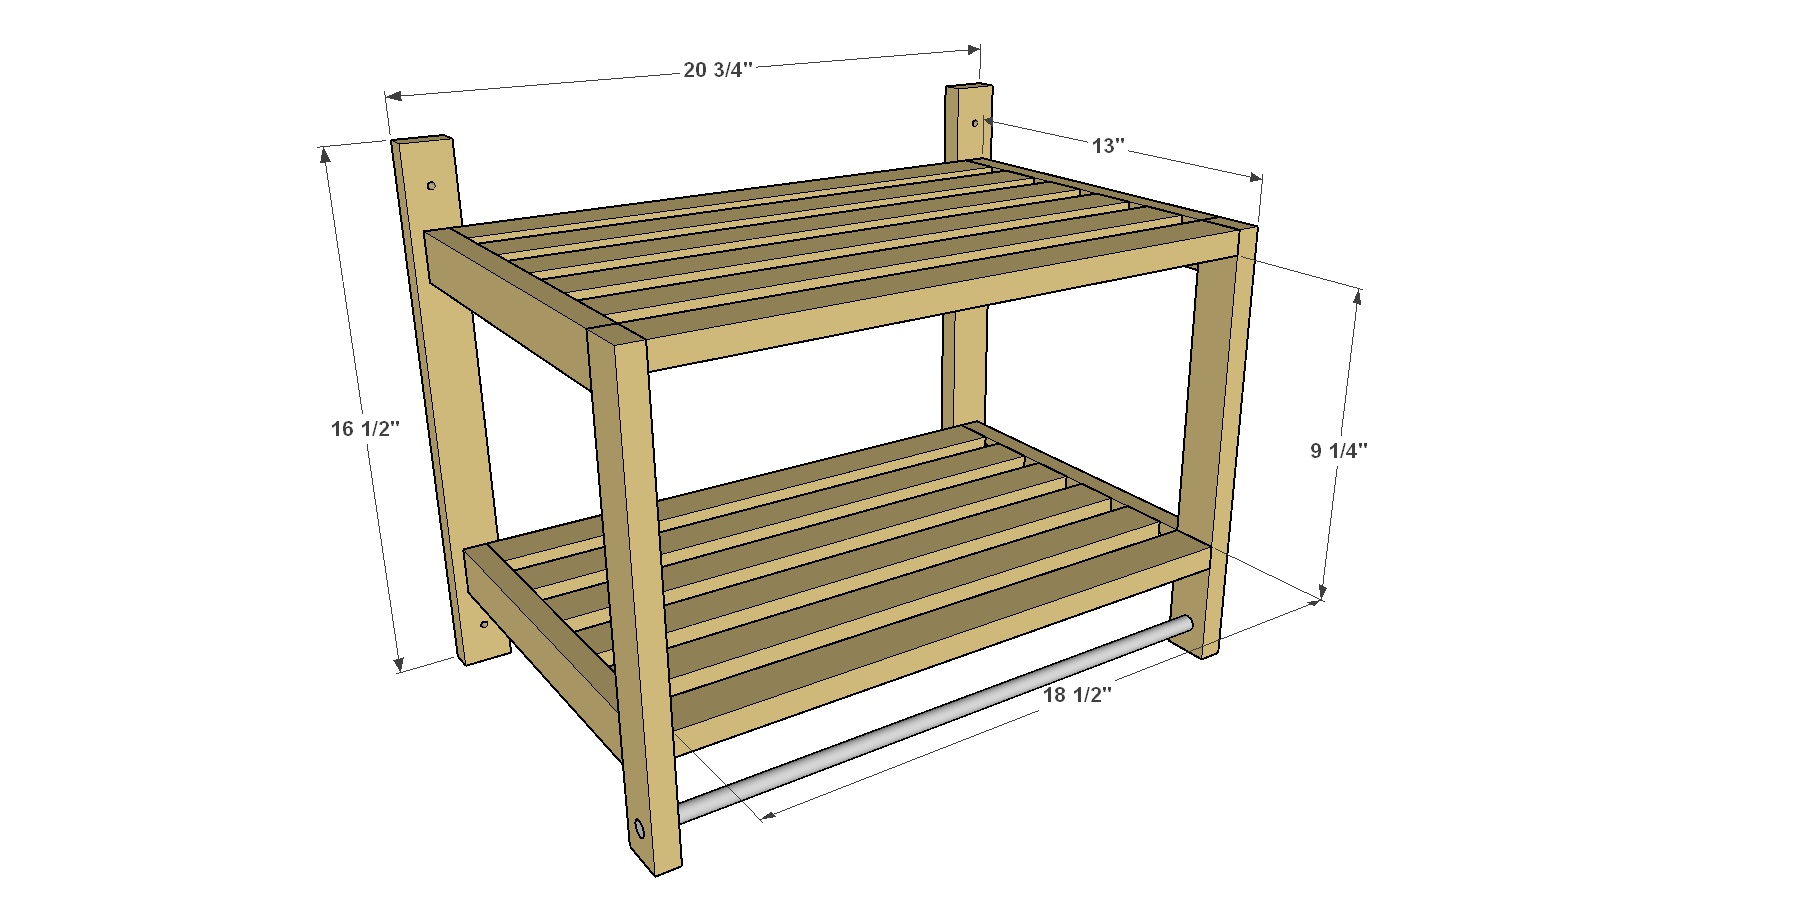
- 2 Front Leg , 3/4" x 1 1/2" x 14"
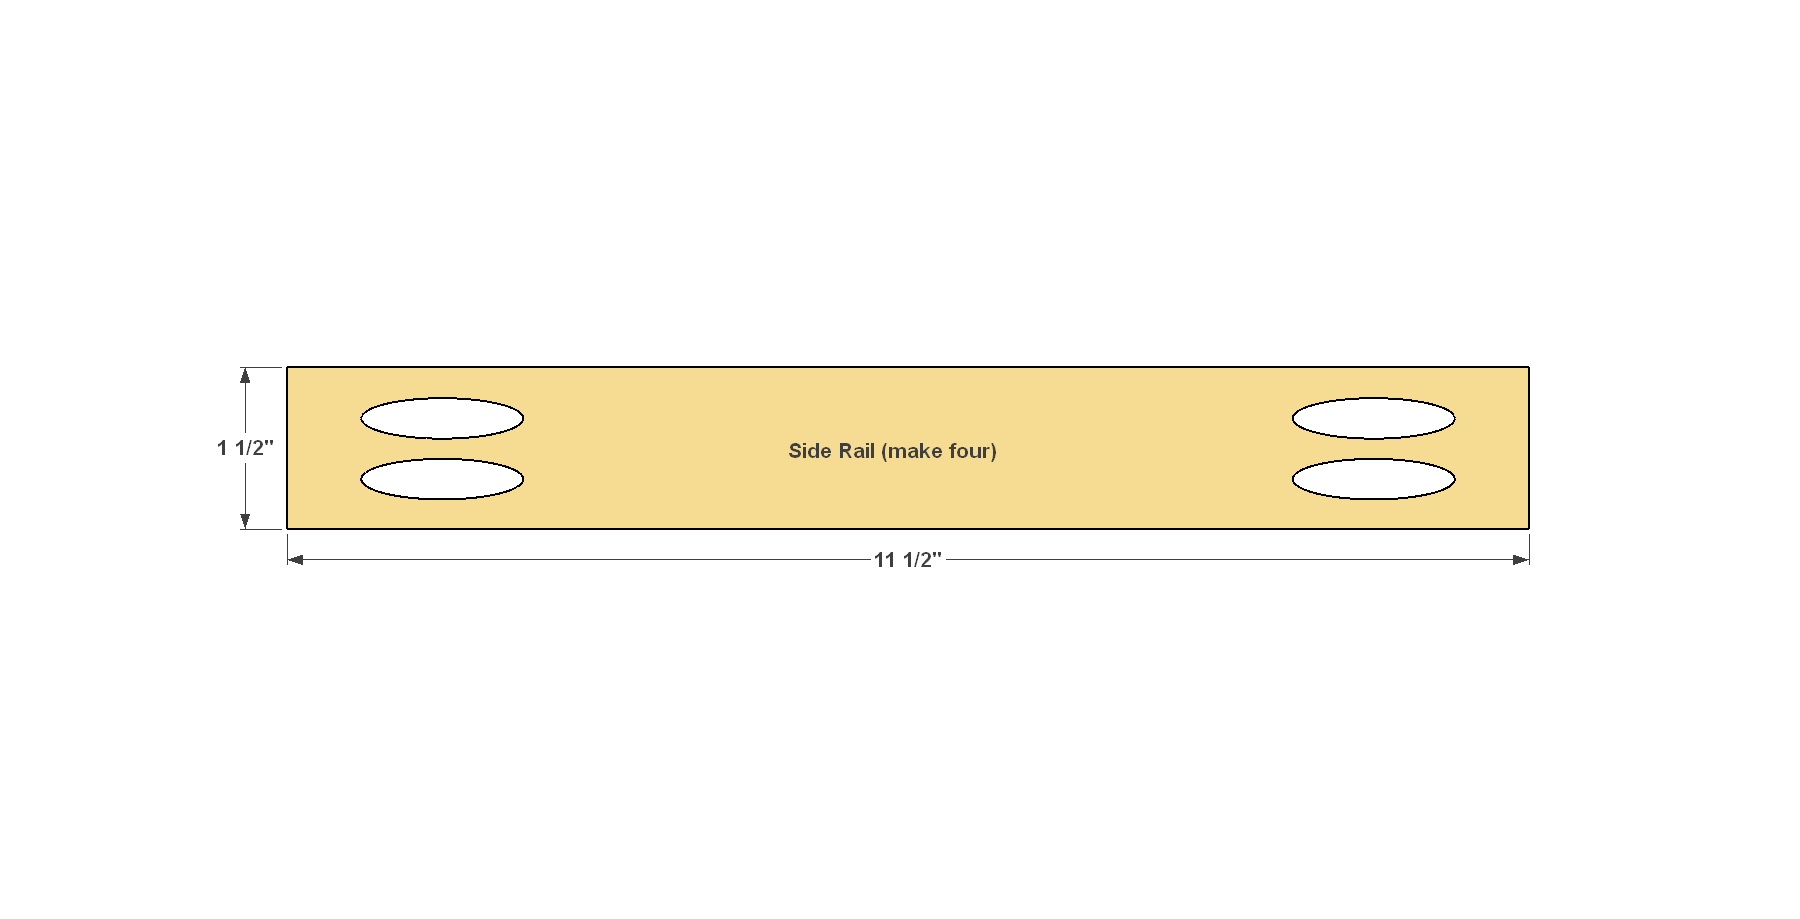
- 4 Side Rail , 3/4" x 1 1/2" x 11 1/2"
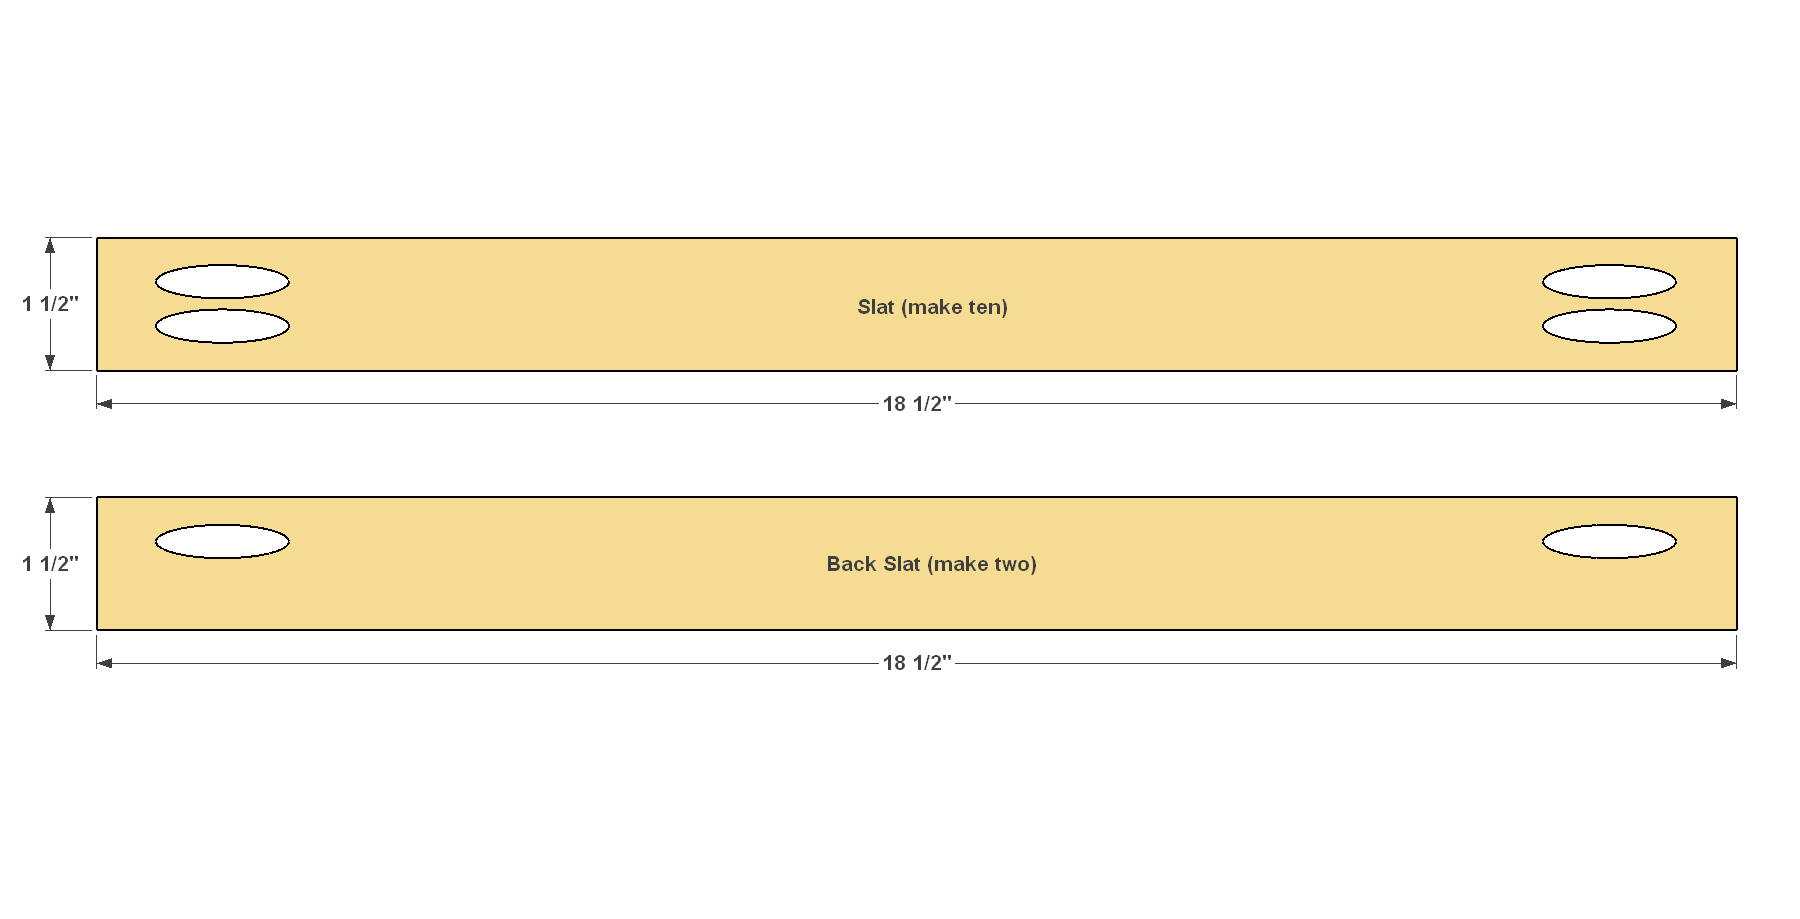
- 10 Slat , 3/4" x 1 1/2" x 18 1/2"
- 2 Back Slat , 3/4" x 1 1/2" x 18 1/2"
- 2 Wall Brace , 3/4" x 1 1/2" x 16 1/2"
- 1 Towel Bar , 1/2"-diameter x 20"
Directions
-
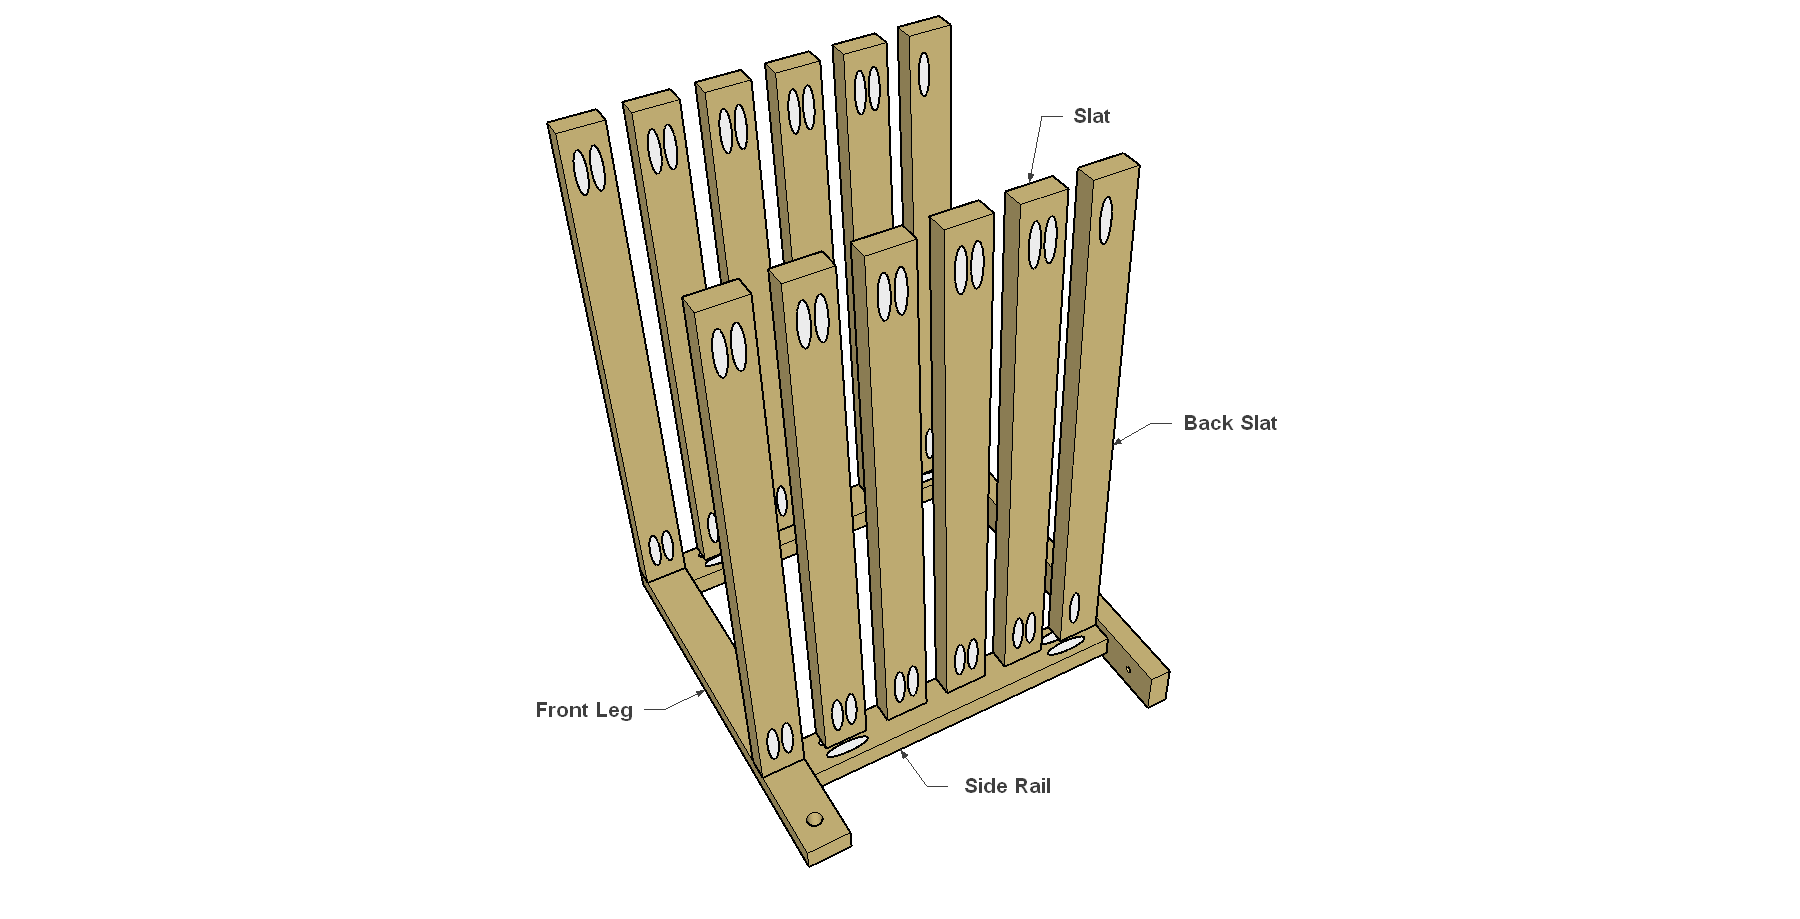
Make the Wall Braces and Front Legs
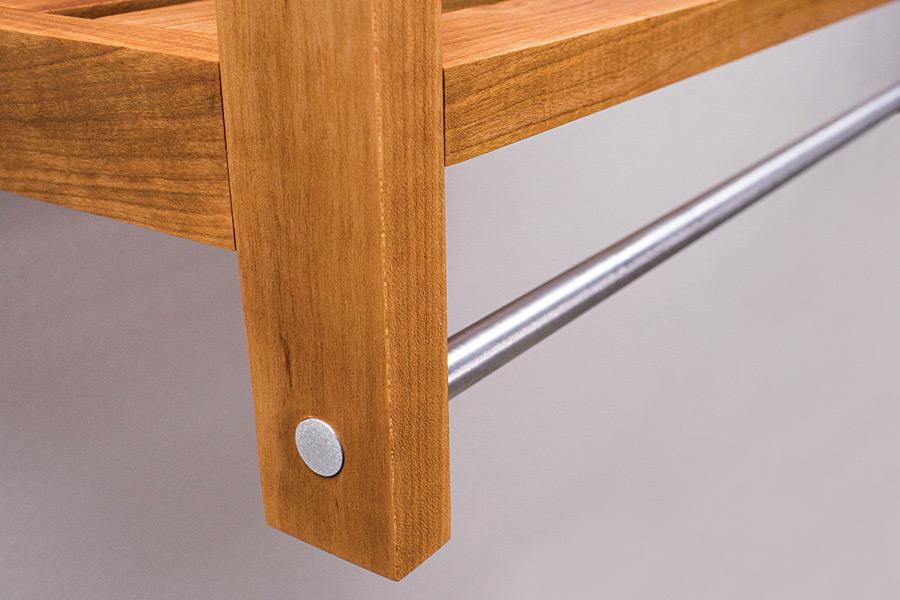
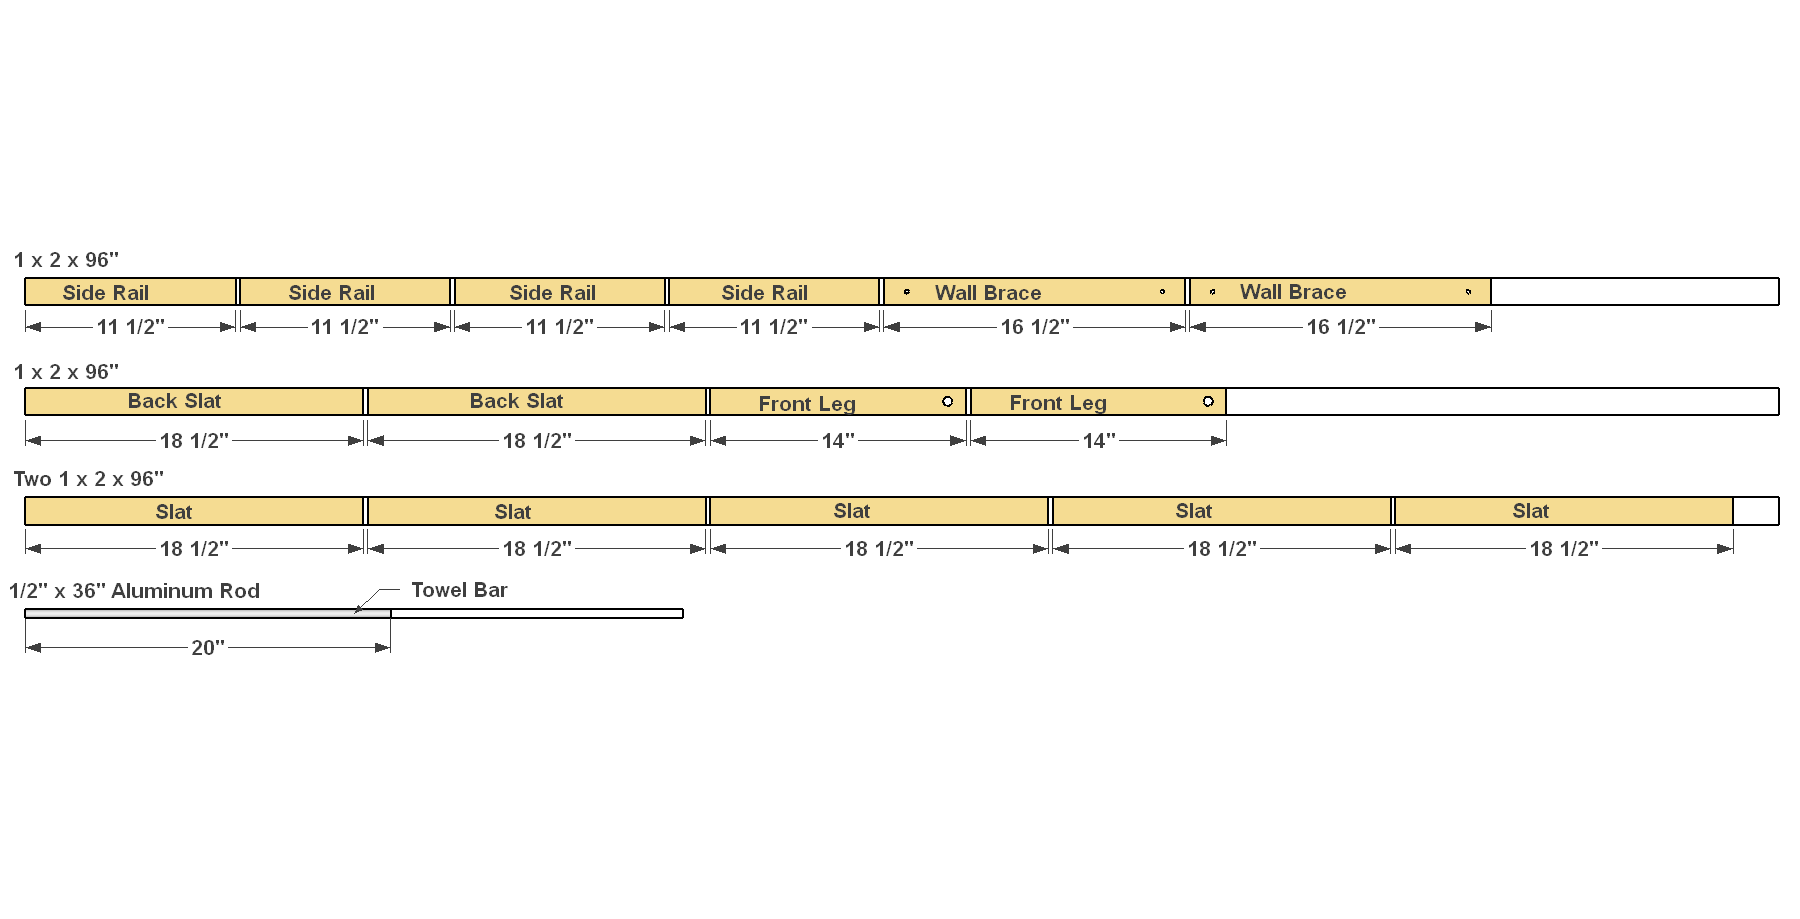
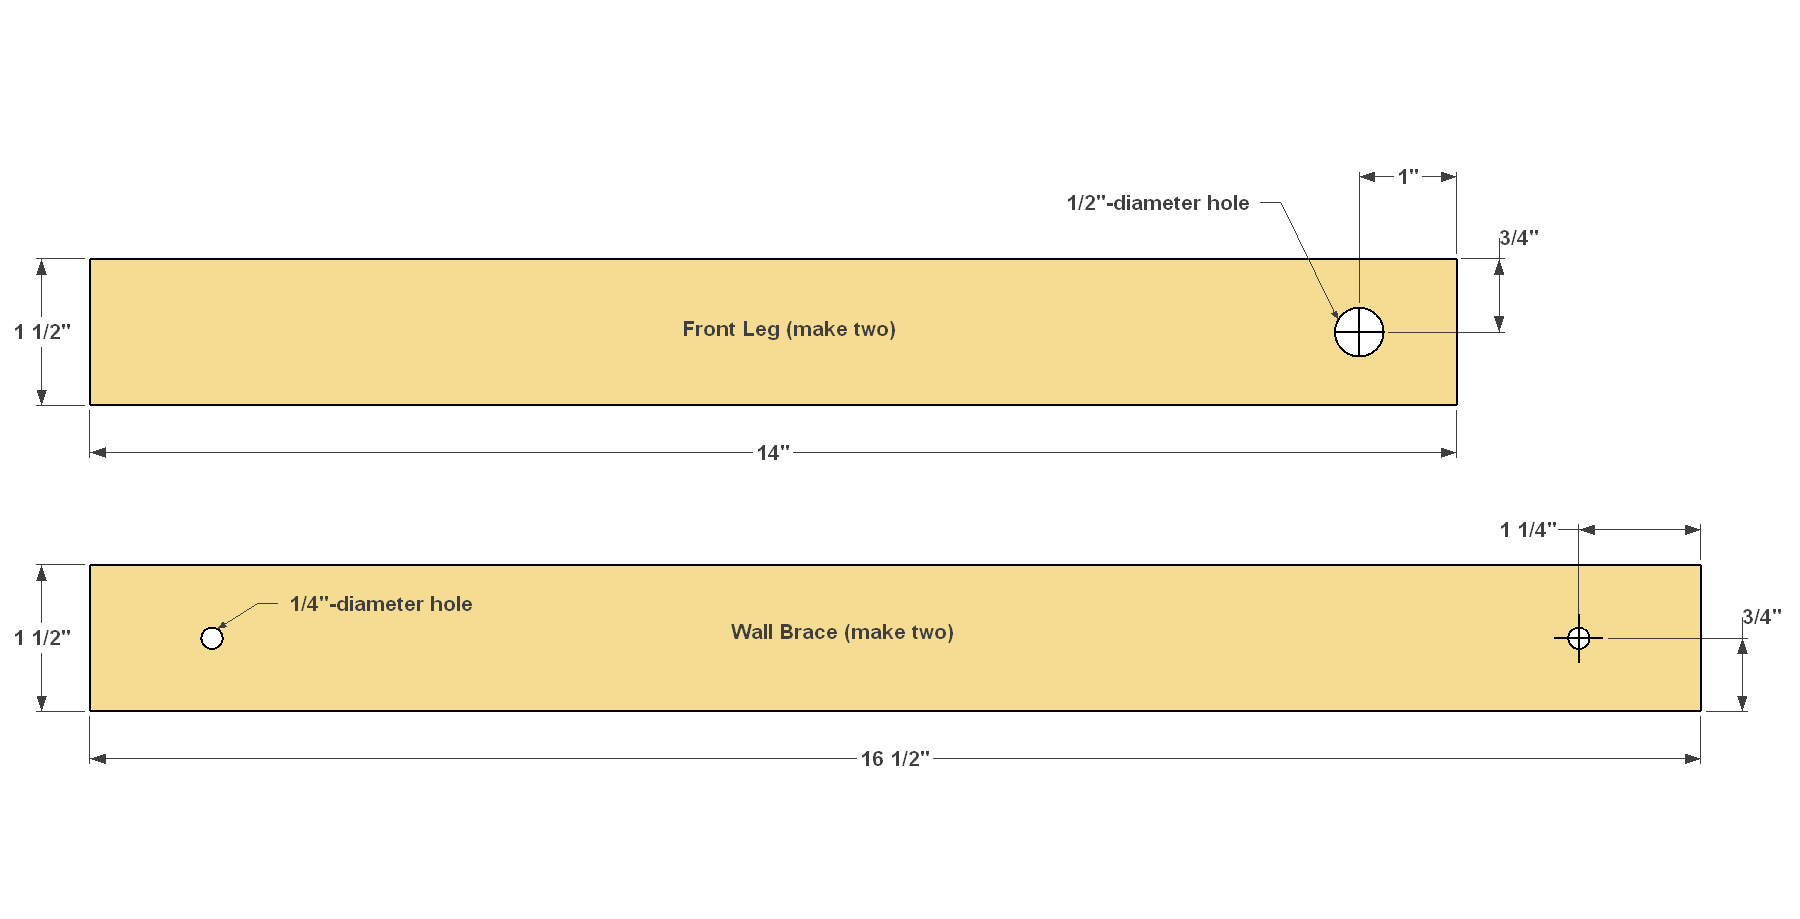
Cut two Wall Braces and two Front Legs to size from a 1x2 board, as shown in the cutting diagram. In the Wall Braces, drill two holes where shown for screws that will be used to mount the finished shelf on the wall. In the Front Legs, drill a hole for the aluminum rod that will serve as a towel bar. Sand the pieces smooth
-
Make the Side Rails
Cut four Side Rails to size from a 1x2 board, as shown in the cutting diagram. Set your Kreg® Pocket-Hole Jig set for 3/4"-thick material, and then drill pocket holes in these pieces where shown. Sand the faces and edges, but not the ends.
-
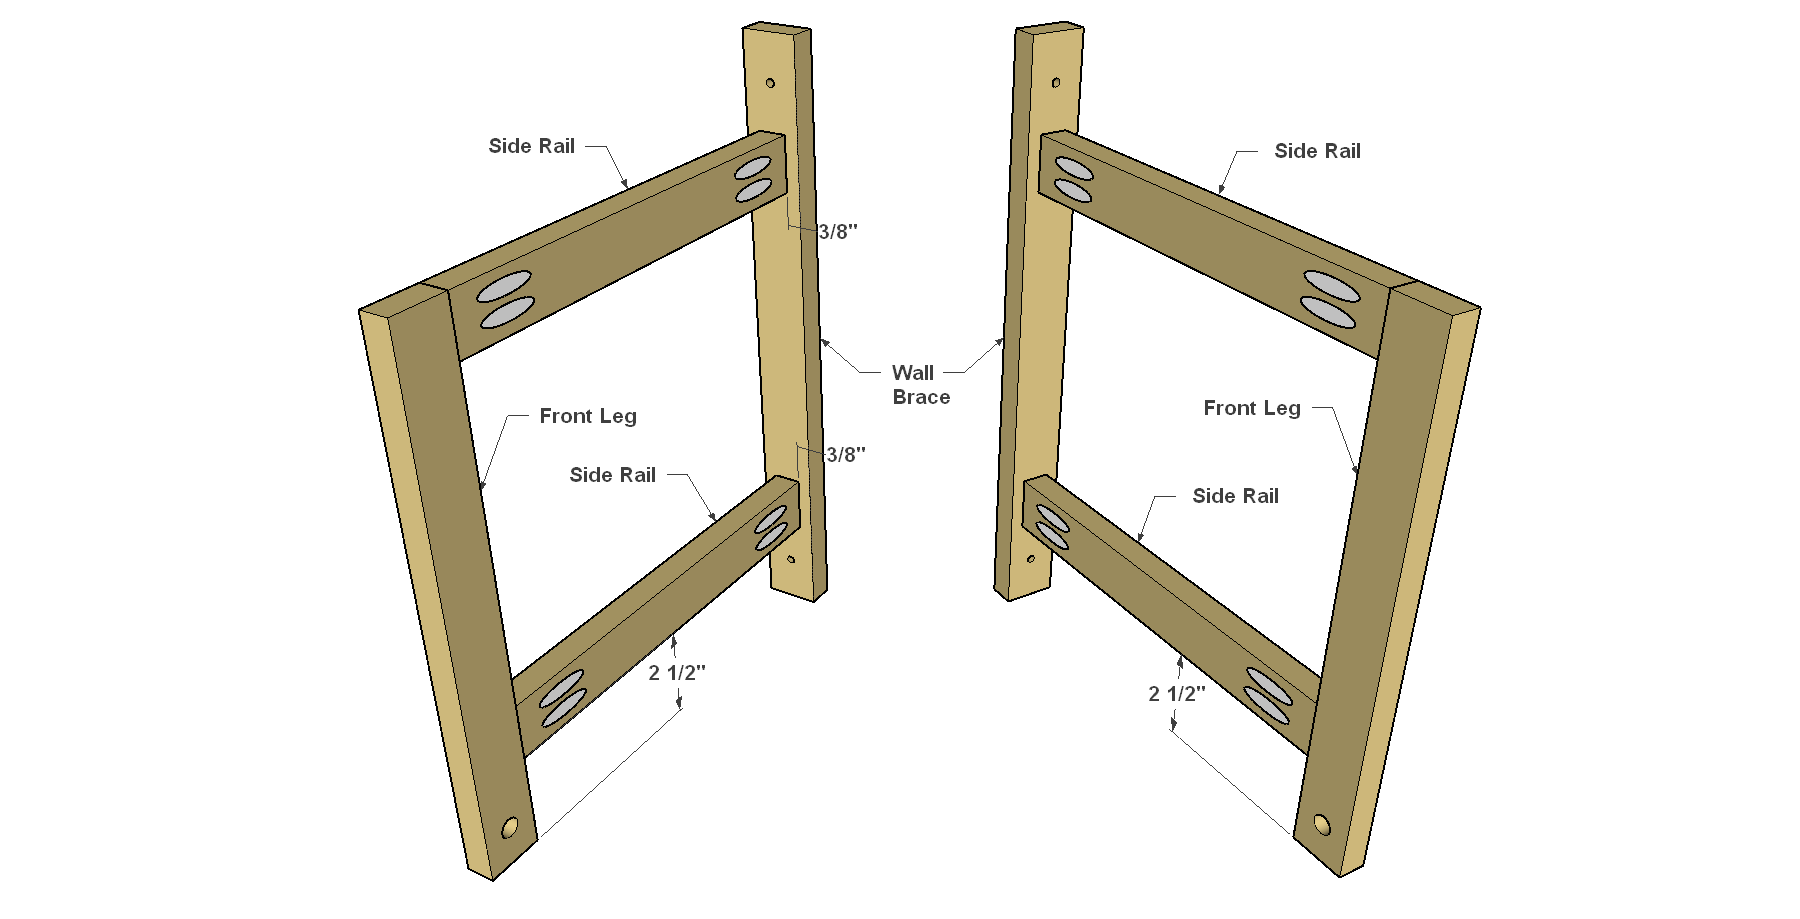
Create Side Assemblies
Begin assembly by attaching the Side Rails to the Front Legs and Wall Braces, as shown. Make sure to create two “mirror image” assemblies with the pocket holes on the Side Rails facing inward inside. Next you can attach the Slats and Back Slat using 1 1/4" Kreg Pocket-Hole Screws. We chose fine-thread screws for our oak, which is a hardwood. If you’re using a softwood, such as pine, instead, you’ll want to use coarse-thread screws.
Because these pocket holes may show on the completed project, you can plug them by gluing in Pocket-Hole Plugs that match the species of wood you use for your project. Let the glue dry, and then sand the plugs flush.
-
Make the Slats
Cut ten Slats and two Back Slats to length from a 1x2 board, as shown in the cutting diagram. Then drill pocket holes where shown. Note that the ten Slats get two pocket holes on each end, while the two Back Slats only have one. Sand the faces and edges smooth, but don’t sand the ends.
-
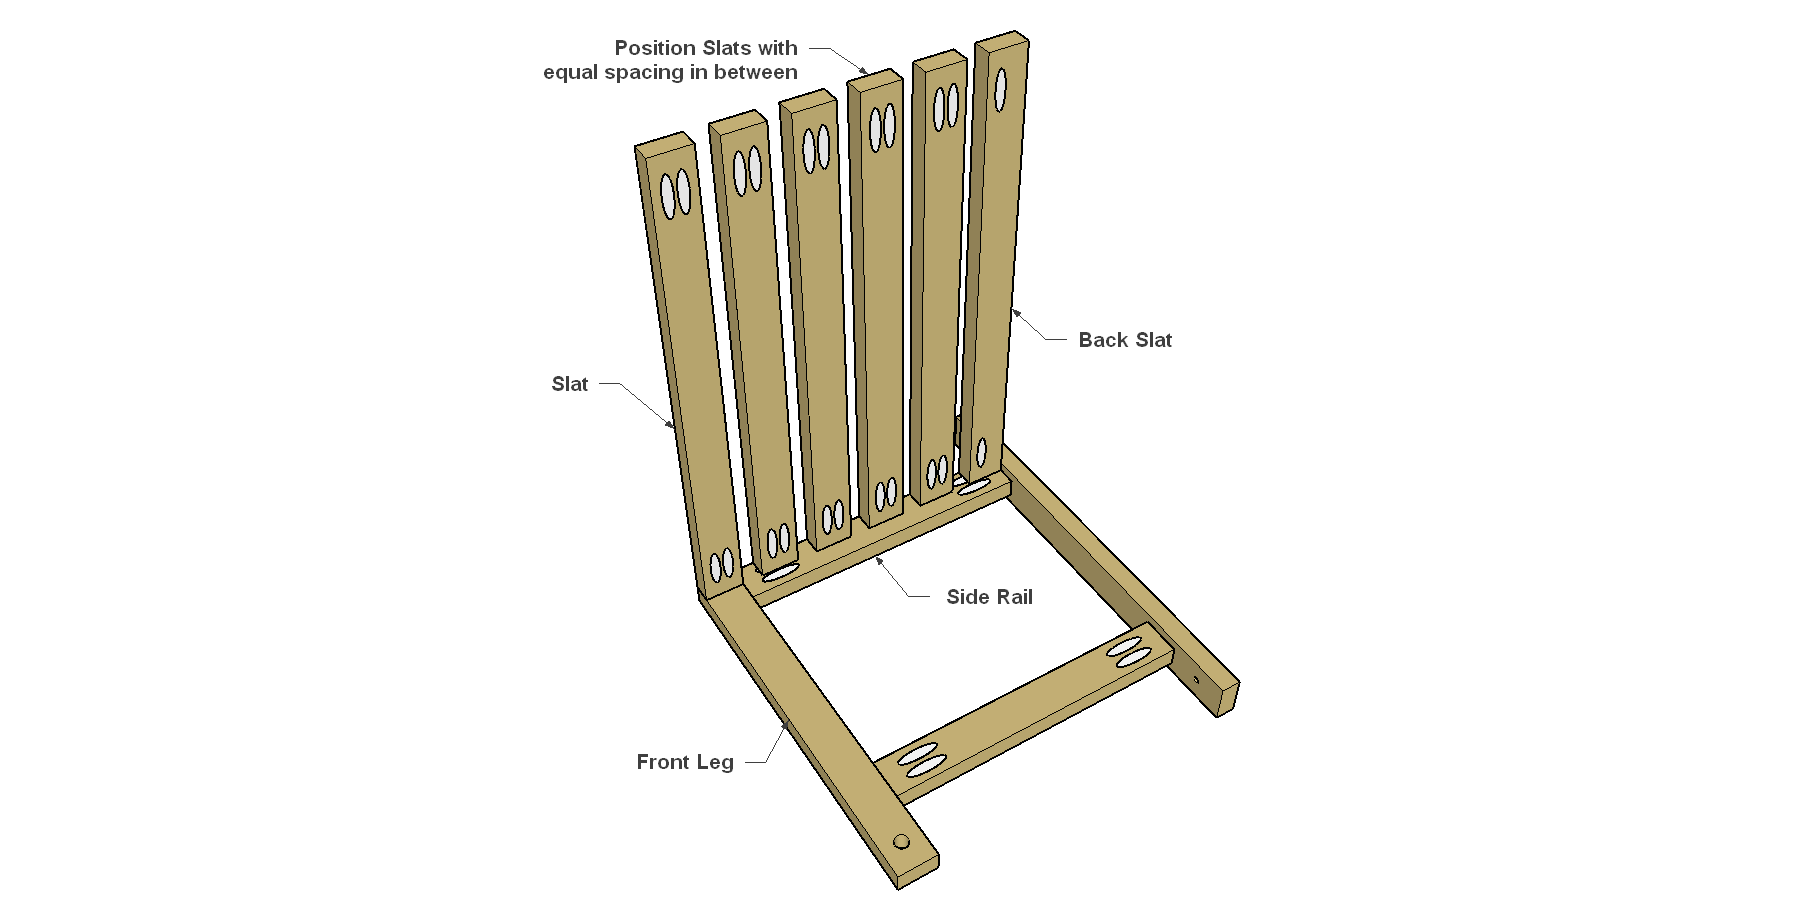
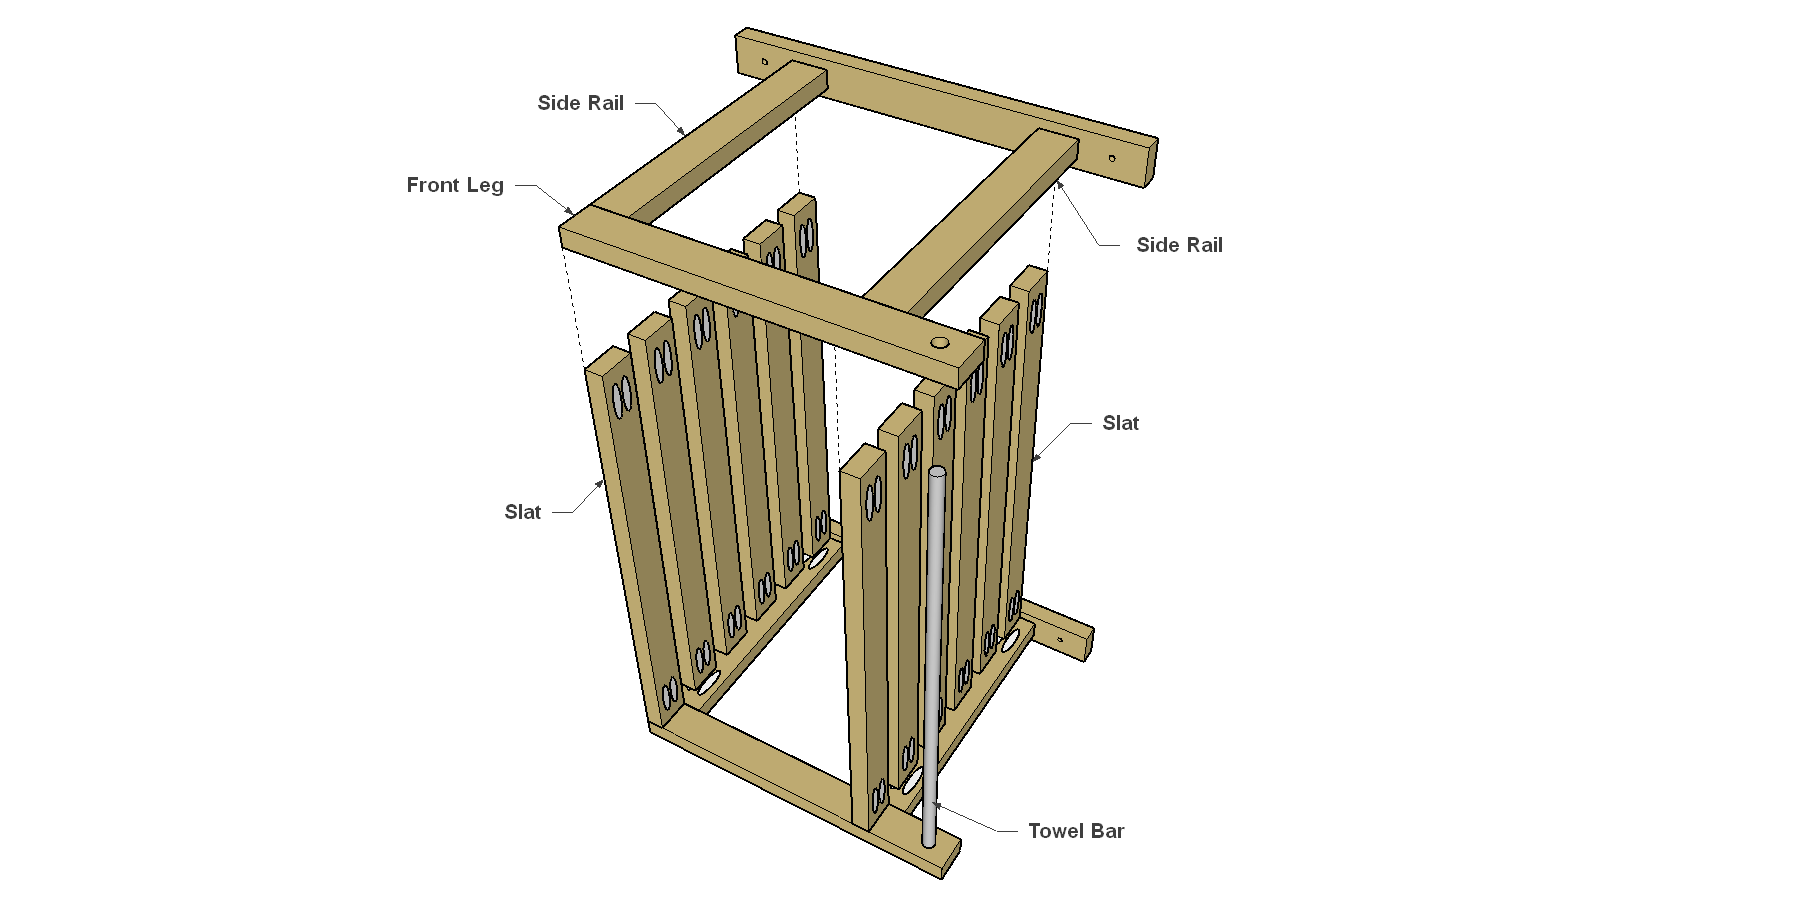
Create the Upper Shelf
Create the upper shelf by attaching five Slats and one Back Slat, as shown, using 1 1/4" Pocket-Hole Screws. It’s easiest if you attach the front-most Slat, and the Back Slat, and then space the remaining Slats evenly in between them.
-
Add the Lower Shelf
Now you can attach the other slats to create the lower shelf in the same way.
-
Add the Second Side
Add the second side to the shelf assembly using 1 1/4" Pocket-Hole Screws.
-
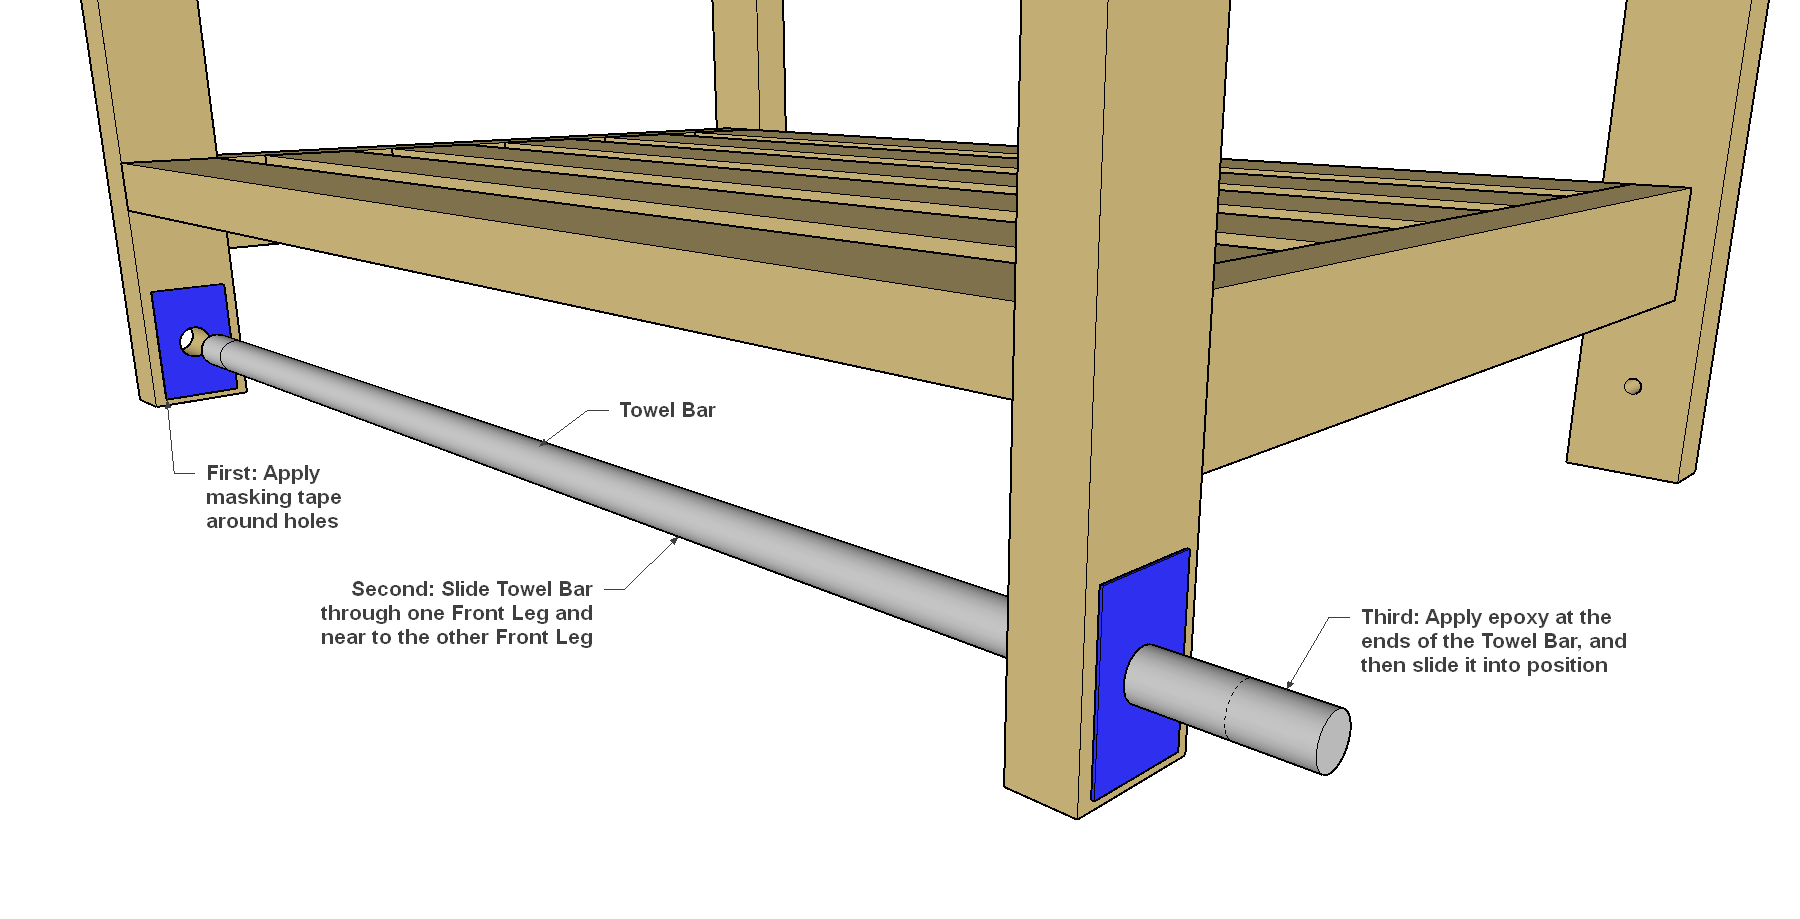
Add a Towel Bar
To create the Towel Bar. Cut an aluminum rod to length, as shown in the cutting diagram. Use #0000 (super fine) steel wool or 400-grit sandpaper to polish the rod to a finished look. Mask over the holes for the Towel Bar in the Front Legs with painter’s tape, and then cut the tape from the hole with a utility knife. Slide the rod through one hole but leave it shy of the second hole. Add a dab of epoxy to the open hole and a little to the other end of the rod. Gently slide the rod into position. Remove the painters tape before the epoxy sets up. If you need to clean up any excess epoxy you can use denatured alcohol or lacquer thinner.