Creating pocket-hole joints is a simple process. As we like to say, once you learn how to use a pocket-hole jig, it’s as easy as drill, drive, and you’re done! To see how a pocket-hole joint comes together, though, it’s fun to take a look inside.
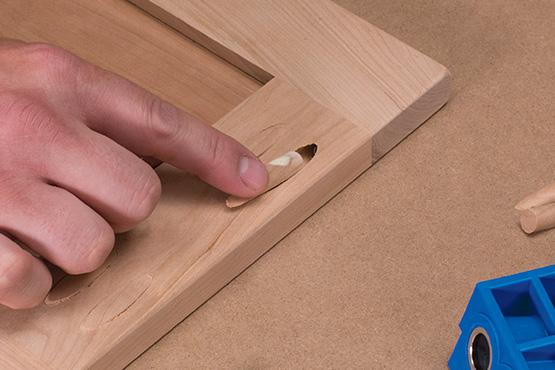
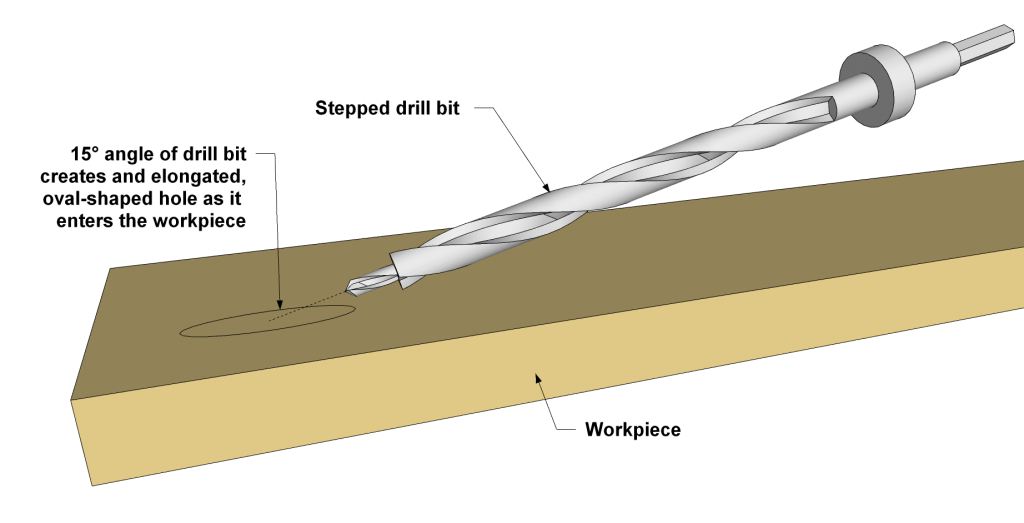 The angle creates the oval
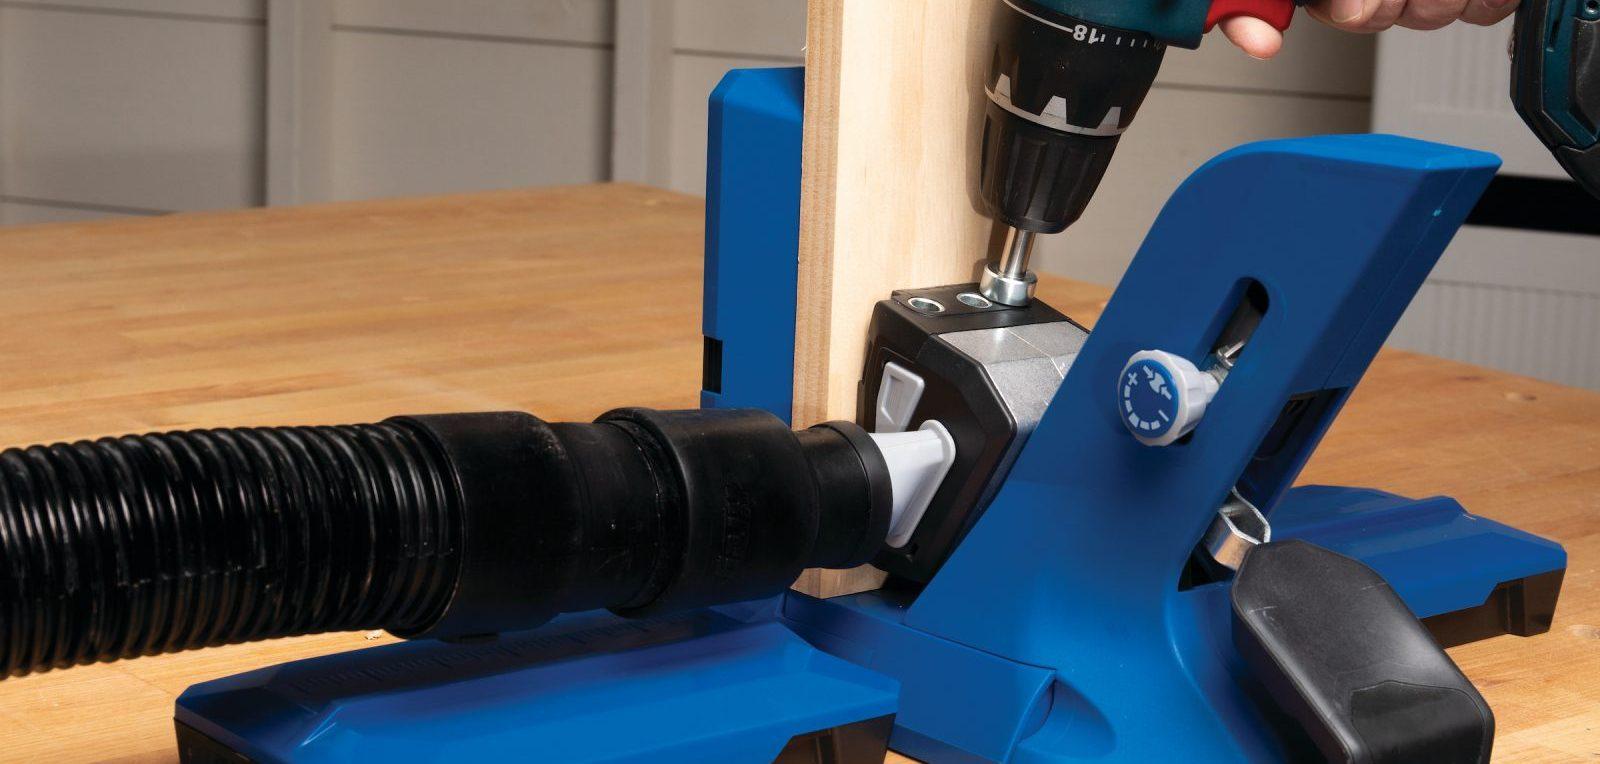
As you drill, the stepped drill bit enters the wood at a 15° angle. That’s what creates the distinctive oval shape. The pocket-hole jig ensures this angle is consistent, and that the bit is held steady as you work — making the process of drilling an angled hole entirely foolproof.
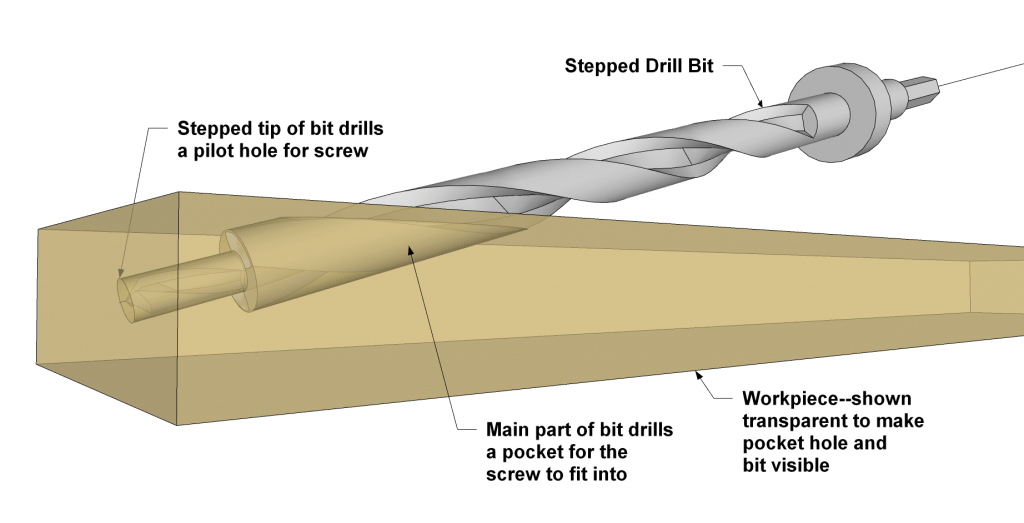 Double-duty drill bit
If you look “inside” the material again, you can clearly see what happens as you drill the pocket hole. The special stepped drill bit does two things: the smaller tip drills a pilot hole for the screw, while the main part of the bit creates the pocket that the screw fits into.
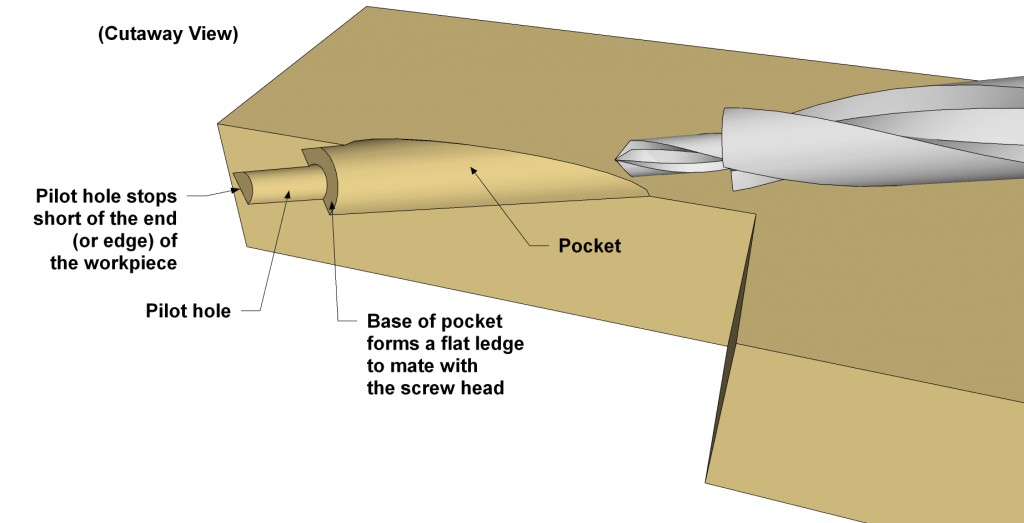 Anatomy of the pocket hole
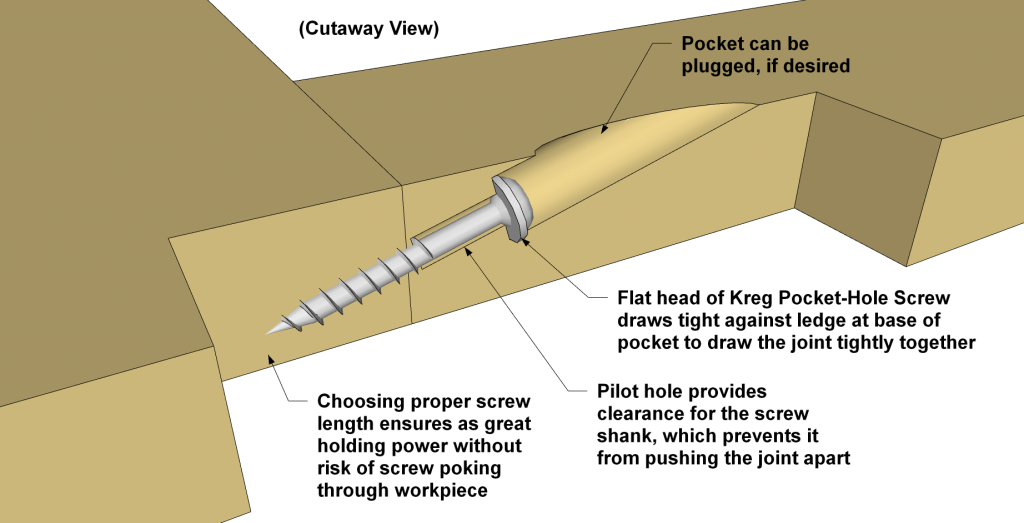
A cutaway view of the pocket hole shows all the elements in another way. At the base of the pocket, there’s a flat ledge that the head of the screw will contact. The pilot hole continues almost—but not quite all the way—to the end of the board. It stops short for good reason: to prevent the wood fibers from “blowing out” as the bit exits the material. That way, there’s nothing to interfere with this piece fitting tightly against the mating piece.
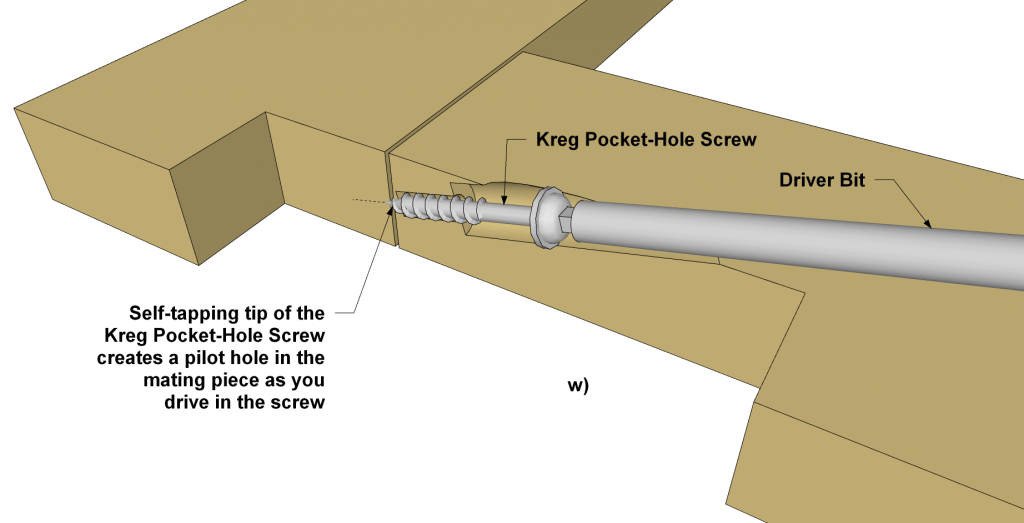 Self-tapping screws keep it simple
As you drive a pocket-hole screw into your material, the pocket and pilot hole guide the screw precisely, while the screw’s self-tapping tip drills its own hole into the mating piece. That means you don’t have to drill into both pieces, and you’ll get great holding power without splitting or stripping the wood.
 Kreg pocket-hole screws pull it all together
As you tighten the screw, it pulls the joint tightly together. The process is simple, but there are several things going on that make it possible. For starters, the upper part of the screw doesn’t have threads. That lets it turn easily inside the pilot hole instead of driving your two pieces of material apart.
Second, the flat underside of the screw mates perfectly with the ledge at the base of the pocket. This way, the head pulls the joint tightly together to create a super-strong, lasting joint.
Now that you know ins and outs of pocket-hole joinery, make sure you’re getting the most out of it. Using the right kind of pocket-hole screw is critical to strong, long-lasting joints. Try our online Screw Selector tool to figure out exactly which screw you’ll need for your specific project.

