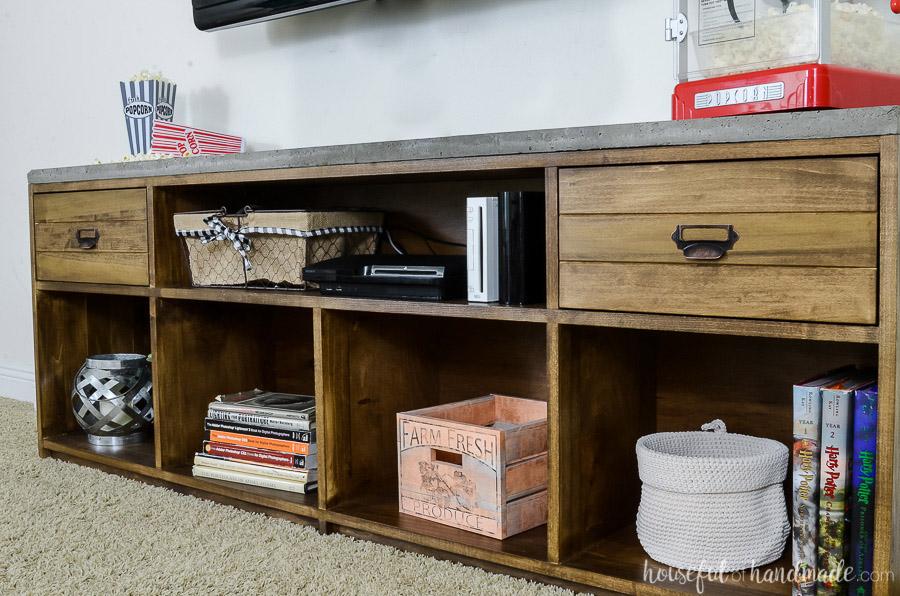
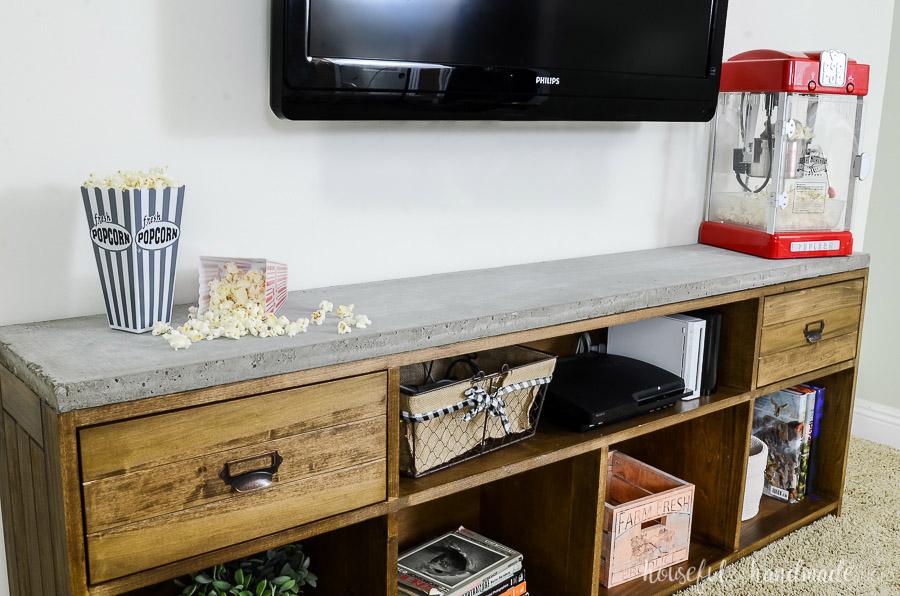
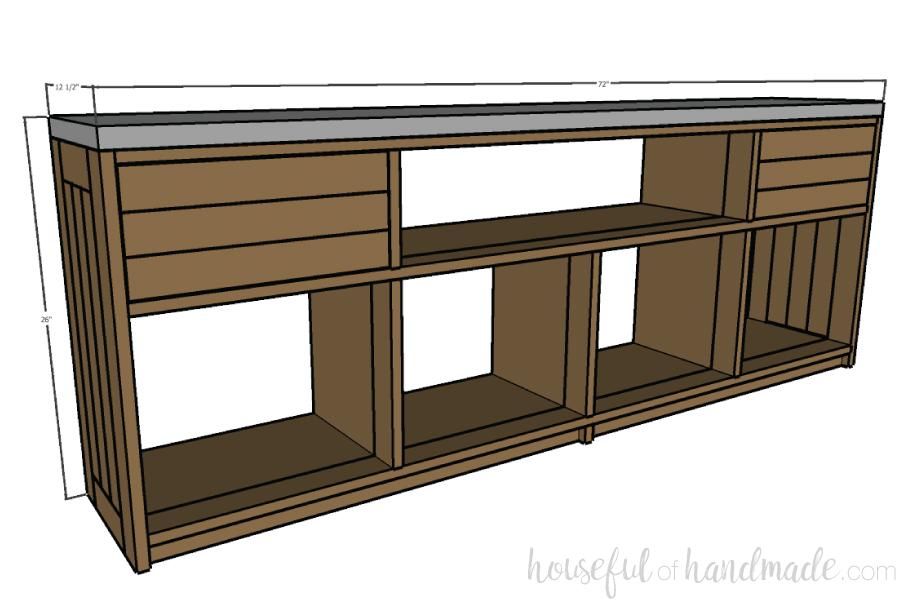
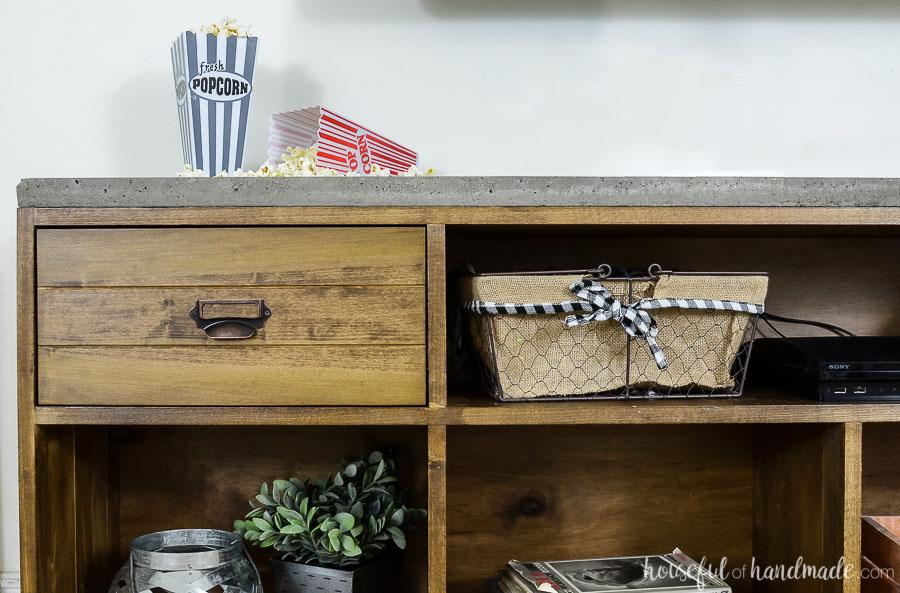


This large rustic TV stand with an industrial concrete top is the perfect way to house all your television components and more. The 6 foot long TV console has plenty of storage with drawers and shelves. And the simple routered details and concrete top will make it stand out in any room.
Tools
Kreg Tools


Other Tools
-
Circular Saw (corded)

-
Miter Saw
-
Square
-
Table Saw
-
Tape Measure
-
Drill (cordless)
-
Impact Driver
-
Nail Gun
-
Router
-
Sander
Materials
Wood Products
- 7 Board , 1x3 , 96"
- 1 Board , 1x2 , 96"
- 2 Board , 1x6 , 72"
- 1 Plywood , 3/4" Thick , Full Sheet
- 1 Plywood , 1/4" Thick , Half Sheet
- 2 Board , 15" melamine covered shelf , 96"
Hardware & Supplies
- 150 1 1/4" pocket hole screws
- 100 1 1/4" finish nails
- 1 Wood glue
- 1 80 lb bag concrete counter top mix
- 25 3/4" finishing nails
Directions
-
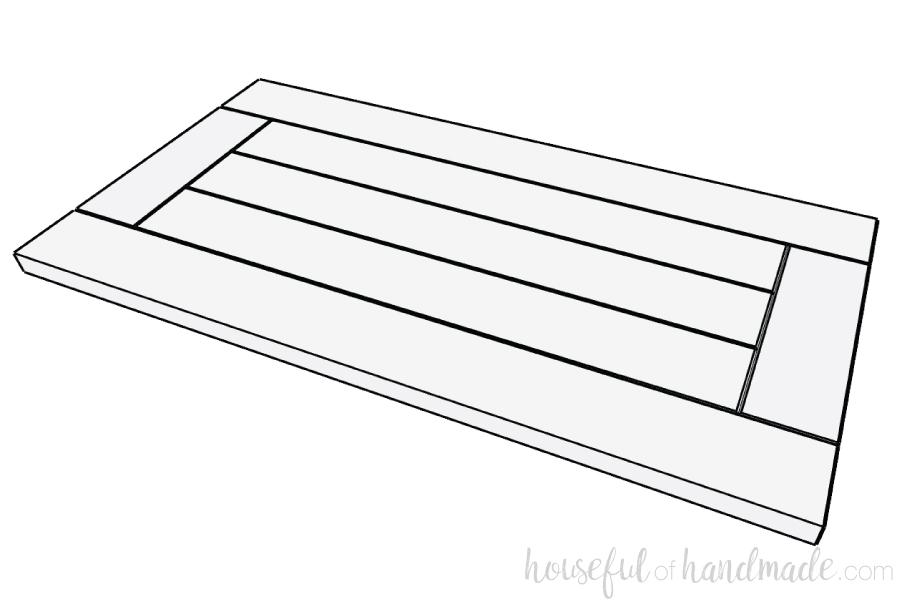
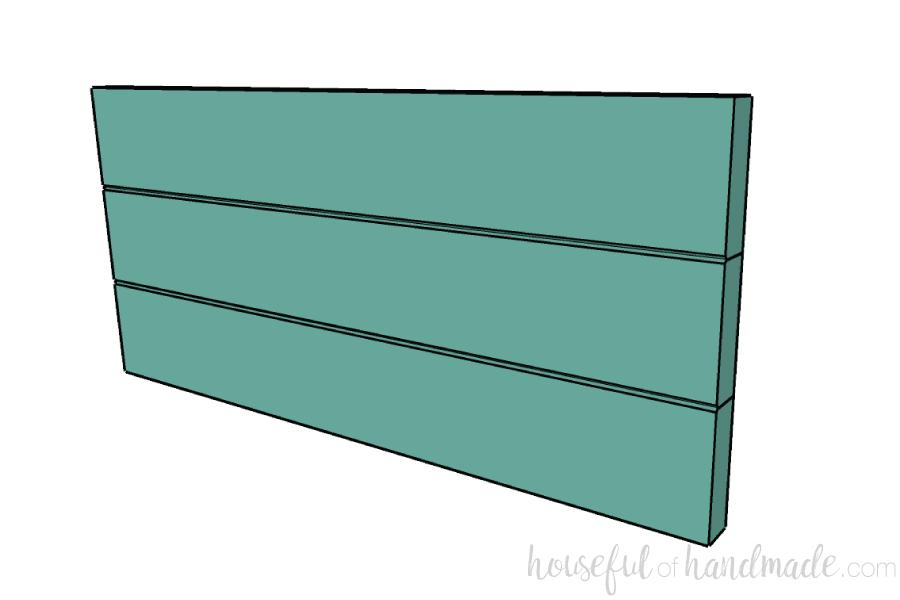
Add detail to the sides
If you want to add detail to the sides of the TV stand to make the design stand out. Set the router up to remove 1/16" off the corner at a diagonal. Router all 4 sides of the inner side boards. Router 3 sides of the top/bottom side boards (2 short & 1 long). And router 1 long side of the outer side boards.
-
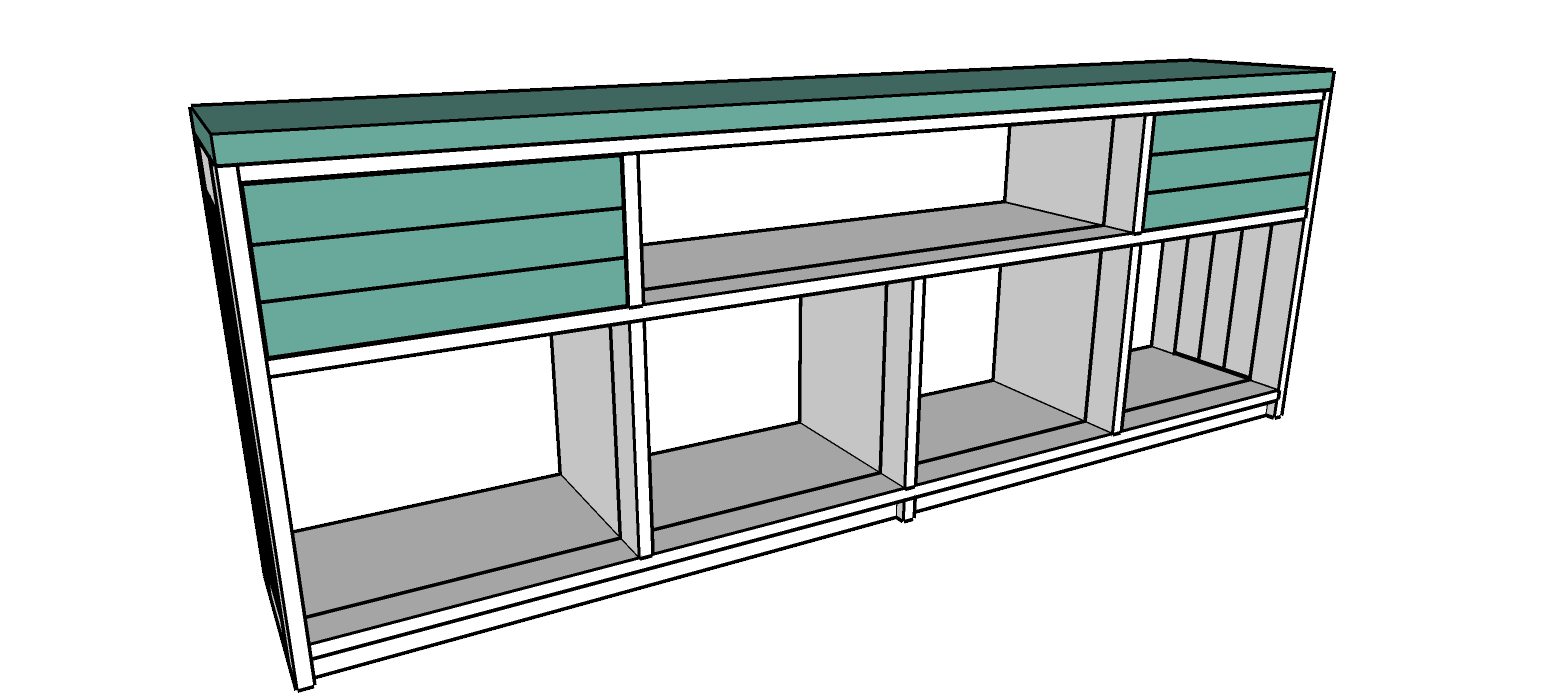
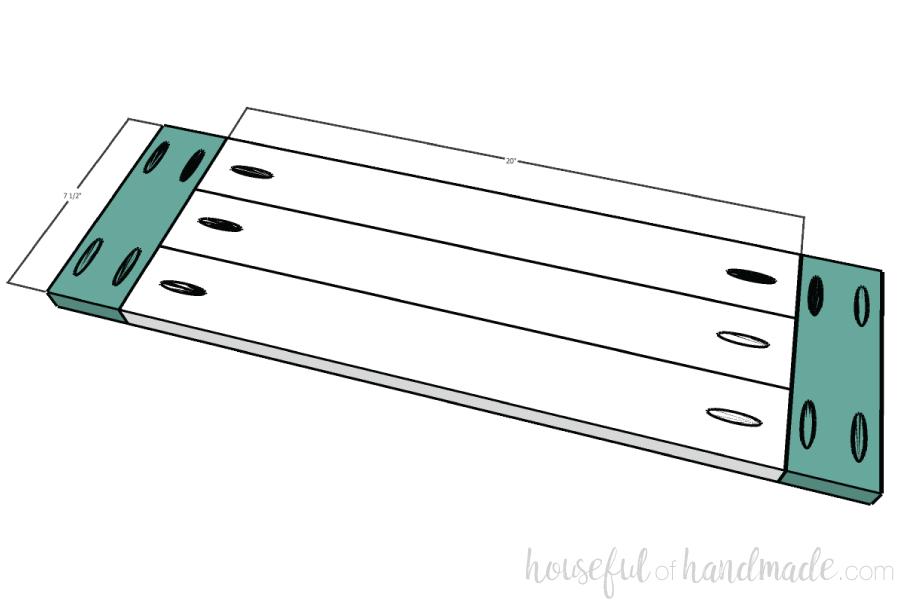
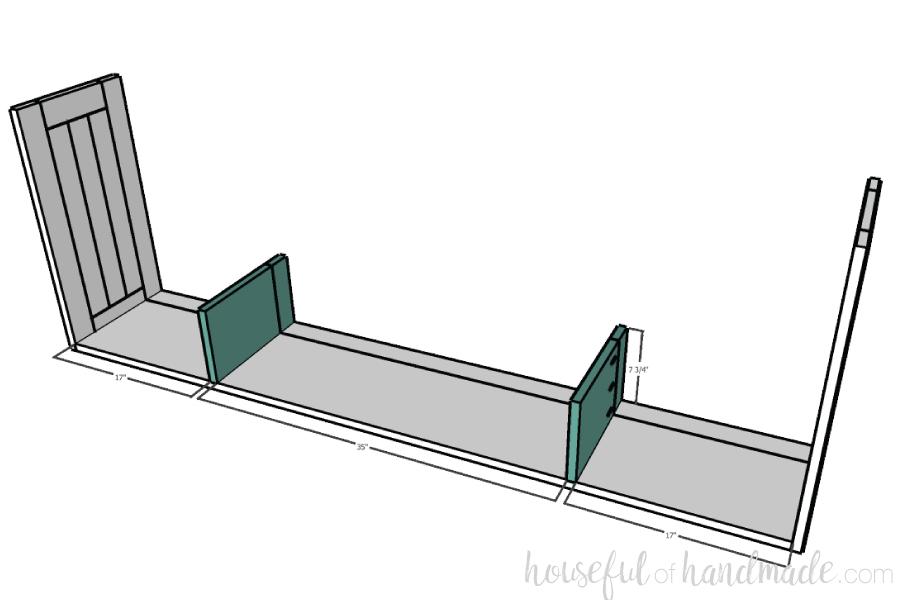
Assemble center of sides
Drill a pocket hole set for 3/4" wood in the end of each of the inner side boards and drill 2 pocket holes in either end of the top/bottom side boards. Attach the inner side boards to the top/bottom side boards as shown in the picture with 1 1/4" pocket hole screws.
-
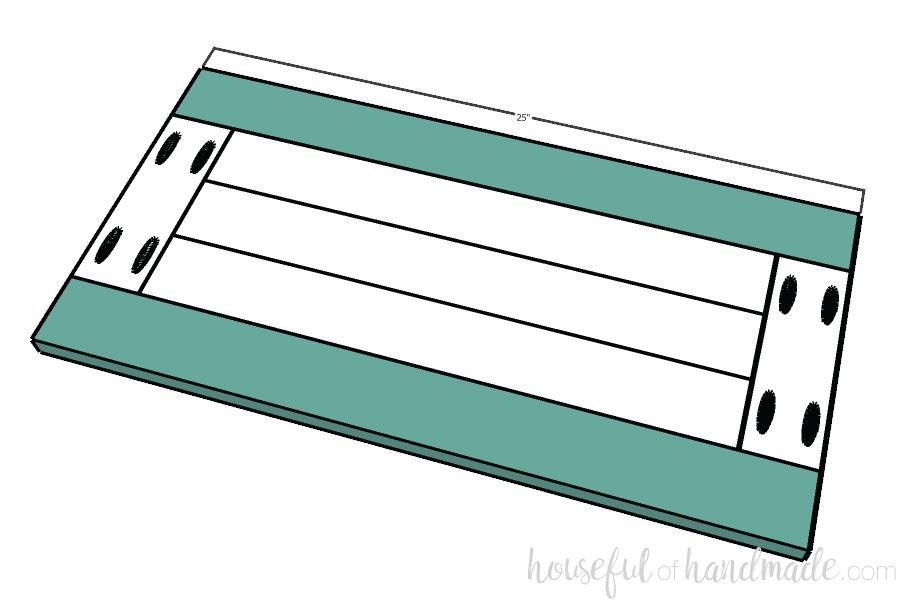
Finish assembling the sides
Attach the outer side boards to either side of the top/bottom side boards with 1 1/4" pocket hole screws.
-
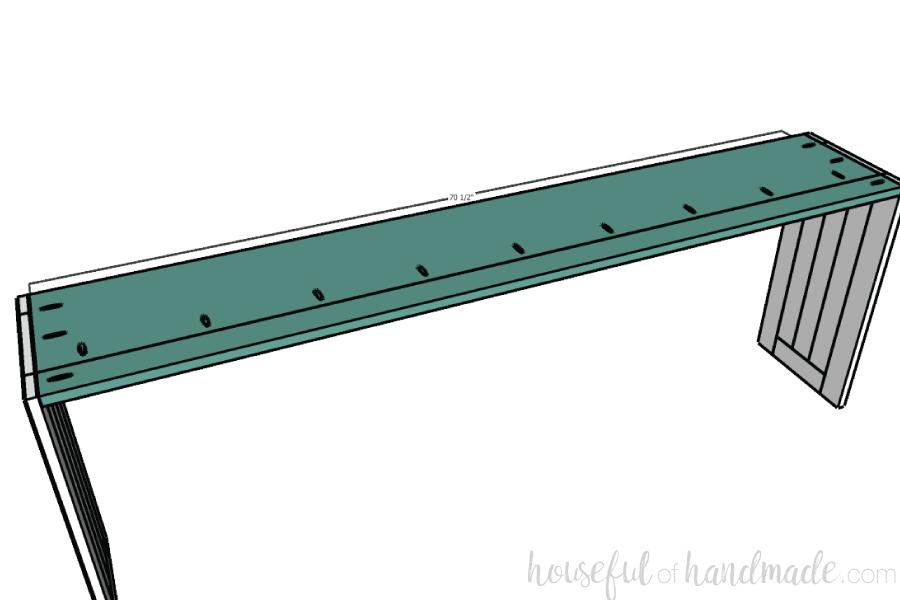
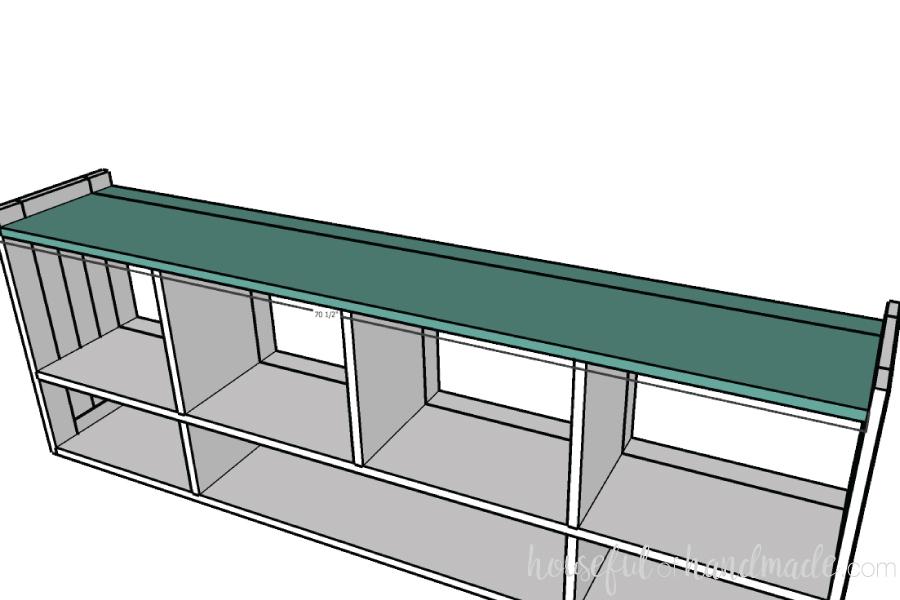
Attach top of tv stand
Drill pocket holes set for 3/4" wood in the side of the horizontal shelf plywood pieces. Attach the horizontal shelf boards to the edge of the horizontal shelf plywood with 1 1/4" pocket hole screws and wood glue. Typically the plywood will be slightly thinner than the boards. Line up one edge of the top side. Attach the top horizontal shelf board to the sides so they are flush on the top and front of the sides. The boards will end 1/4" in from the back to allow for the plywood backing to attach (if you do not want to add a back to the TV stand. Cut the plywood boards 10" deep instead of 9 3/4"). Make sure the pocket hole screws are facing up (they will be covered by the concrete top later).
-
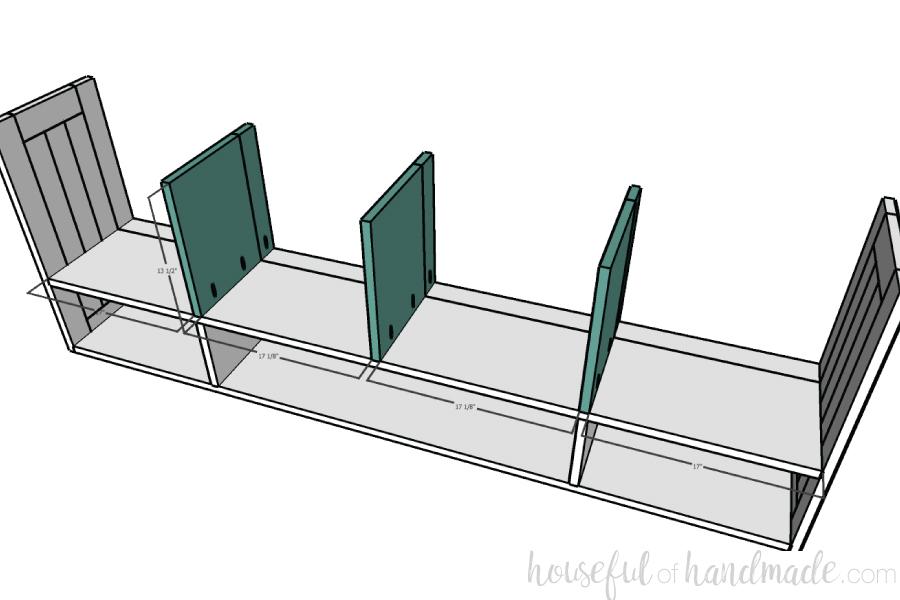
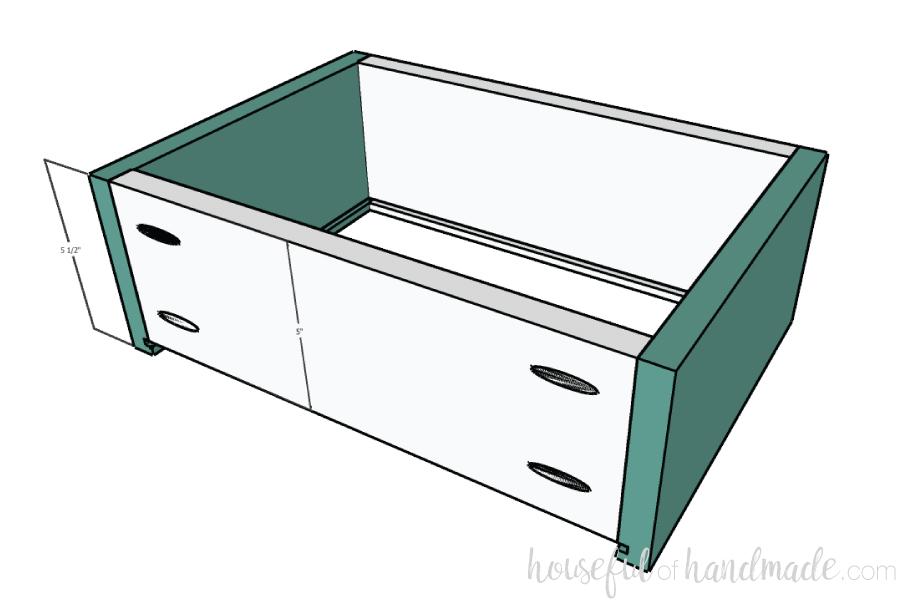
Attach small vertical dividers
Attach the small vertical divider boards to the edge of the small vertical divider plywood the same as you did for the horizontal shelf pieces. Attach the assembled small vertical dividers to the top of the TV stand with either pocket holes or wood glue and finishing nails through the top shelf boards. Attach them so that they are 17" away from the sides and the pocket holes are facing toward the sides so they will be hidden by the drawers.

-
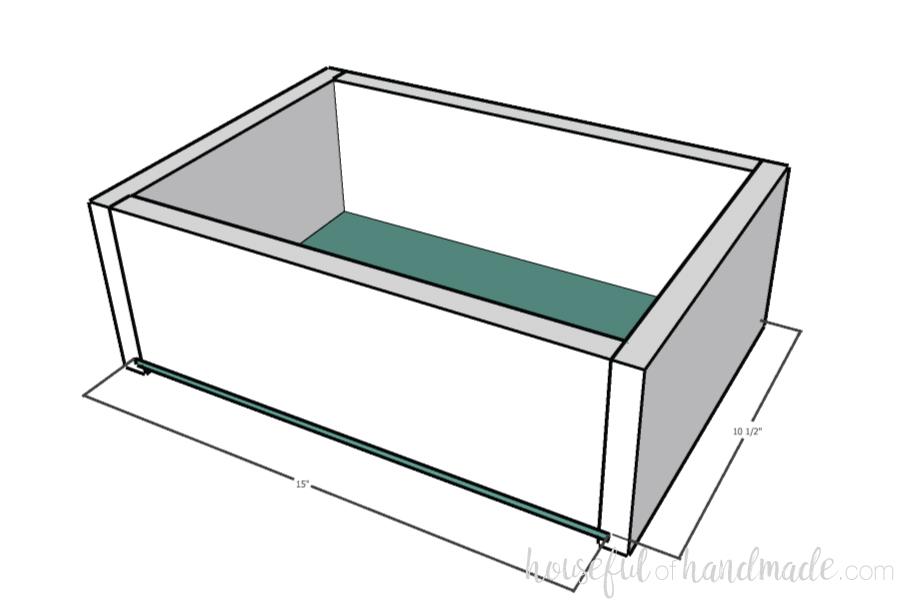
Attach center shelf
Repeat the same steps for the center shelf using the horizontal shelf boards and plywood as you did for the top of the TV stand. This time, place the pocket holes so they are on the bottom of the shelf. You can fill them if desired (but they are not noticeable since they are under the shelf).
-
Attach large vertical dividers
Repeat the same steps for the large vertical dividers as you did for the small vertical dividers. Try to center the boards on the plywood since all sides the large vertical dividers are visible. Also, you will want to fill the pocket holes after assembling. Attach the large vertical dividers so the outer two are 17" away from the sides and the center one is centered on the TV stand.
-
Attach bottom shelf
Repeat the same steps for the bottom shelf using the horizontal shelf boards and plywood as you did for the top of the TV stand. Again, place the pocket holes so they are on the bottom of the shelf so they will be hidden by the toe kick.
-
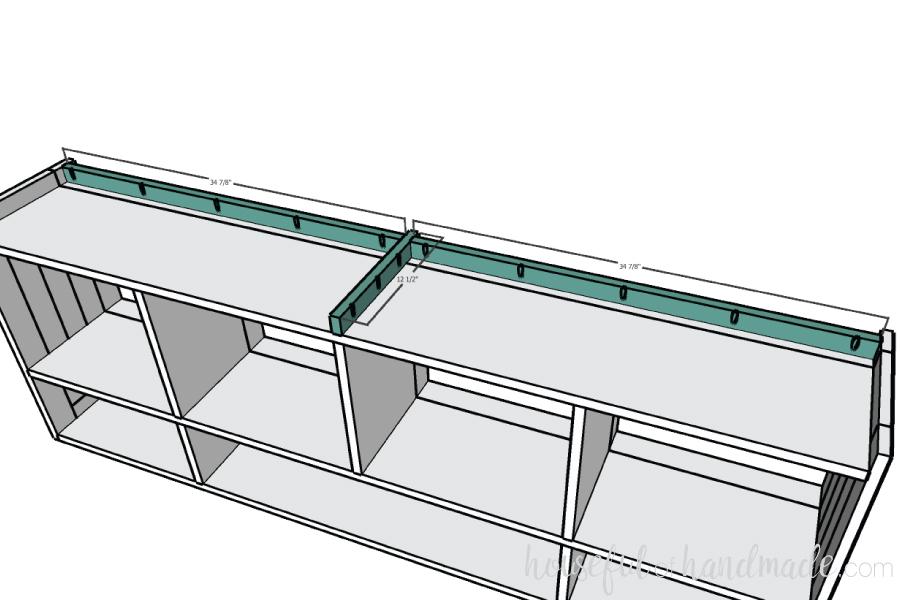
Add the toe kick
Drill pocket holes set for 3/4" material in the toe kick and toe kick center boards. Attach them to the bottom of the bottom shelf with 1 1/4" pocket hole screws so the center board is directly center of the TV stand and flush with the front. The toe kick boards should be set 1" back from the front of the bottom shelf boards.
-
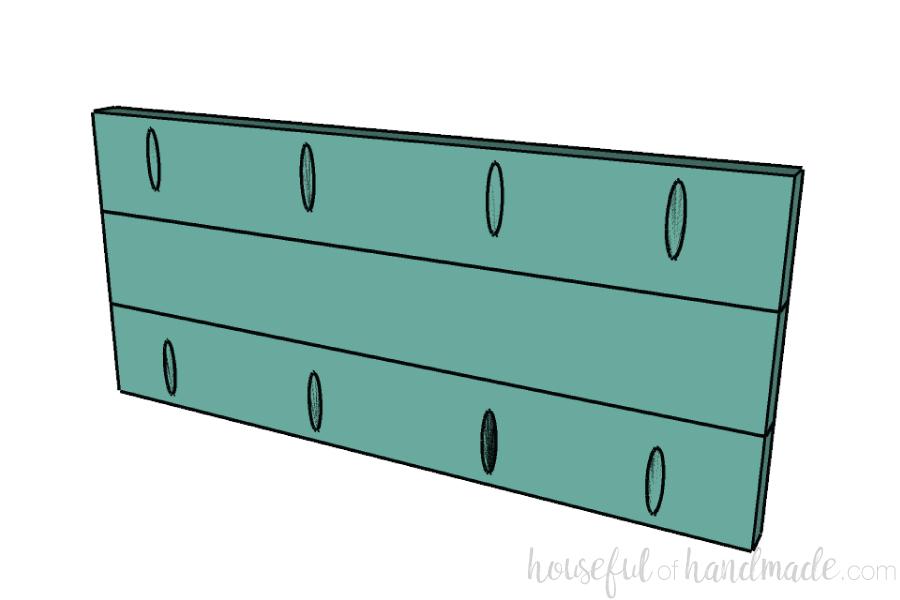
Add detail to the drawer fronts
If you want to add detail to the drawer fronts. Router the inside long edge of two of the boards and both long edges of one of the boards for each drawer just like you did for the sides.
-
Build the drawer fronts
Attach the 3 drawer front boards for each drawer front together with wood glue and pocket holes. Make sure the board with both sides routered is the center and the outer two boards have the inside edge routered.
-
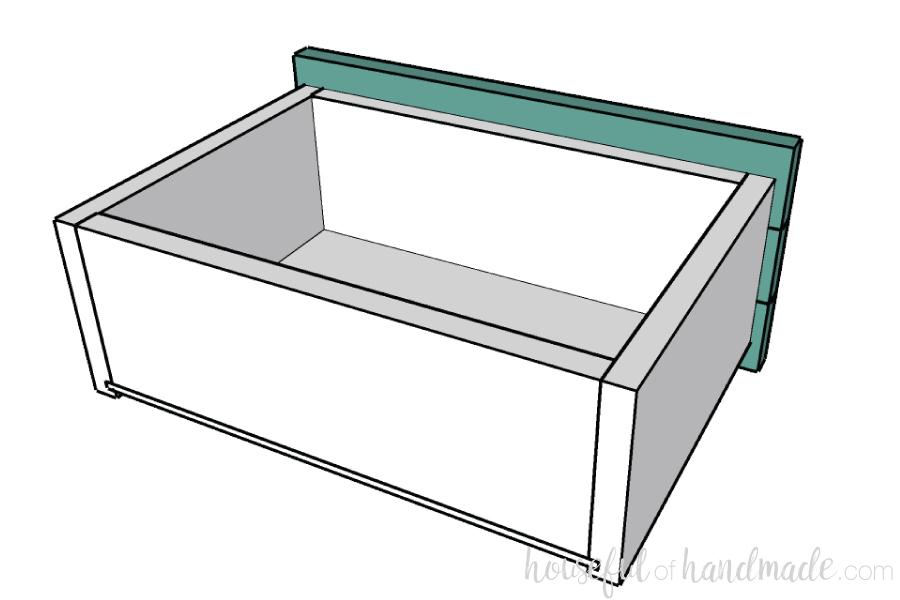
Build the drawer boxes
Using a router or table saw, cut a 1/4" x 1/4" groove in the bottom of the drawer box sides and drawer box fronts. Then rip the drawer box back so the bottom of the board will hit the top of the groove when assembled. Drill 3/4" deep pocket holes in the ends of drawer box front and back boards. Assemble the box so the top of the boards are flush and the corners are square.
-
Add the drawer box bottom
Slide the drawer box bottom piece into the groove under the drawer box back. Ensure the box is squared up and then attach the drawer box bottom to the drawer box back with finishing nails.
-
Attach the drawer front
Attach the drawer front to the front of the drawer box so it is centered. I like to use 1 1/4" pocket hole screws for this as well because they are self tapping. Drive the screws in from the inside of the drawer box into the back of the drawer front in all 4 corners.
-
Finish the TV stand
Sand and finish the TV stand, including the back piece. I felt it was easier to apply the finish without the back attached. After it is dry, attach the back inside the sides. Make sure to measure out where the horizontal shelf boards are and secure the back in multiple places with 3/4" finishing nails into them.
-
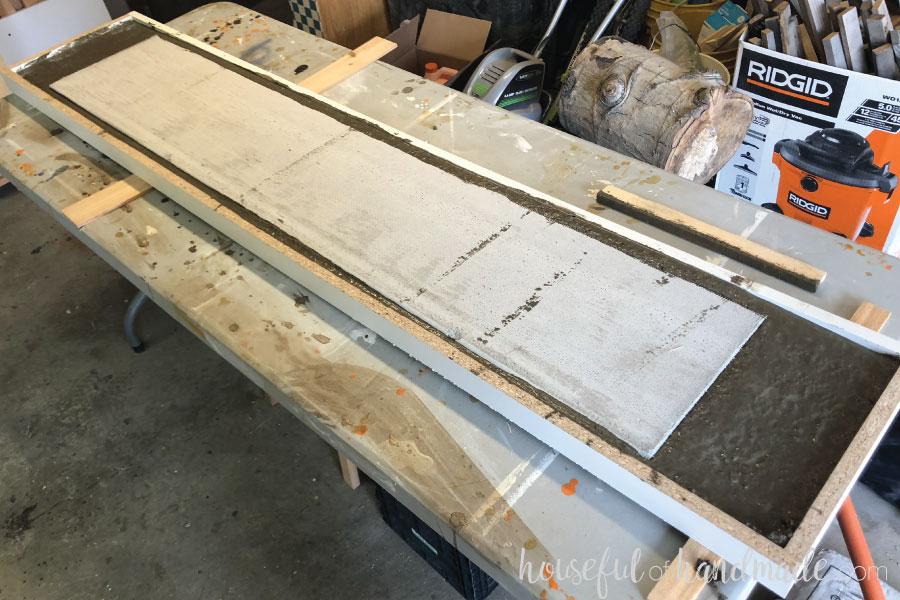
Build the concrete form
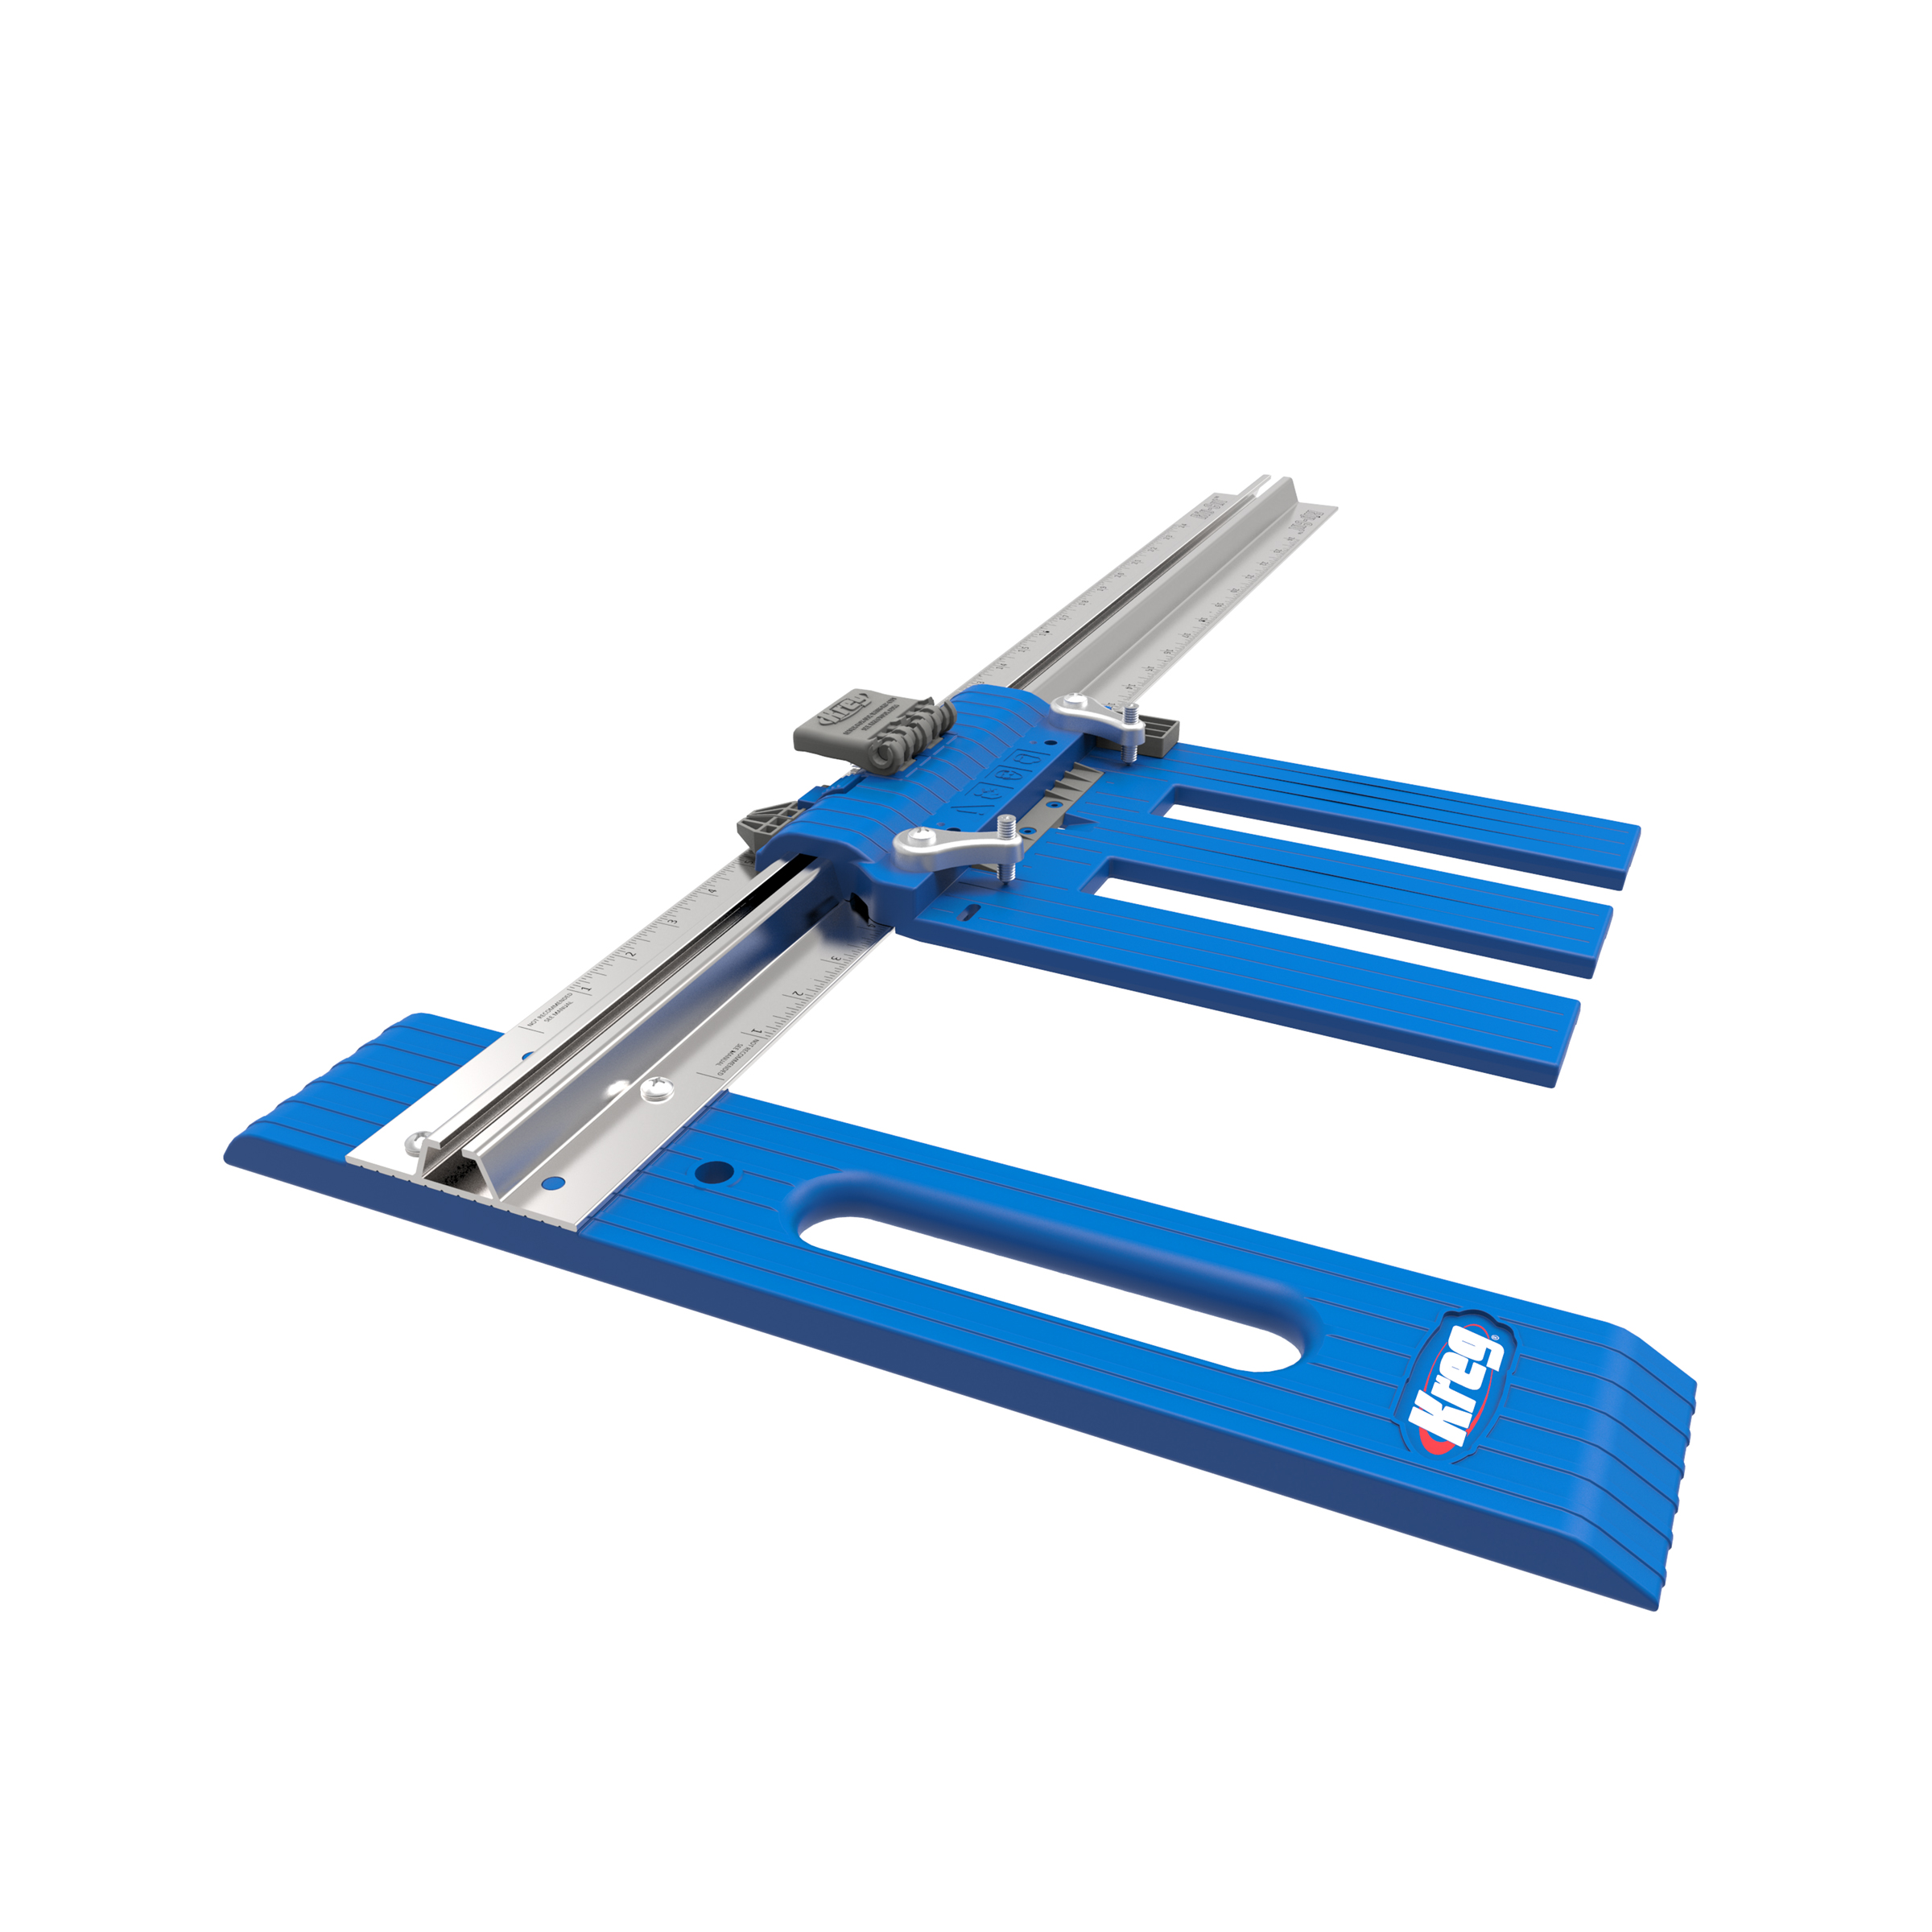
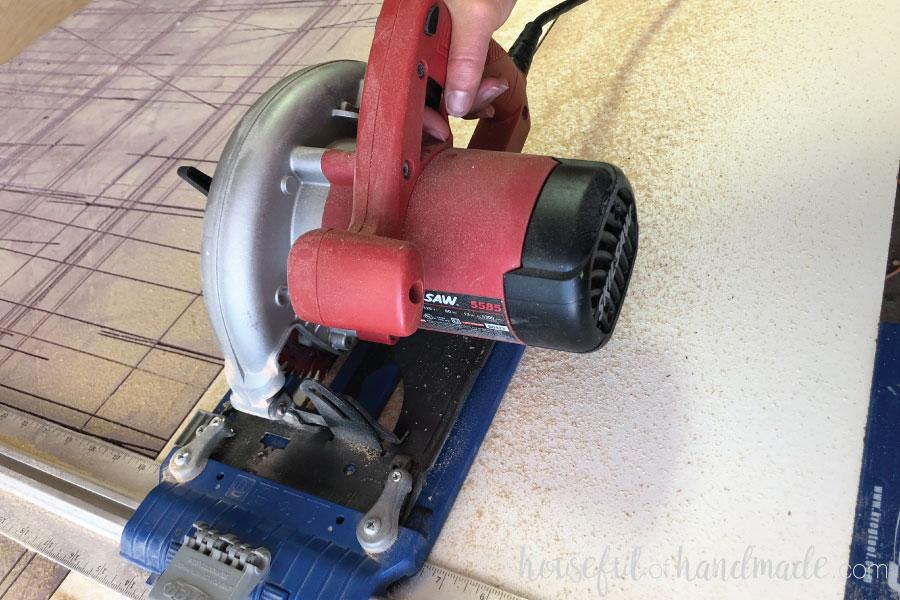
For the concrete top, you will need to build a form from the melamine covered shelves. Cut 1 piece at 12 1/2" x 72", 2 at 12 1/2" x 2" and 2 at 73 1/2" x 2". You can easily rip down the boards with the Kreg RipCut and a circular saw.
-
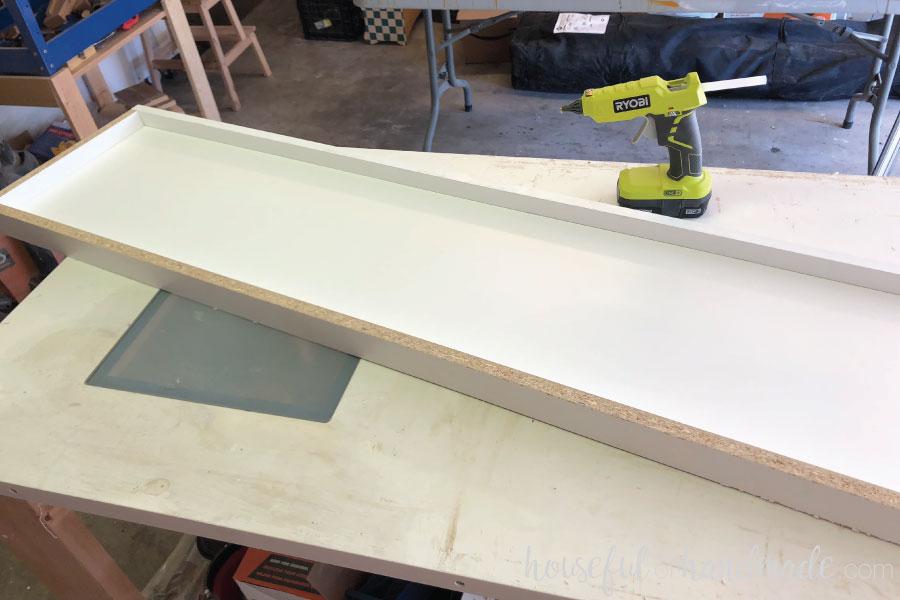
Assemble the concrete form
Attach the 2" boards around the larger board to create a trough. I used my hot glue gun to do this easily (and make it easier to remove the form later).
-
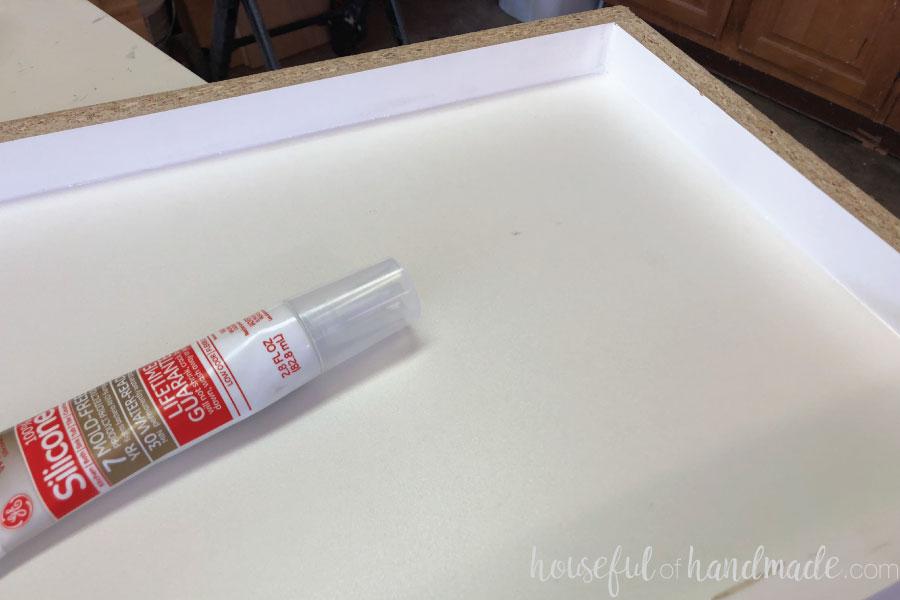
Caulk the form
Using silicone caulk, caulk all the corners of the concrete form to keep the concrete from leaking through. It will give your concrete top cleaner corners.
-
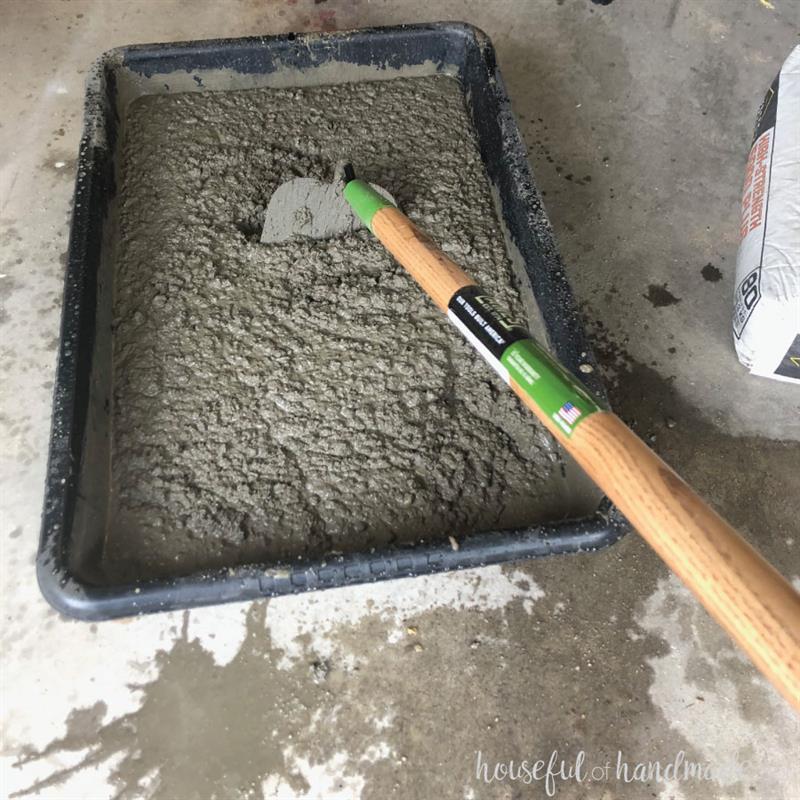
Mix the concrete
Mix the countertop concrete mix with water. Always add water to the mixing trough or bucket first, then pour the concrete mix into it. Stir it together with a hoe. Add more water or mix as needed until it is the consistency of natural peanut butter (slightly watery around the edges but scoopable). I mixed together 1 full 80lb bag of concrete and used almost all of it for the TV stand top.
-
Add the concrete to the form
Scoop the concrete into the form. Make sure to get it into all the edges and corners. To give my top a bit more structure, I decided to add a piece of cement board to the bottom (which is actually the top of the form). I do not know if it was necessary, but it made me feel better. I just cut a piece of cement board so it was slightly smaller than the form and placed it on top of the wet cement when the form was mostly full. Then I added the rest of the concrete around it.
-
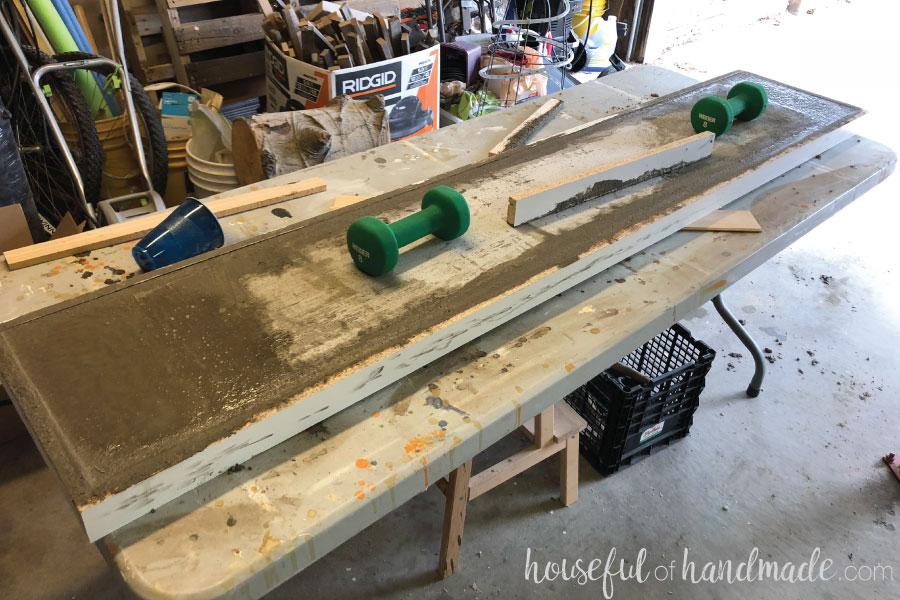
Level the concrete in the form
Using a scrap of the melamine covered board, slide it back and forth on the top of the concrete in the form to level out the surface. Then using a sander without sand-paper on it, vibrate the edges of the form to remove any air bubbles. Smooth the surface again if needed. I placed weights on top of the cement board to keep it flush with the top of the form while the concrete cured. Let the concrete cure for a couple days. Remove the melamine form by carefully pulling the pieces apart (which should be easy because it was held together with hot glue).
-
Add concrete top & install drawers
Carefully place the concrete top on top of the TV stand. It should be flush on the sides and front/back. Install the drawers with 10" ball bearing drawer slides that require 1/2" clearance on either side of the drawer.