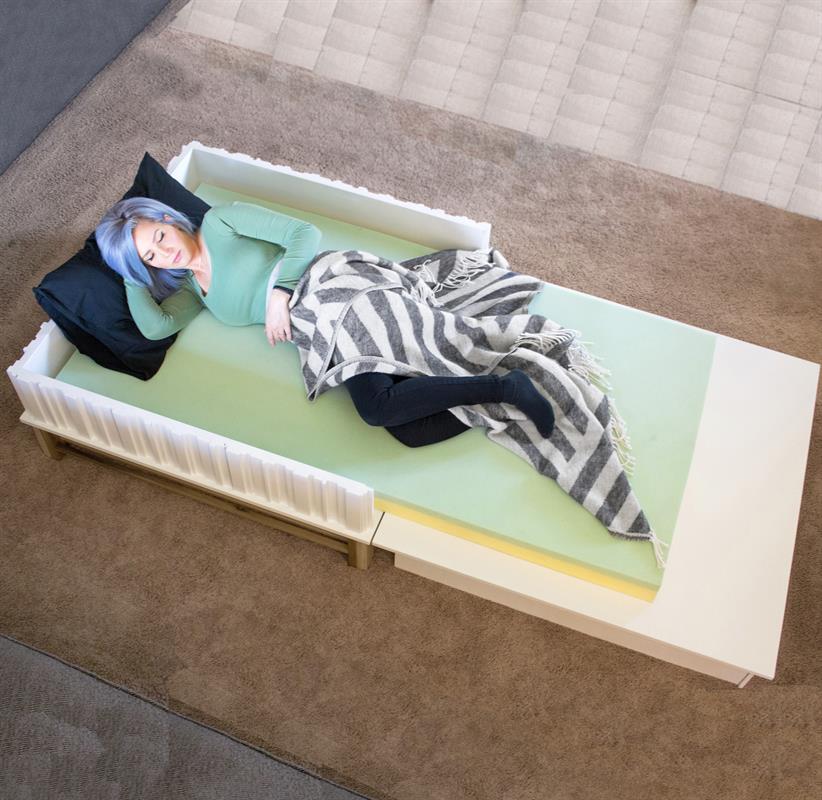
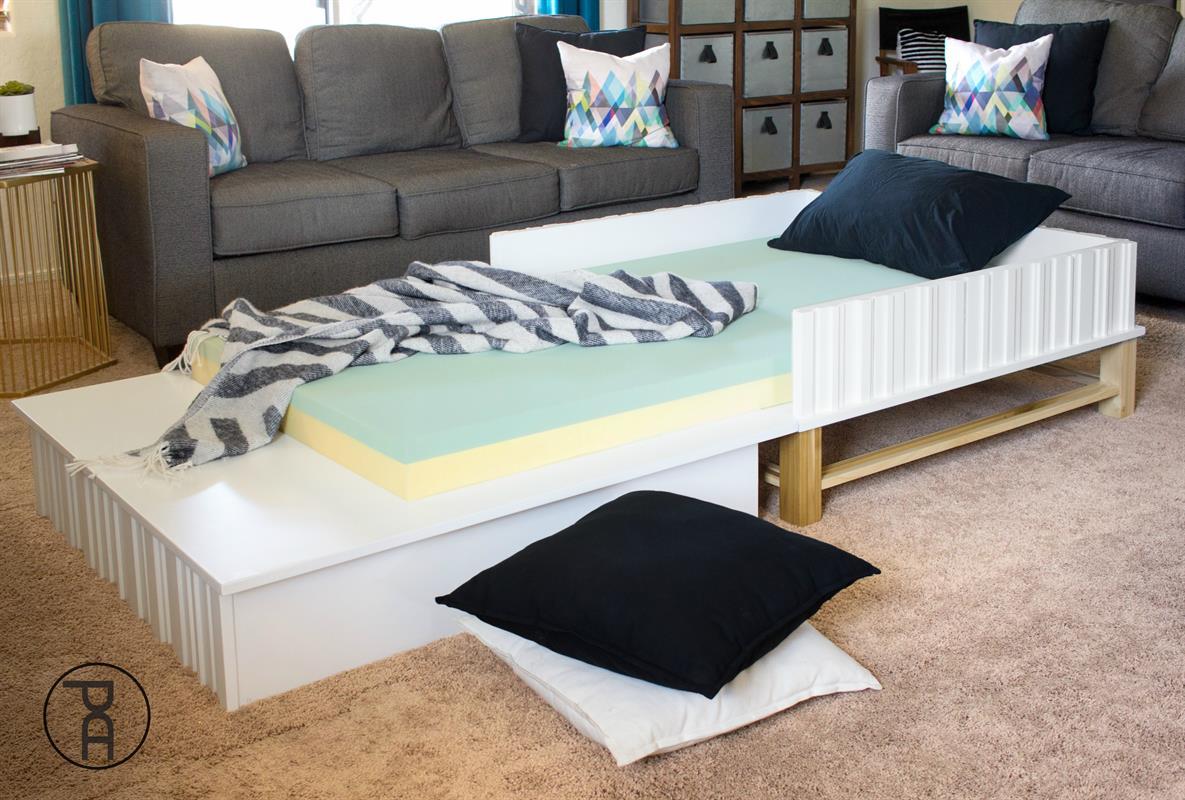


A coffee table which opens up to reveal and support a standard sized twin mattress! A twin-XL in fact! A great way to turn functional furniture into hidden storage space. A smart option for small spaces and overnight guests.
Tools
Kreg Tools


Other Tools
-
Circular Saw (cordless)

-
Miter Saw
-
Clamps
-
Drill (cordless)
-
Impact Driver
-
Nail Gun
-
Sander
-
Shop Vacuum
-
Workbench
Materials
Wood Products
- 2 MDF , 3/4" Thick , Full Sheet
- 1 MDF , 1/4" Thick , Quarter Sheet
- 1 MDF , 1/2" Thick , Quarter Sheet
- 1 Board , 1x3 , 96"
- 1 Board , 1x3 , 48"
- 8 Dowel , 3/4" square dowel , 48"
Hardware & Supplies
- 50 1/14" pocket hole screws
- 16 3", #8 wood screws
- 500 1", 23 gauge brads
Directions
-
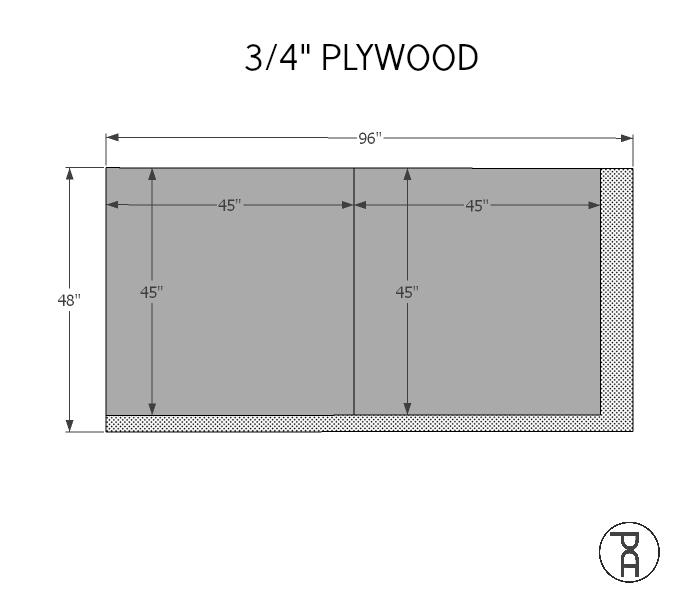
Cut Top and Bottom
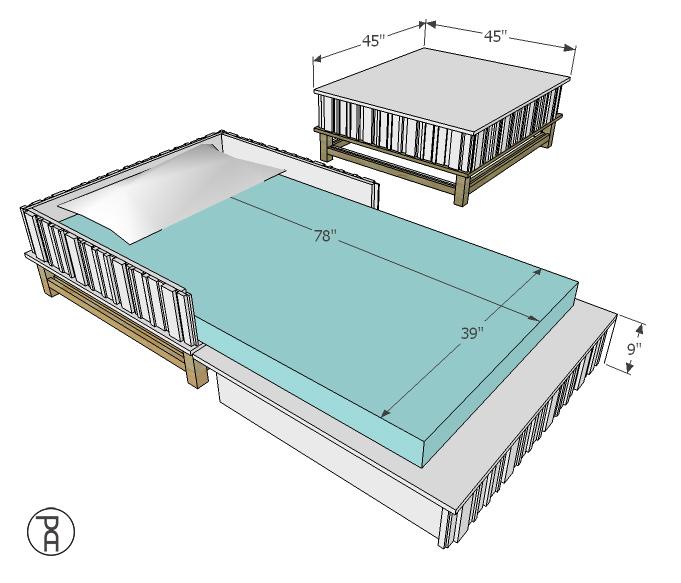
Cut two, 45" x 45" squares from 3/4" thick plywood or MDF
-
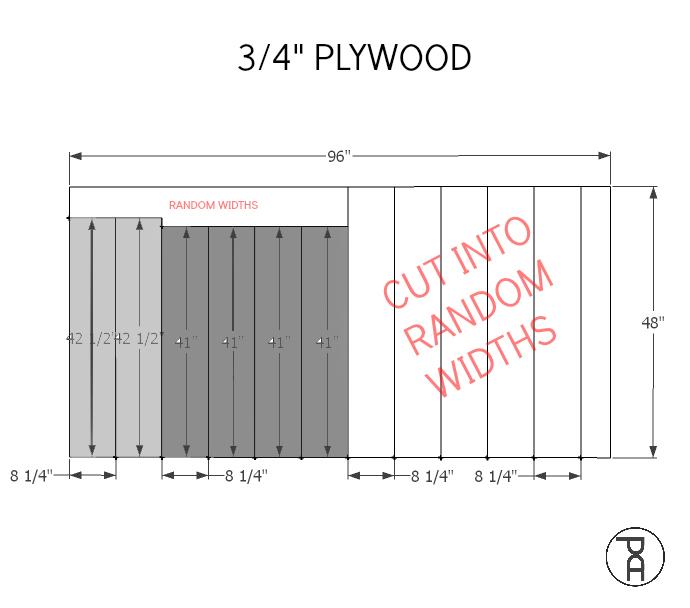
Cut Sides and Faces
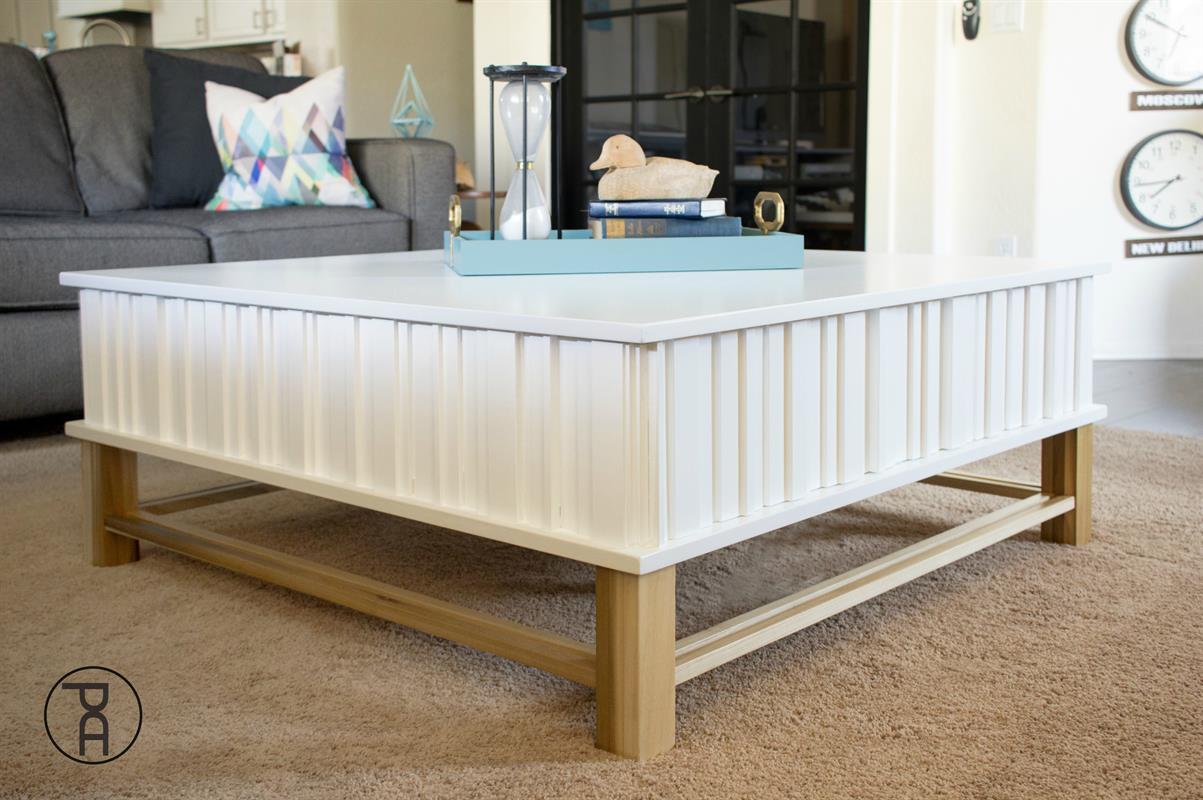
Cut two, 8-1/4" x 42-1/2" face panels and four, 8-1/4" x 41" sides panel from 3/4" thick plywood or MDF. Cut the remaining scrap into 8-1/4" lengths of material and various, random widths.
-
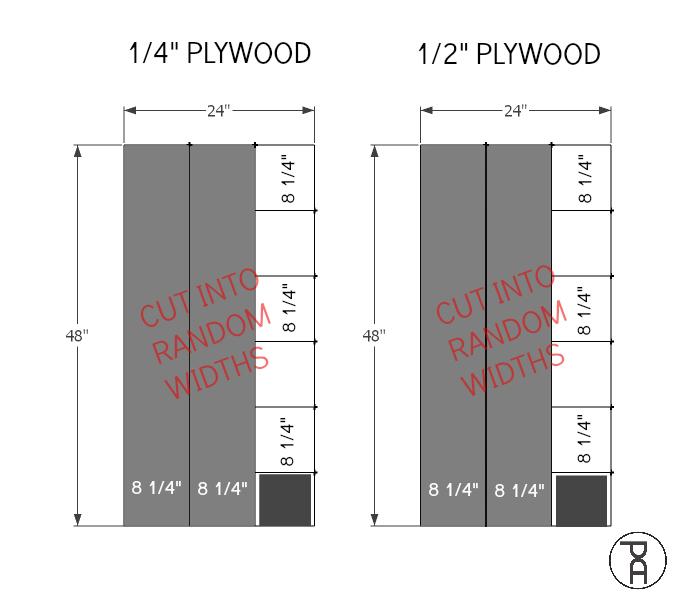
Cut Veneer Pieces
Cut an entire 2' x 4' x 1/4" plywood or MDF "hobby panel" AND an entire 2' x 4' x 1/2" plywood or MDF "hobby panel" into 8-1/4" lengths, at random widths.
-
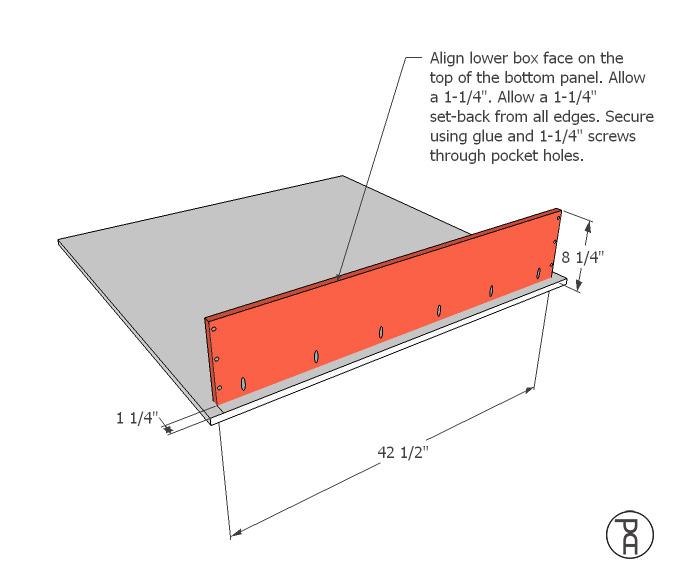
Lower Box Face
Align the lower box face on the top of the bottom panel. Allow a 1-1/4" set-back from all edges. Secure in place using glue and 1-1/4" screws through pocket holes.
-
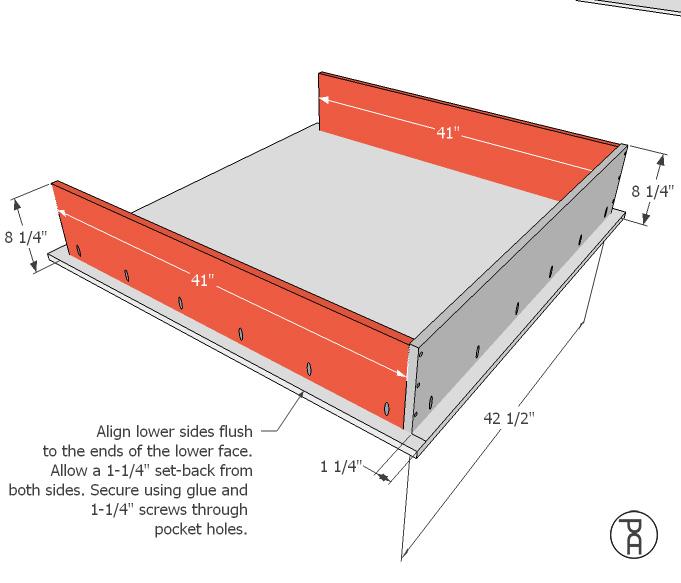
Lower Box Sides
Align the lower sides flush to the ends of the lower face. Allow a 1-1/4" set-back from both sides. Secure in place using glue and 1-1/4" screws through pocket holes.
-
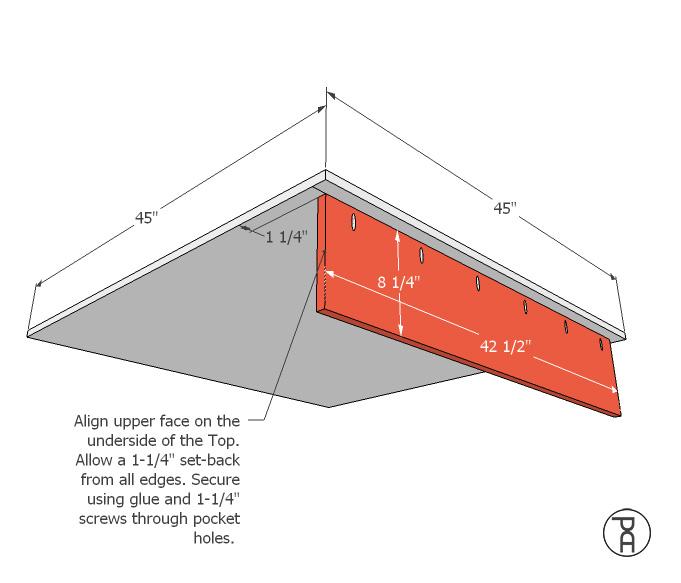
Upper Box Face
Align the upper face on the underside of the Top. Allow a 1-1/4" set-back from all edges. Secure in place using glue and 1-1/4" screws through pocket holes.
-
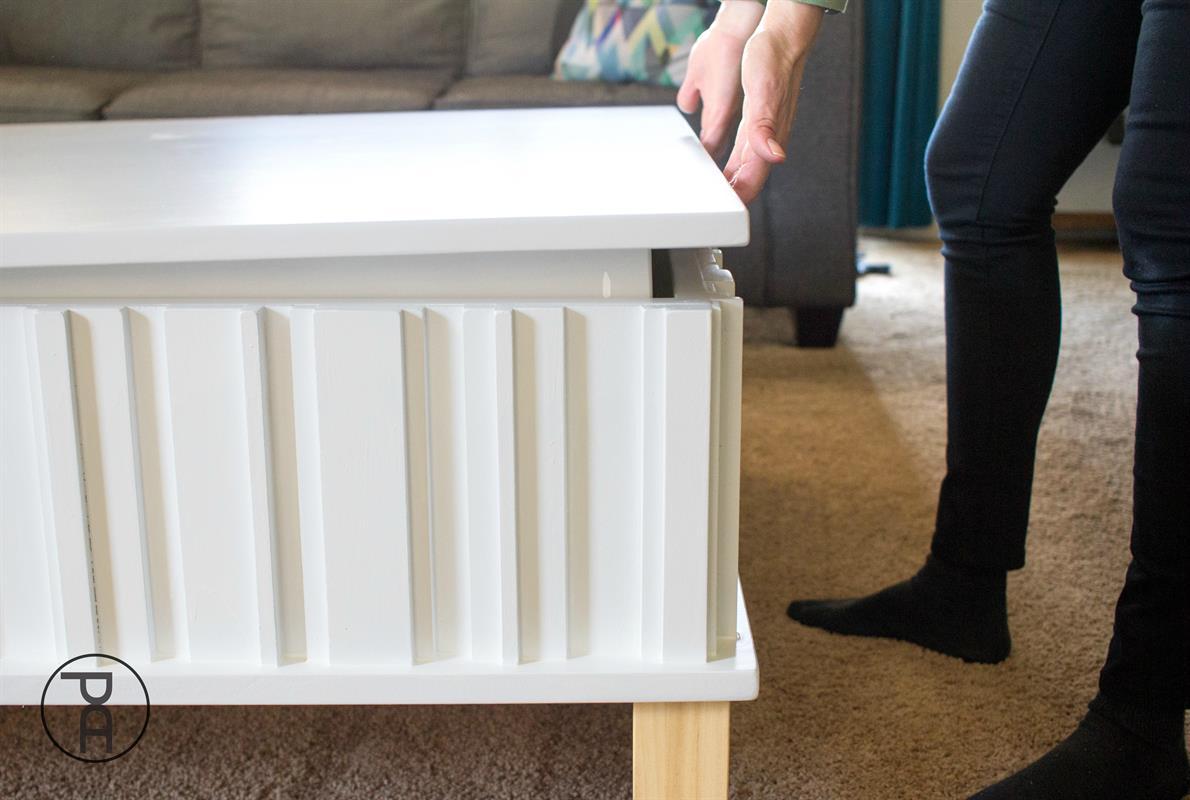
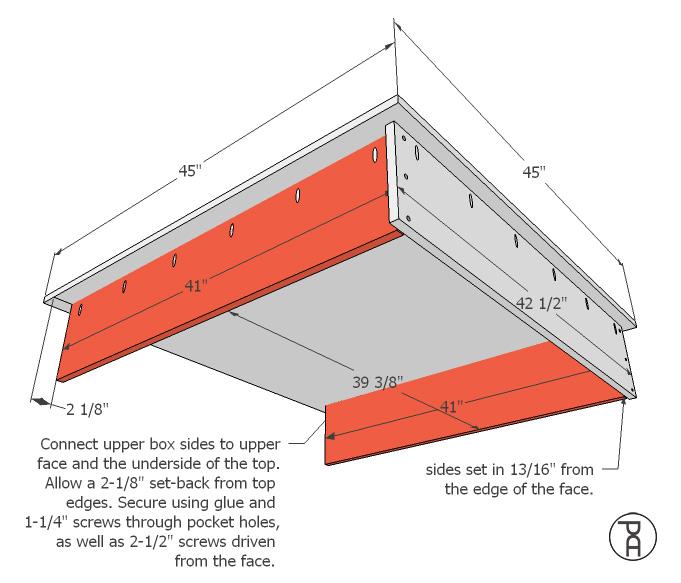
Upper Box Sides
Connect the upper box sides to upper face and the underside of the top. Allow a 2-1/8" set-back from top edges. Secure in place using glue and 1-1/4" screws through pocket holes, as well as 2-1/2" screws driven from the face. The sides will be set in 13/16" from the ends of the face board.
-
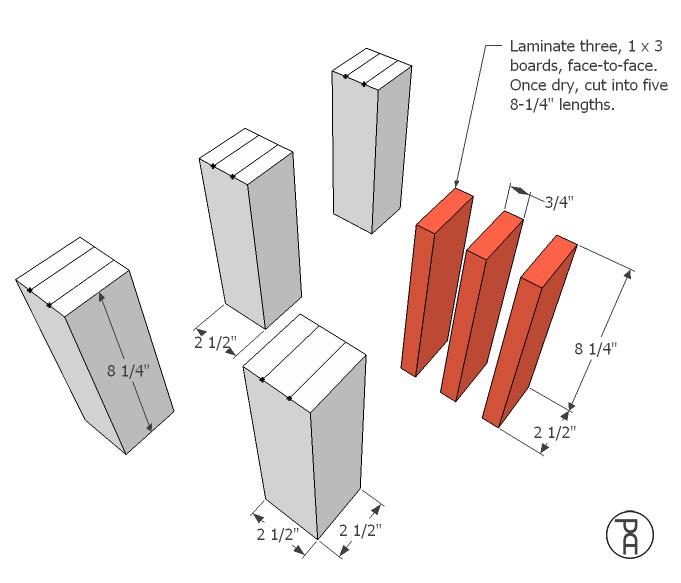
Build Legs
Laminate (glue together) three, 1 x 3 boards, face-to-face. Once dry, cut into five, 8-1/4" lengths. It is much easier to glue and clamp full-length boards together and allow to dry before cutting into shorter lengths.
-
Connect Legs
Drill 3/4" pocket holes on the underside of 8, 3/4" x 3/4 x 39" dowels. Connect pairs of legs together, using the dowels as double, side-by-side stretchers. Create a 1/2" space between stretchers. Align the bottom face of stretchers 3" from the bottom of each leg. Secure in place using glue and 1-1/4" screws.

-
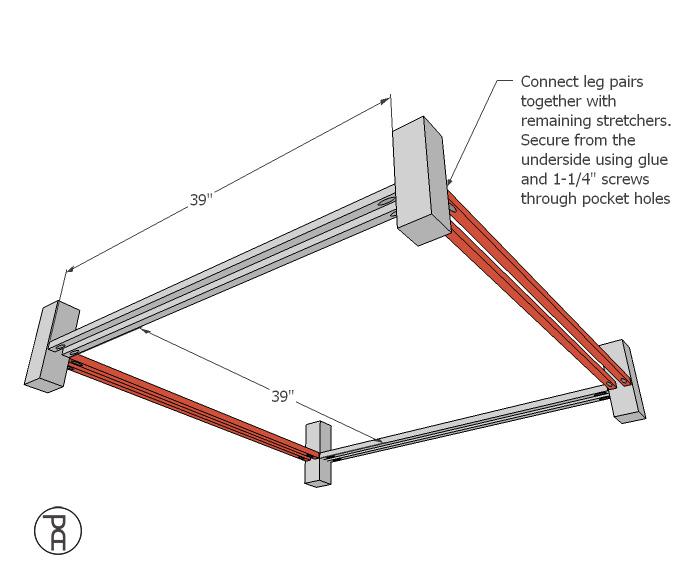
Stretchers
Connect leg pairs together with remaining stretchers. Secure in place from the underside using glue and 1-1/4" screws through 3/4" pocket holes
-
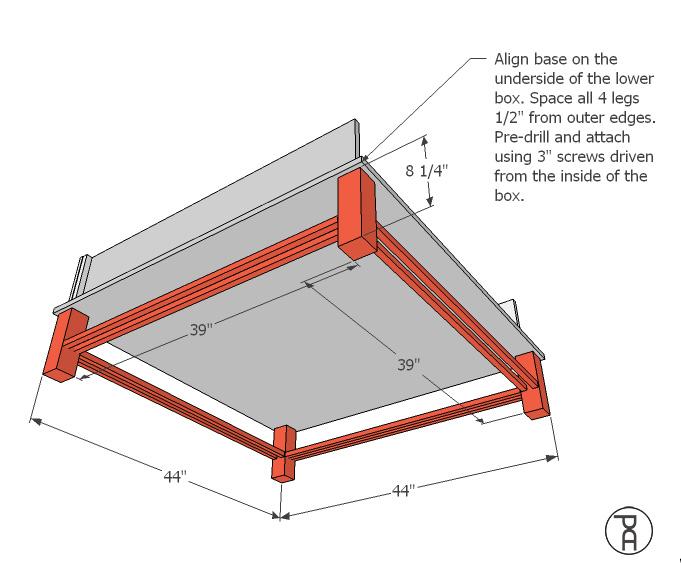
Attach Base
Align the table base (legs and stretchers) on the underside of the lower box. Space all 4 legs 1/2" from outer edges. Pre-drill into the top of the legs and attach using 3" screws driven from the inside of the box.
-
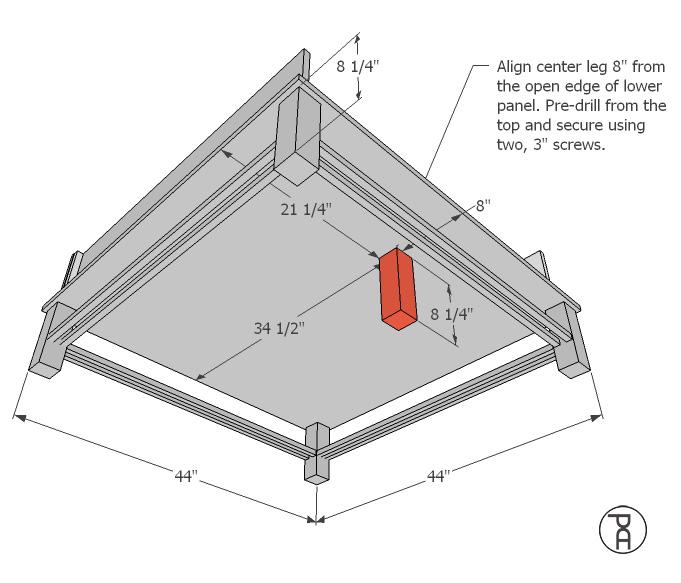
Center Leg
Align the center leg 8" from the open side of the lower box panel. Pre-drill into the top of the leg and secure using two, 3" screws.
-
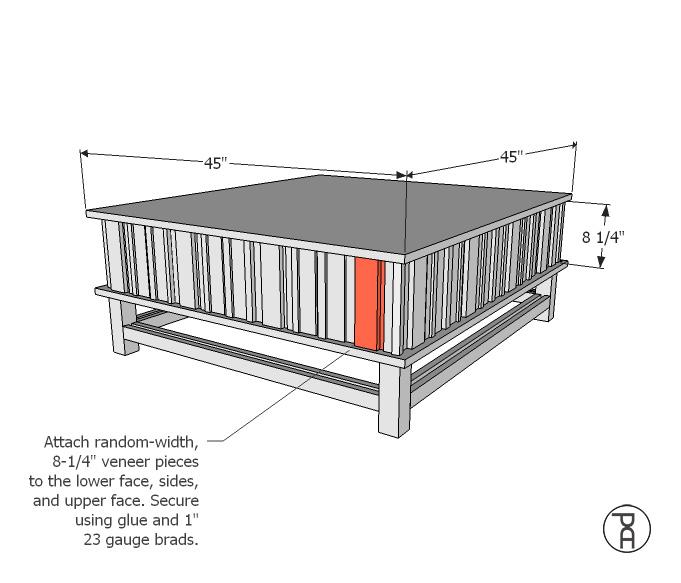
Add Veneer Pieces
Place the upper portion of the box on top of the lower box. Attach random-width, 8-1/4" long veneer pieces to the lower face, sides, and upper face. Alternate the pattern of widths and thicknesses to create a random look. Secure in place using glue and 1", 23 gauge brads.
-
Finish and Add Mattress
Sand the entire surface with 220-grit sand paper. Remove dust and paint or finish however you'd like. I recommend using an all-foam mattress. The inside of the box will accommodate a twin-XL mattress, folded in half.
-
More Tips and Ideas
Head to PneumaticAddict.com or YouTube.com/pneumaticaddict for more plans, tips and DIY tricks.