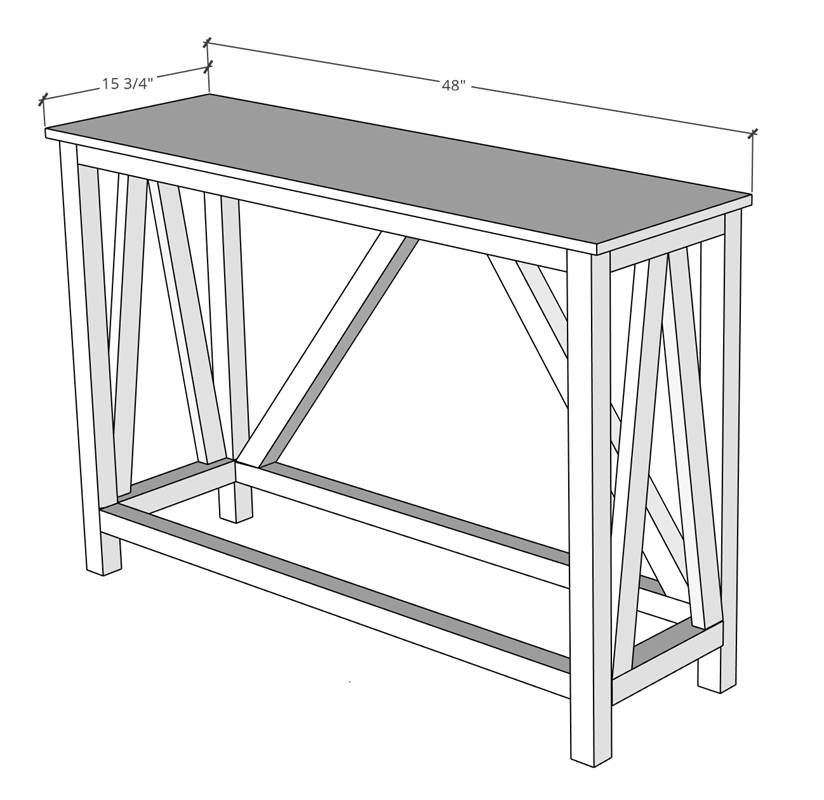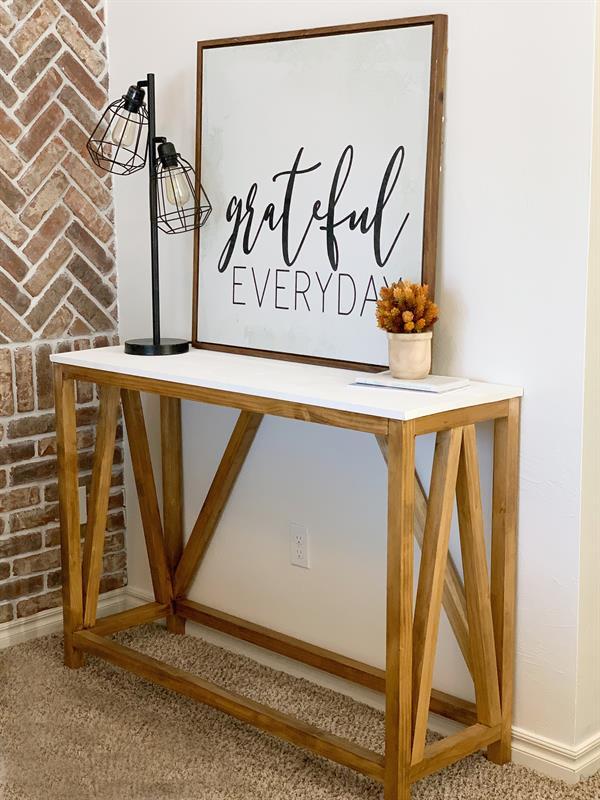
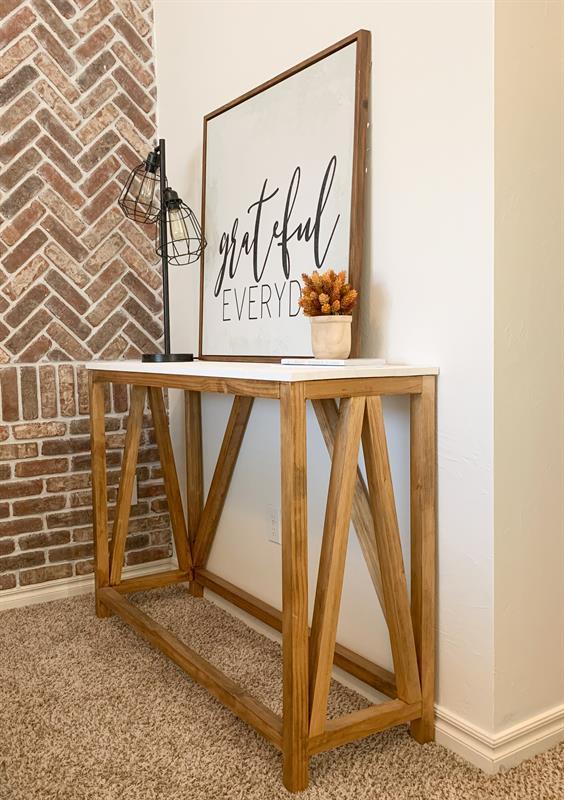


Need a fun stylish storage console for the entryway? Check out this fun build.


Materials
Wood Products
- 7 Board , 2x2 , 72"
- 1 Board , Project Panel , 15.75" x 48"
Hardware & Supplies
- 1 Pack of 50 - 2 1/2" Pocket Hole Screws
Directions
-
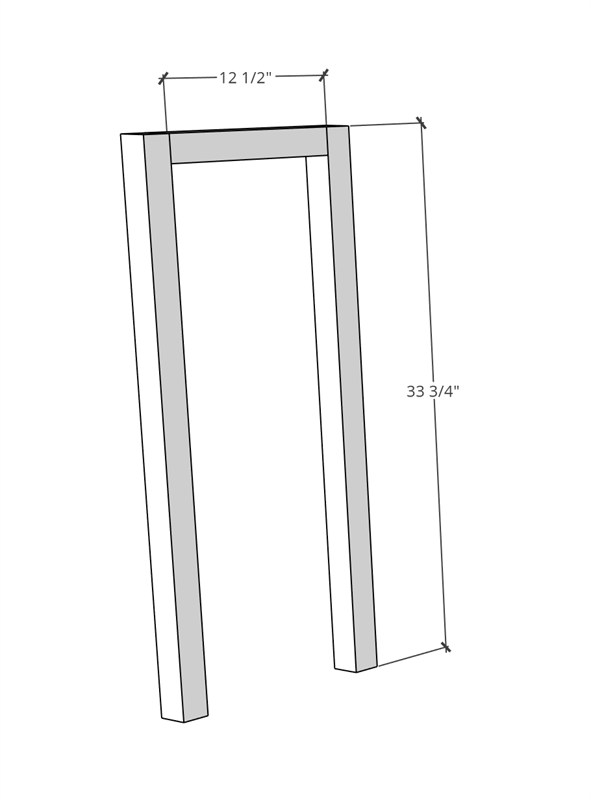
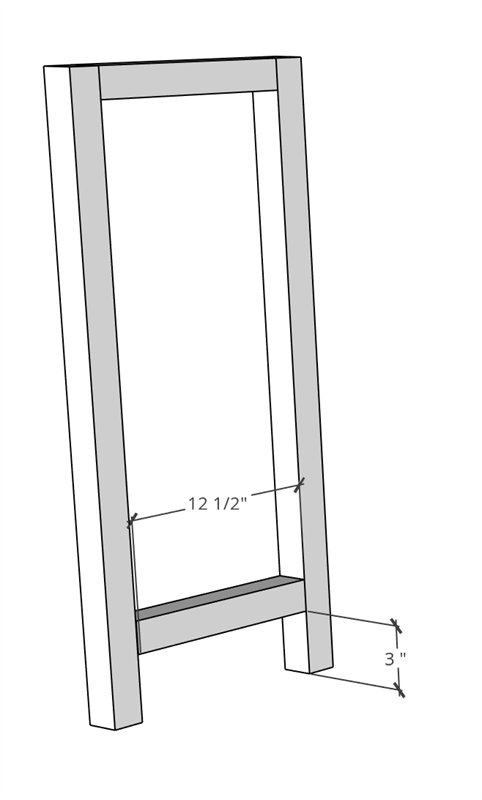
Start Building Console Legs
Attach the 2x2 support (12 1/2") to the 2x2s (33 3/4") using a Kreg Jig K4 Pocket Hole System on a 1 1/2" setting, with 2 1/2" Pocket Hole Screws to attach along with Wood Glue.
Note: The pocket holes on the bottom support should face up on the top support.
-
Build Console Leg
Attach the bottom 2x2 support (12 1/2") to the 2x2s (33 3/4") using a Kreg Jig K4 Pocket Hole System on a 1 1/2" setting, with 2 1/2" Pocket Hole Screws to attach along with Wood Glue.
Note: The pocket holes on the supports should face down on the bottom support.
-
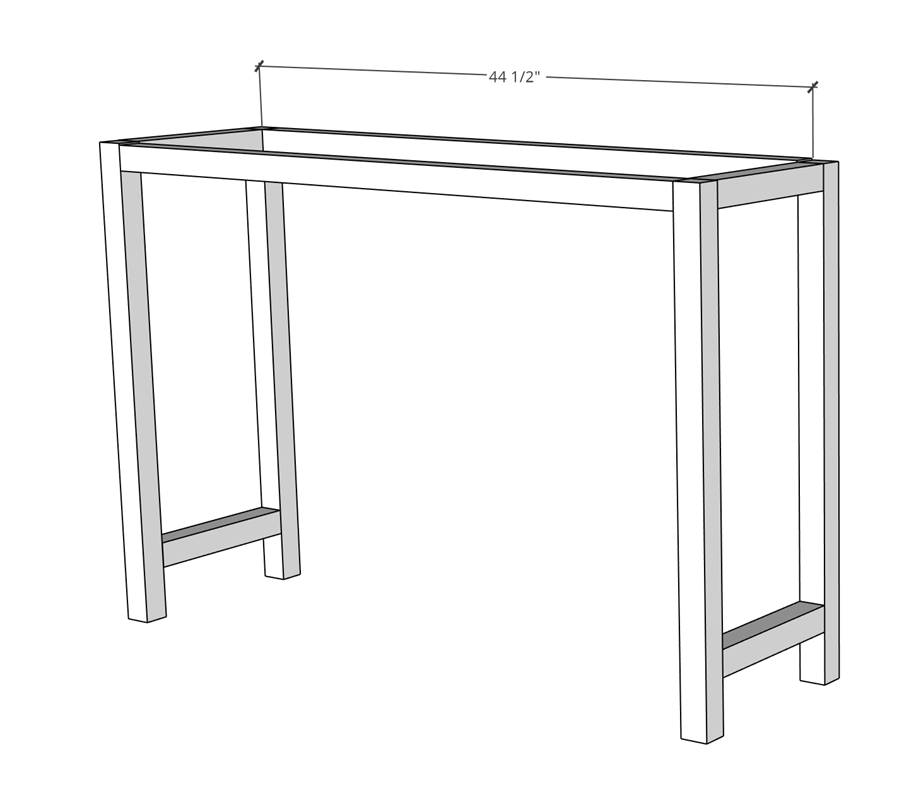
Attach Top Console Legs
Attach the 2x2 (44 1/2") supports to the console legs using a Kreg Jig K4 Pocket Hole System on a 1 1/2" setting, with 2 1/2" Pocket Hole Screws to attach along with Wood Glue.
Note: The pocket holes on the supports should face up on the support.
-
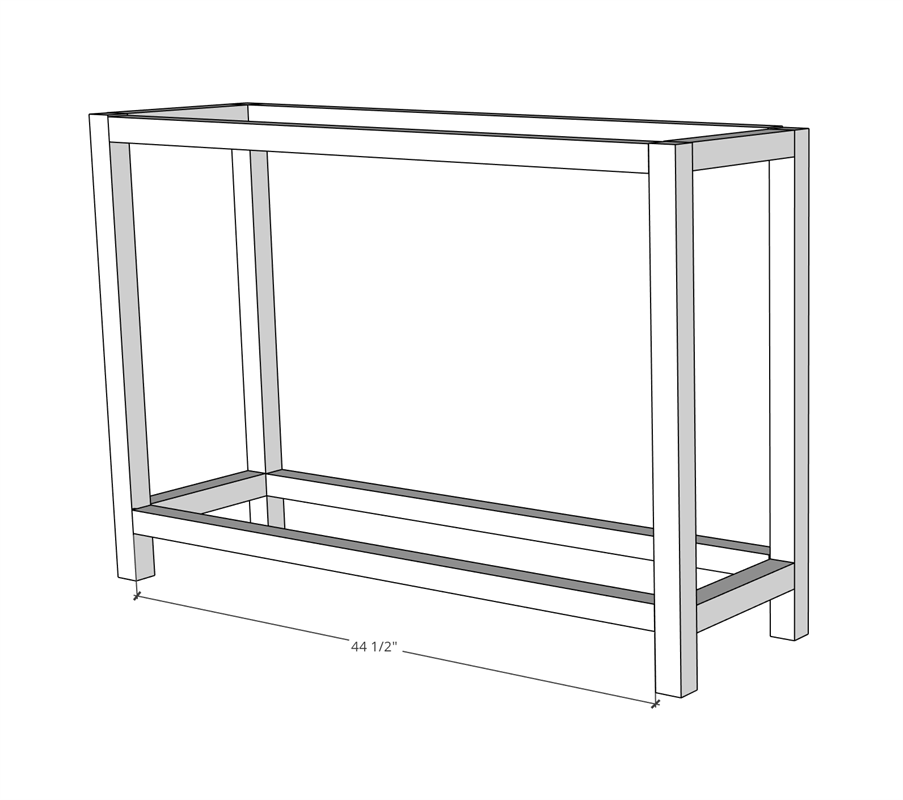
Attach Bottom Console Legs
Attach the bottom 2x2 (44 1/2") supports to the console legs using a Kreg Jig K4 Pocket Hole System on a 1 1/2" setting, with 2 1/2" Pocket Hole Screws to attach along with Wood Glue.
Note: The pocket holes on the supports should face down on the support.
-
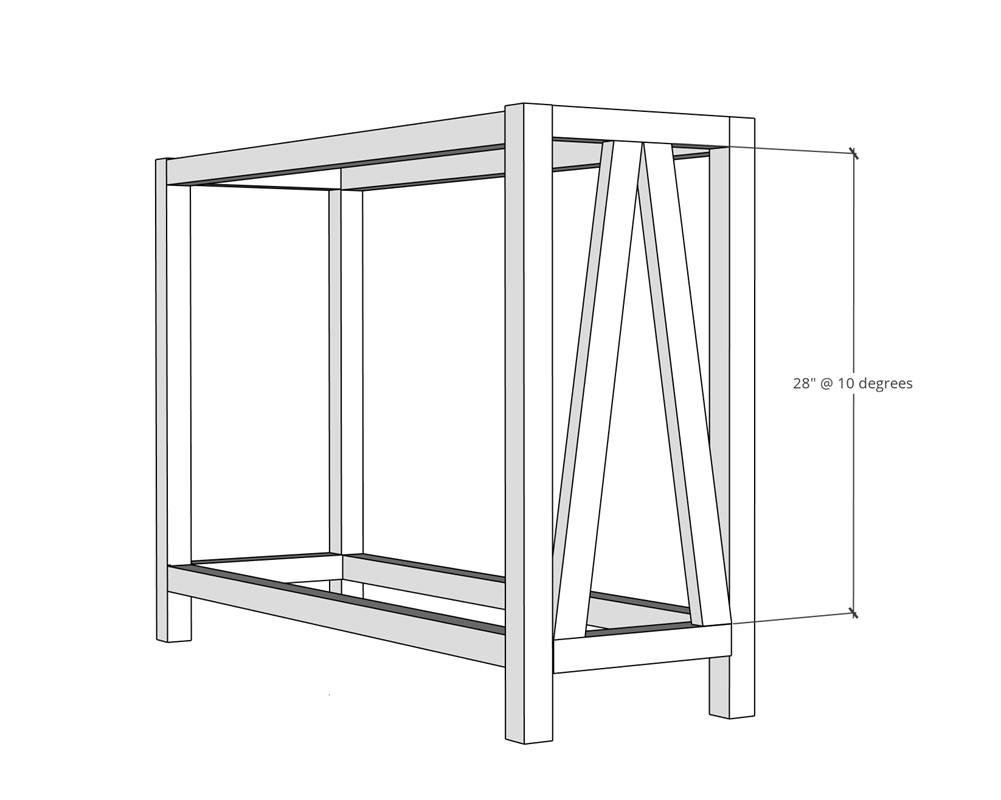
Add Side Supports
Attach the four 2x2 (28") supports to the console legs using a brad nailer and 2" brad nails.
Two 2x2s should be placed on both sides.
-
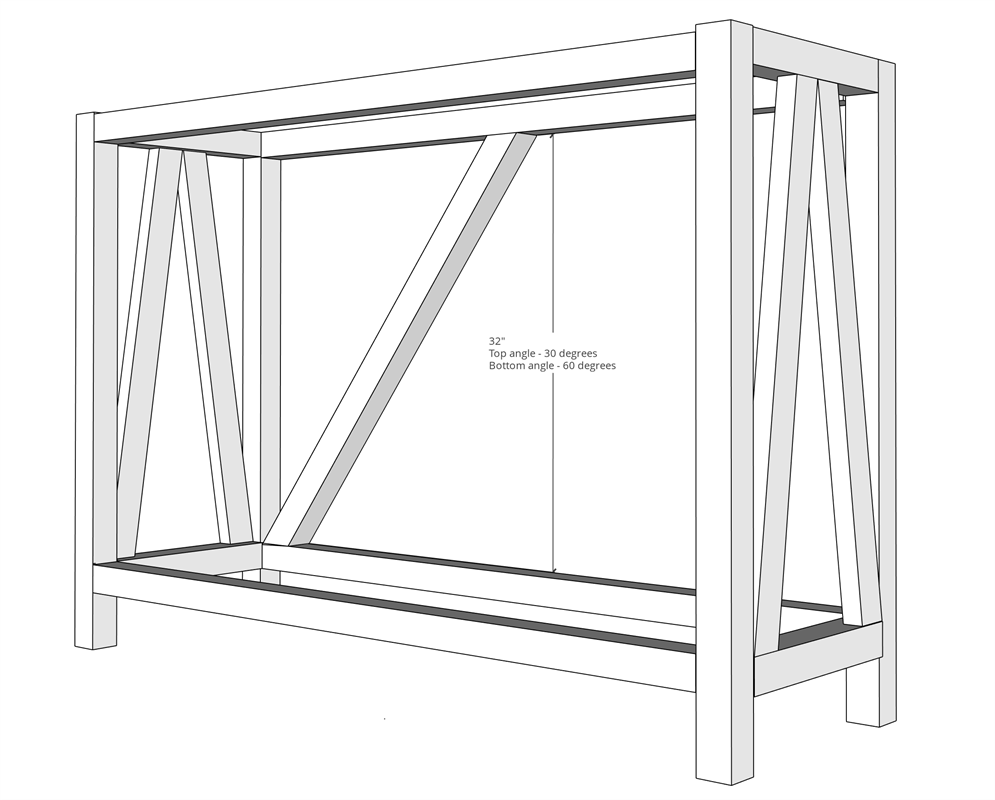
Attach Back Supports
Attach the two 2x2 (32") with a brad nailer and 2" brad nails. The top 2x2 should be cut at 30 degrees and bottom angle should be cut at 60 degrees.
-
Attach Console Top
Attach the project panel top to the completed console bottom using 2" brad nails.