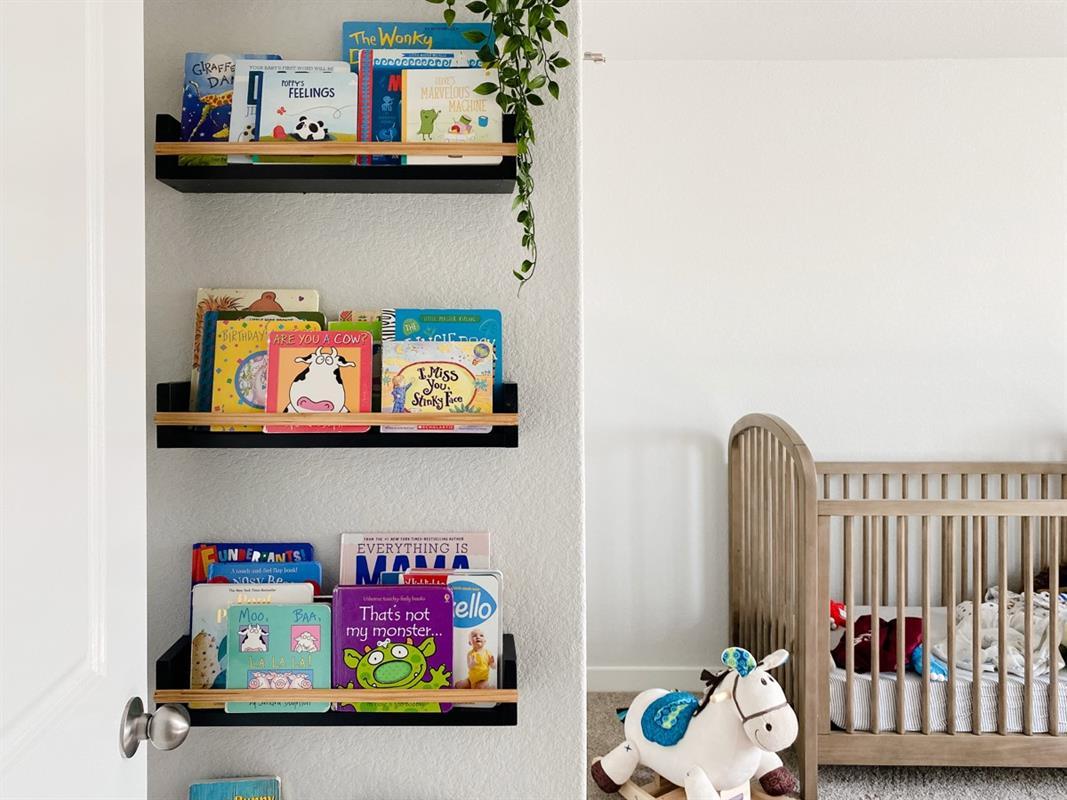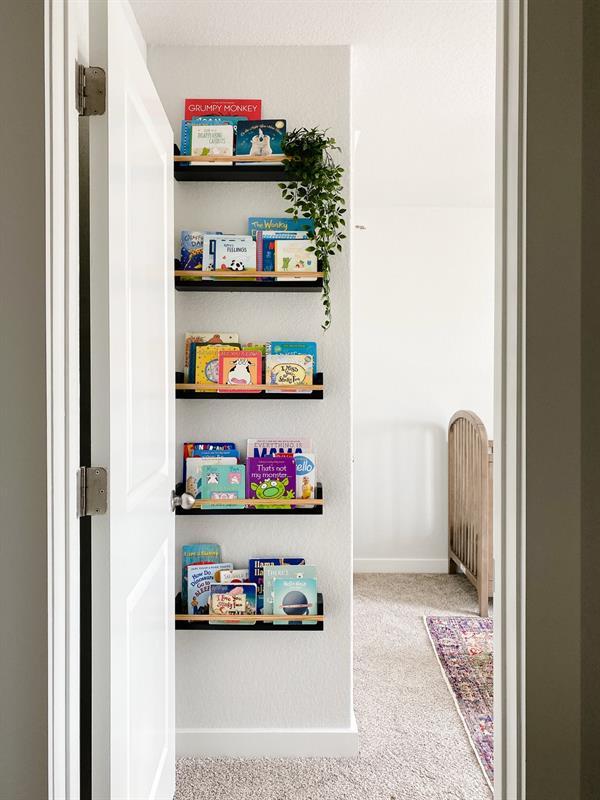
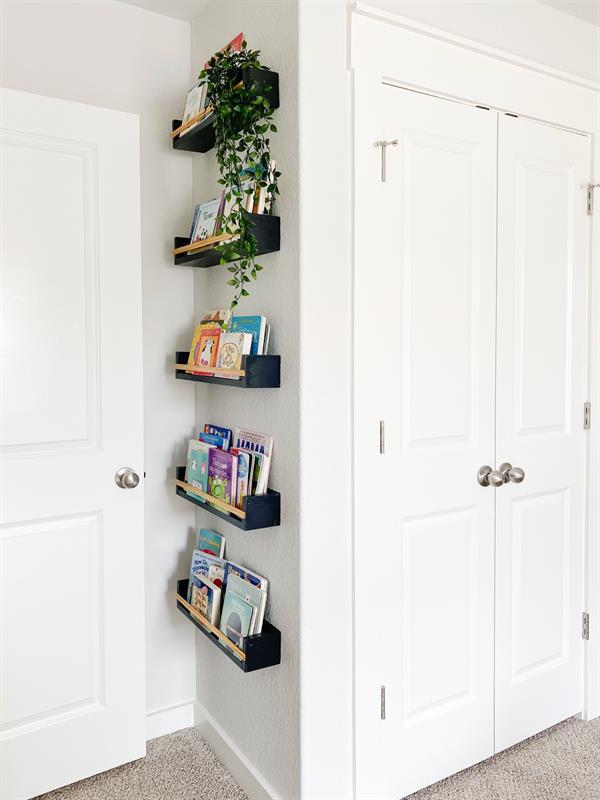


Quick and simple book ledges that will hold small board books, toys, or picture frames.
Tools
Kreg Tools

Other Tools
-
Miter Saw

-
Tape Measure
-
Nail Gun
-
Sander
Materials
Wood Products
- 1 Board , 1x4 , 96"
- 1 Board , Trim , 96"
- 4 Pocket Hole Plugs , 3/8" , 1"
Hardware & Supplies
- 8 Pocket hole screws
Cut List & Parts
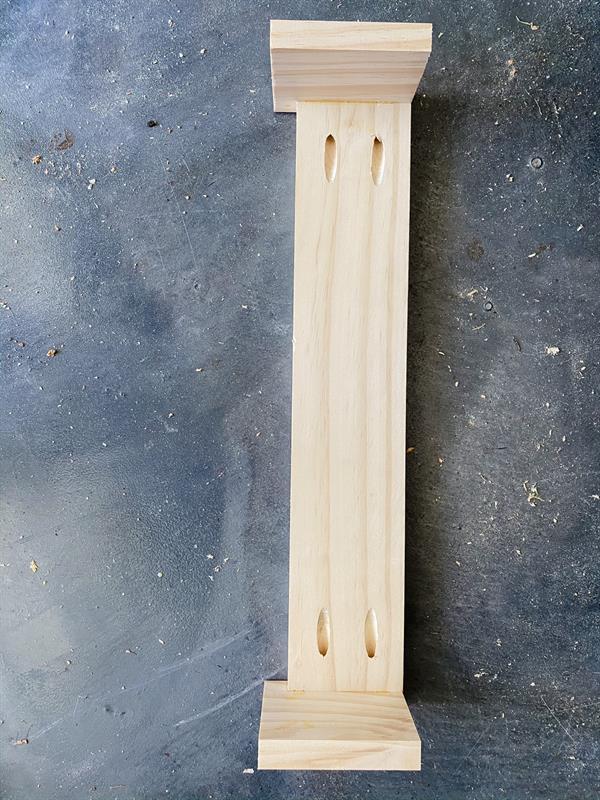
- 2 Bottom & back , 18"
- 2 Side pieces , 4.25"
- 1 Front trim piece , 19.5"

Directions
-
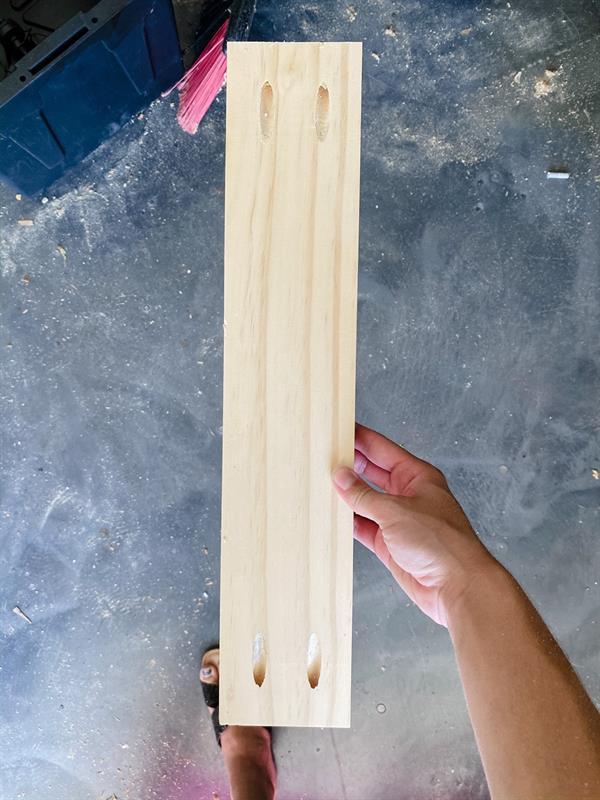
Drill Pocket Holes
Drill four pocket holes (2 on each of the short sides) in both of the 18" boards. These will be the bottom and back pieces.
-
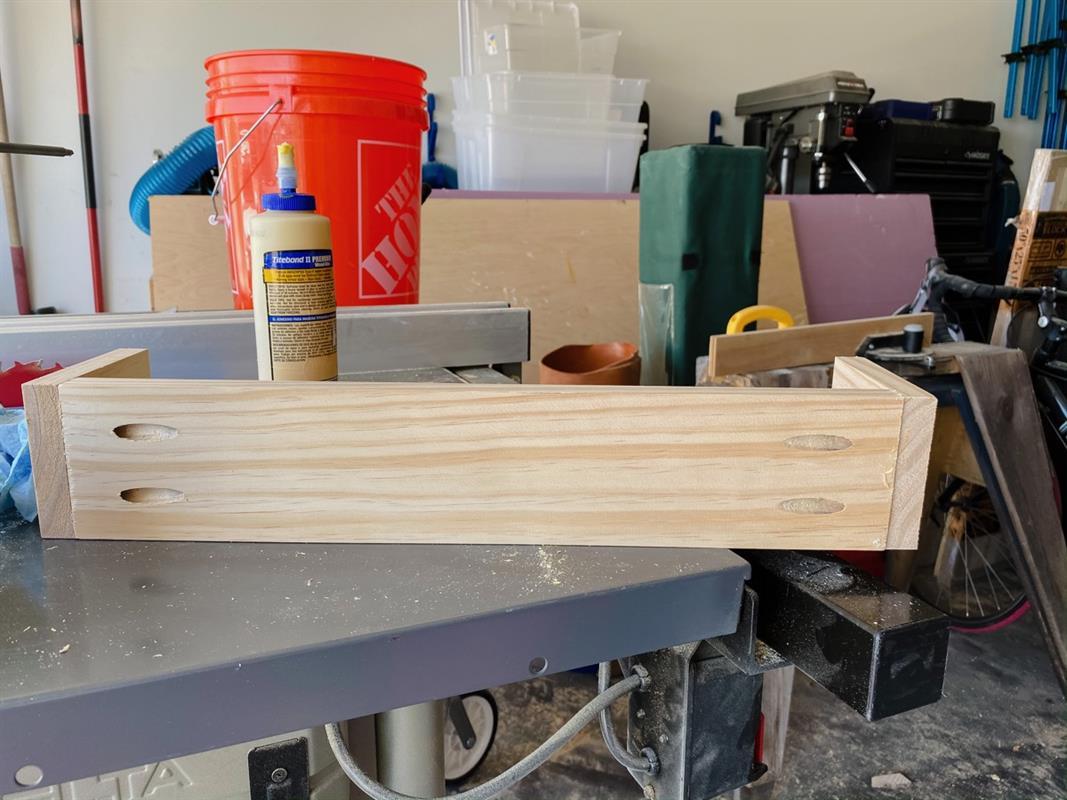
Attach Side Pieces
Add wood glue to each of the side pieces and attach them to the bottom piece. The pocket holes should face the top of the shelf, and there should be an overhang on the back of the side pieces for the back piece to slide into.
-
Attach Back Piece
Add wood glue to the back piece and slide in in-between the two side pieces. Make sure the pocket holes are facing the back of the shelf. Attach using pocket hole screws.
-
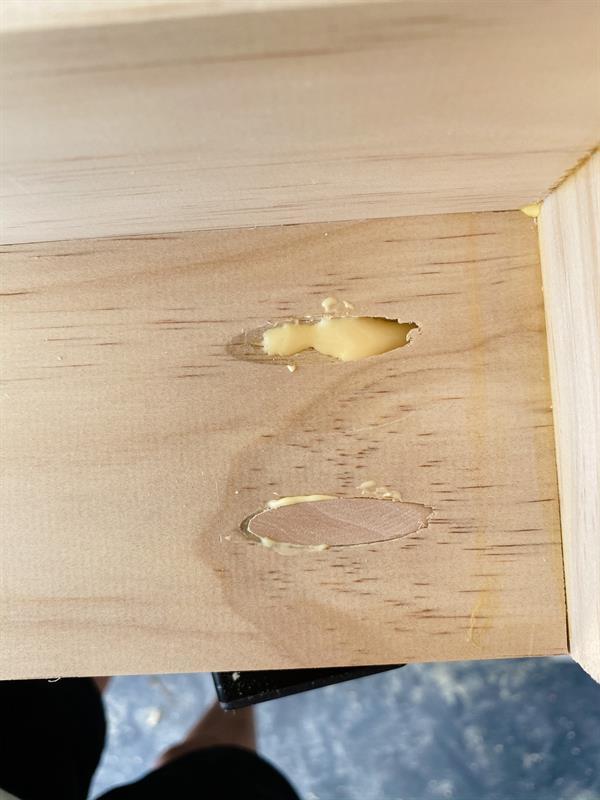
Add Pocket Hole Plugs
Add wood glue to the pocket holes in the bottom of the shelf and slide in plugs to hide the holes.
-
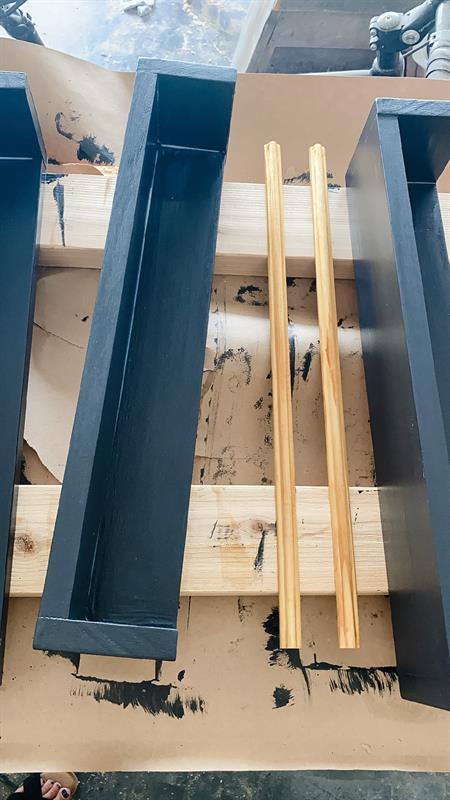
Sand & Paint
Fully sand the shelf, then paint in your desired color and seal. Stain the trim pieces for the front of the shelf.
-
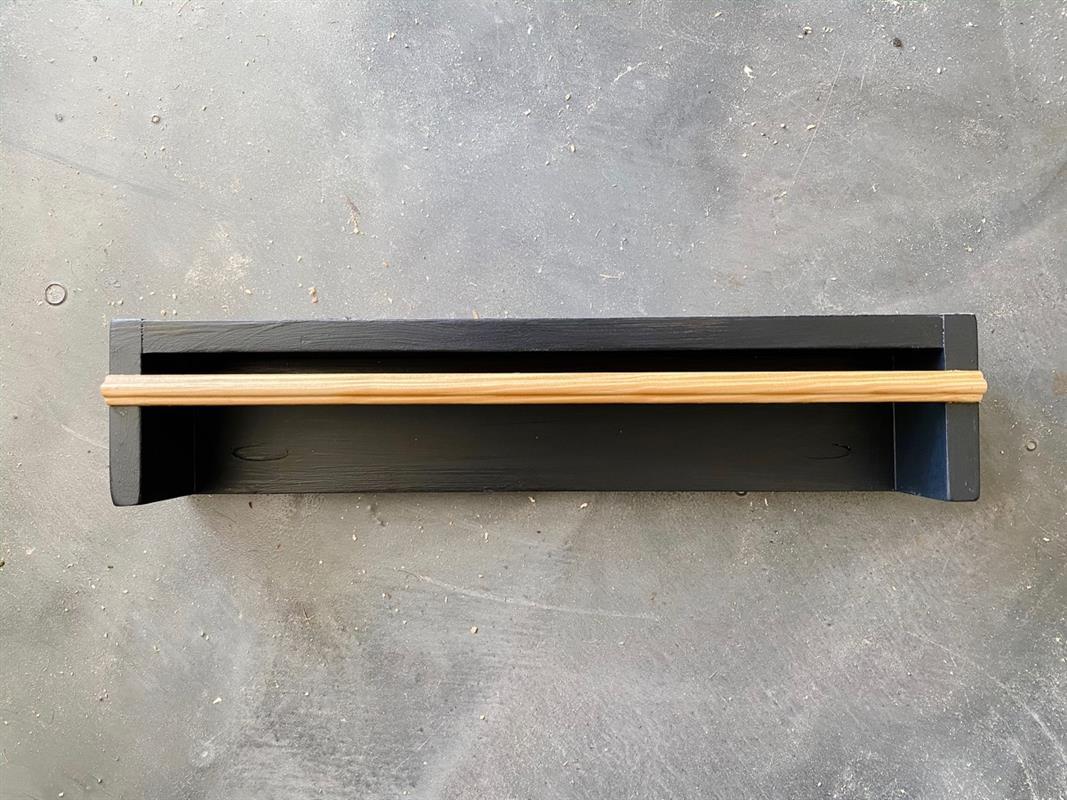
Add Trim
Use wood glue and finish nails to attach the trim piece to the front. It should be attached somewhere in the range of 1.25"-2" from the bottom of the shelf.
-
Hang Shelves
Pre-drill holes in the back of the shelves that align to studs on the wall, then drill the shelves into the wall to hang.