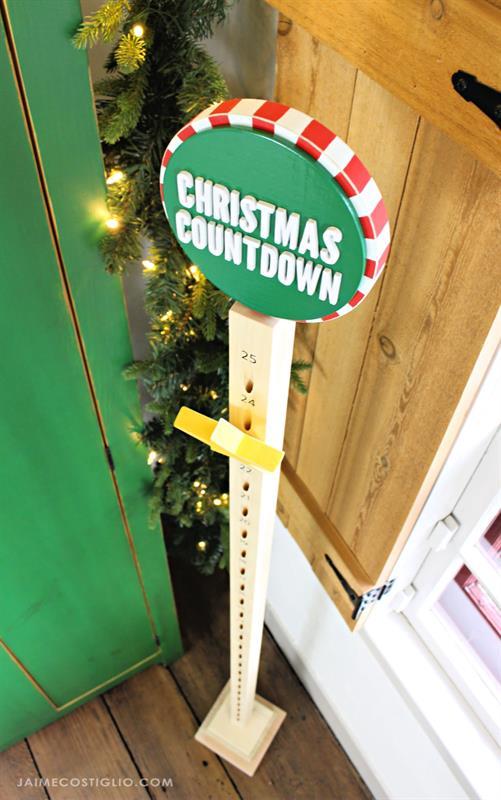
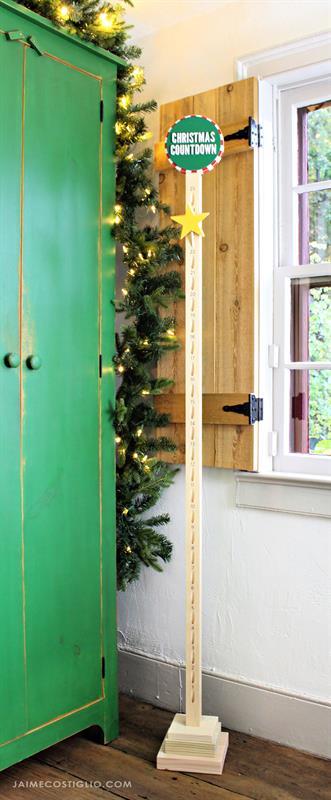
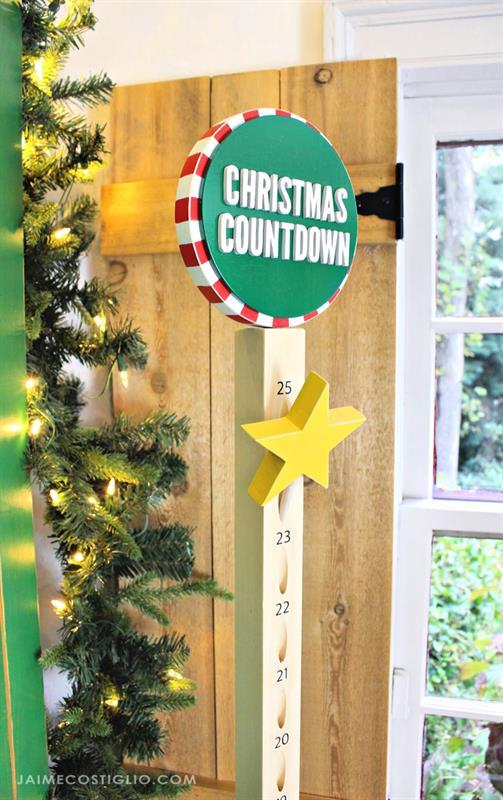


Make this fun Christmas decor using your Kreg pocket hole jig. The pocket holes make a perfect spot for a dowel with a holiday shape on the end to move along as we count down to the big day. Designed with a solid base and optional spot for a sign this advent calendar is fun for the whole family.
Tools
Kreg Tools


Other Tools
-
Jigsaw

-
Miter Saw
-
Scroll Saw
-
Tape Measure
-
Impact Driver
-
Sander
-
Tape Measure
Materials
Wood Products
- 1 Board , 2x2 , 72"
- 1 Board , 1x5 , 4 1/2" scrap
- 1 Board , 2x6 , 5 1/2" scrap
- 1 Board , 2x8 , 7 1/4" scrap
- 1 Board , 1x8 , 6 1/4" circle
- 1 Plywood , 1/4" Thick , 5 3/4" circle
- 1 Board , 1x6 , 4" star
Hardware & Supplies
- 6 2 1/2" spax wood screws
- 4 1 1/4" spax wood screws
Directions
-
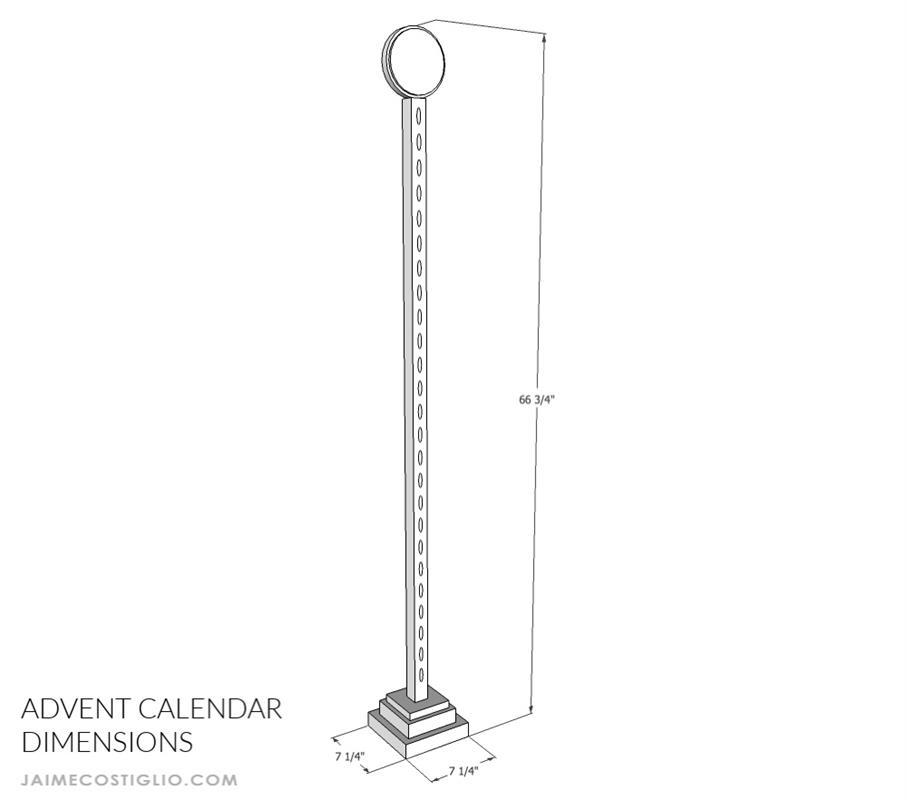
Dimensions
Overall dimensions 66 3/4h x 7 1/4" x 7 1/4"
-
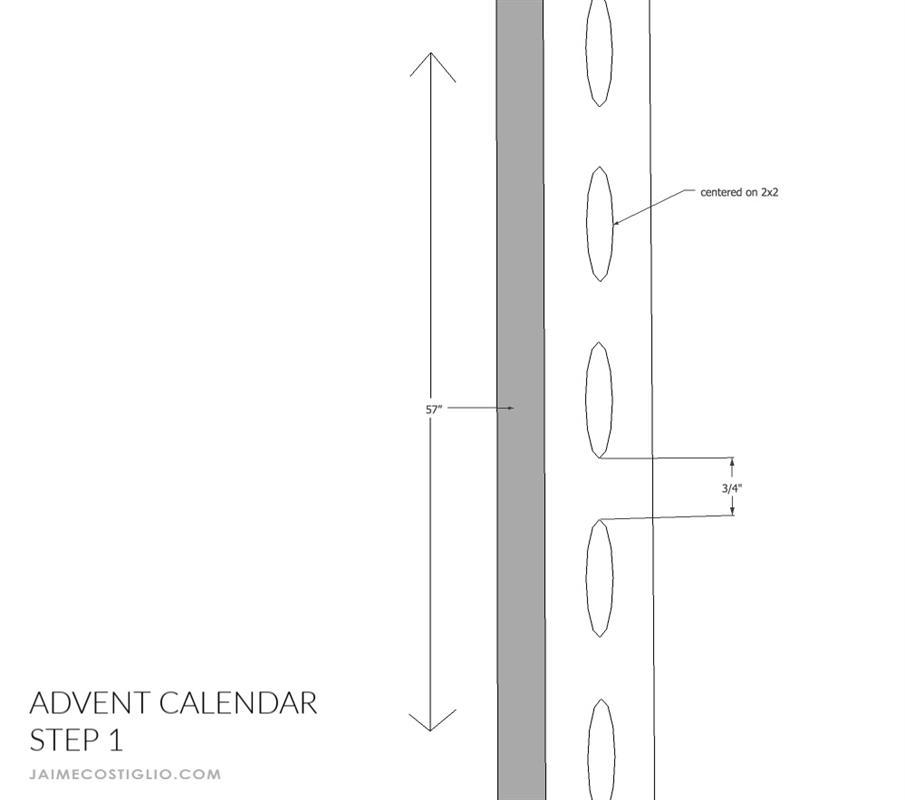
Step 1
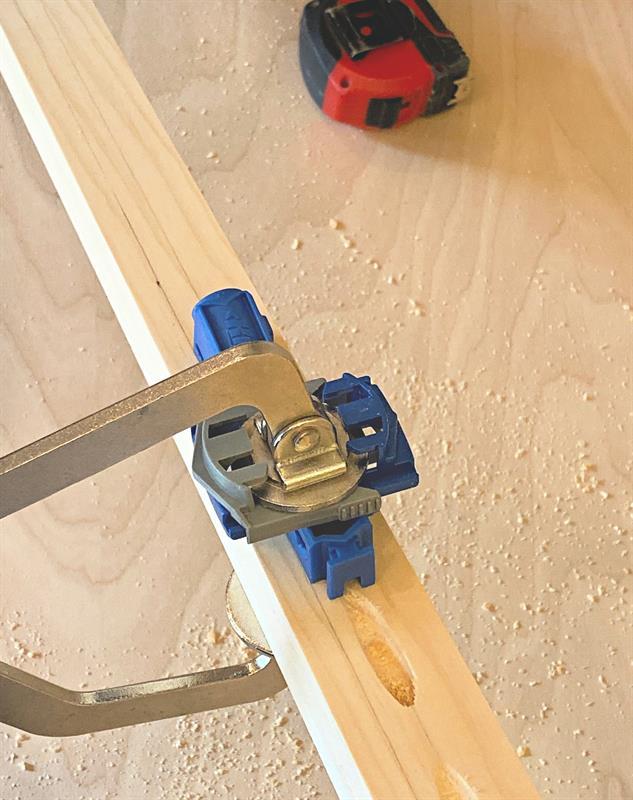
Starting 2” from the end attach one pocket hole jig at center using the face frame clamp and drill a pocket hole. To make the next pocket hole line up the jig using the edge of the first hole as a guide. This will ensure about ¾” spacing between pocket holes. Repeat this process until you have 25 pocket holes.
-
Step 1 IRL
Step 1 IRL
-
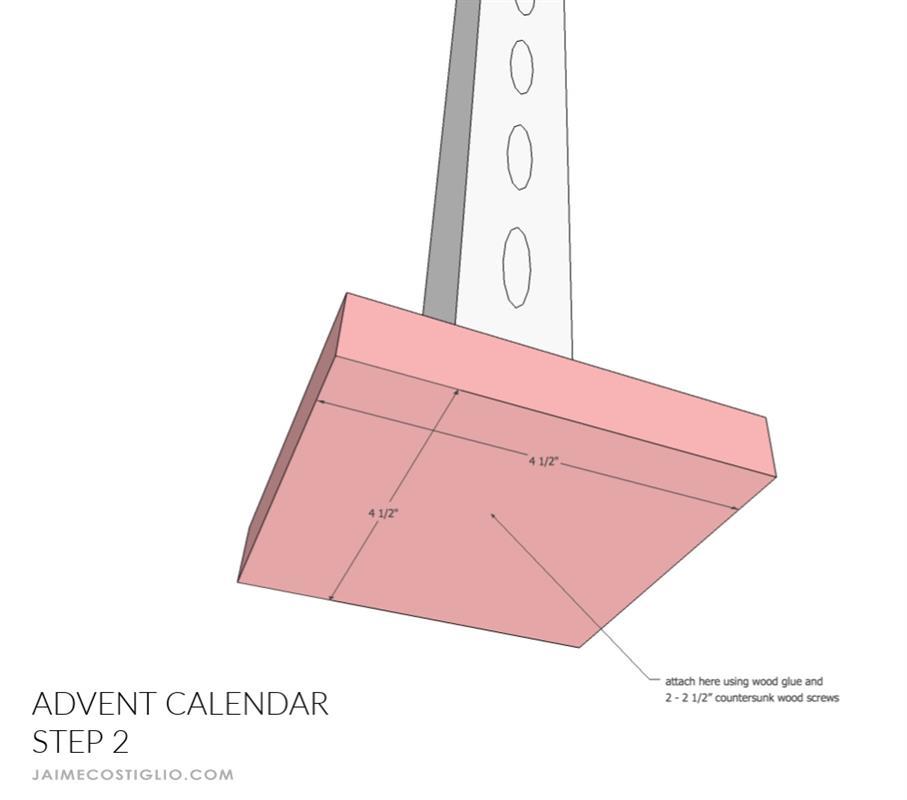
Step 2
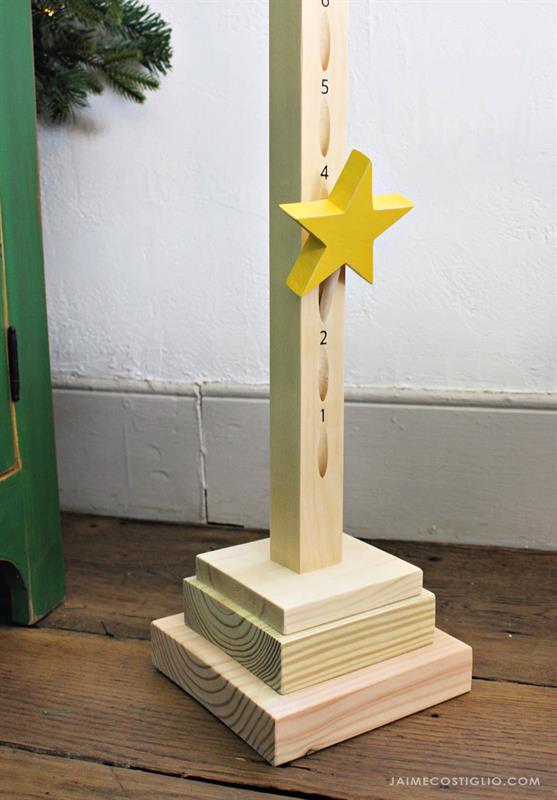
Attach post to base 3 at center using wood glue and at least 2 – 2 ½” countersunk wood screws. Considering predrilling so the post doesn’t split.
-
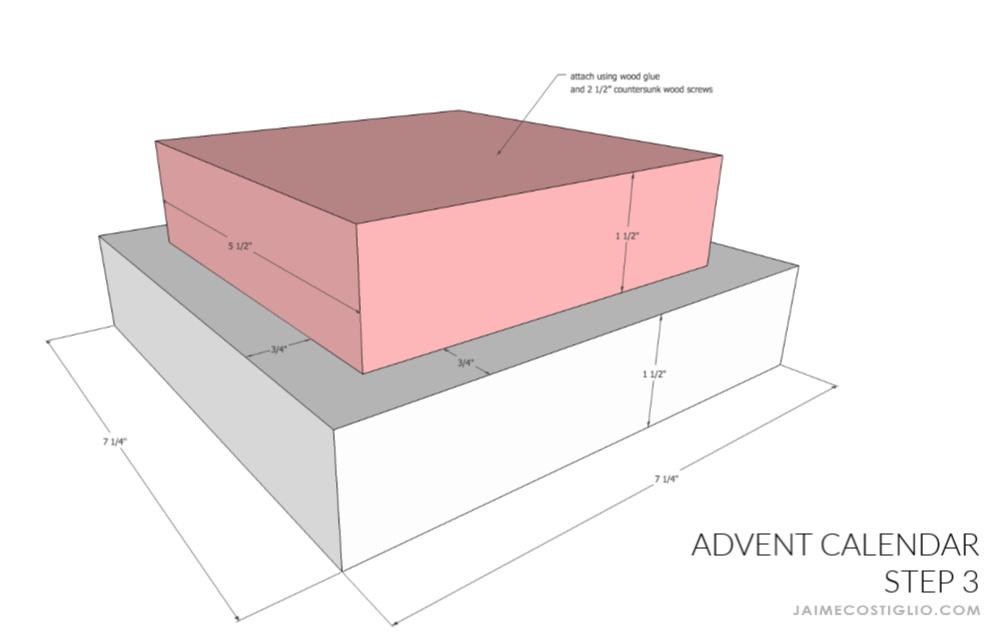
Step 3
Prepare the remaining base 1 and base 2 pieces by attaching the smaller base 2 to the larger base 1 using wood glue and 2 ½” countersunk wood screws.
-
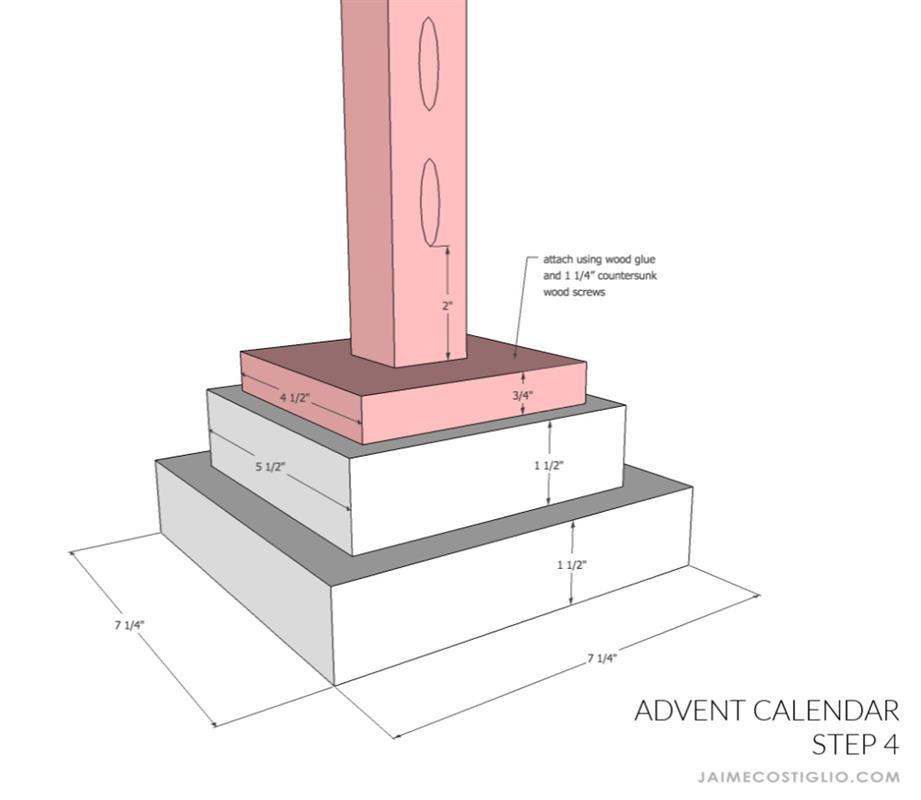
Step 4
Attach the post / base 3 portion using wood glue and 1 ¼” countersunk wood screws.
-
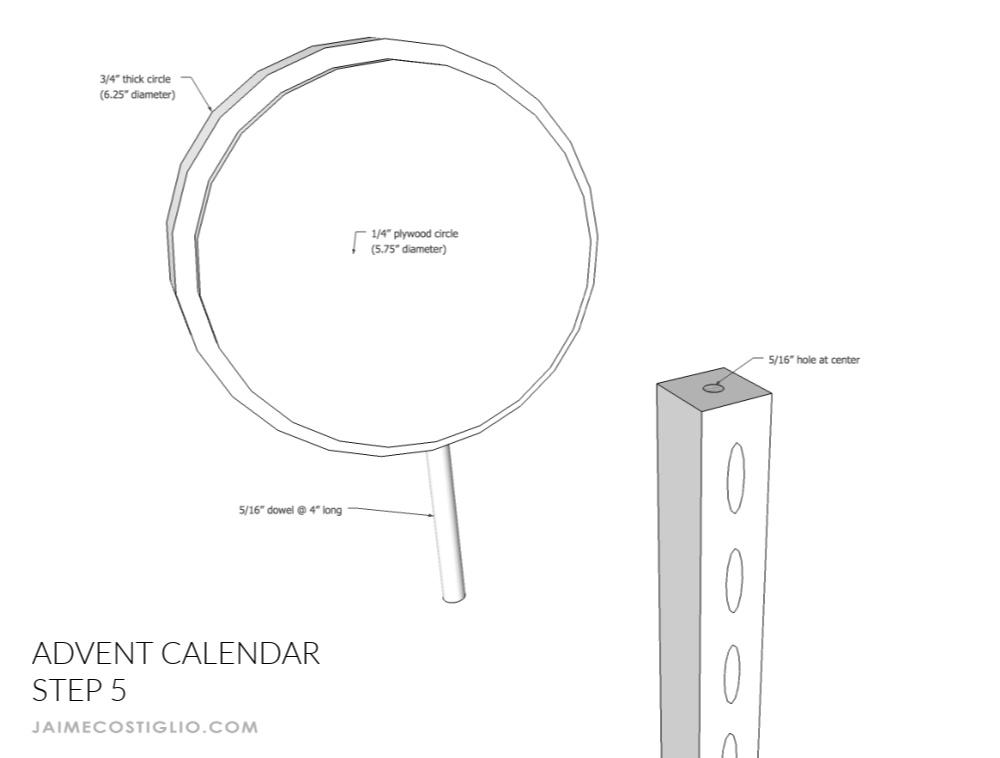
Step 5
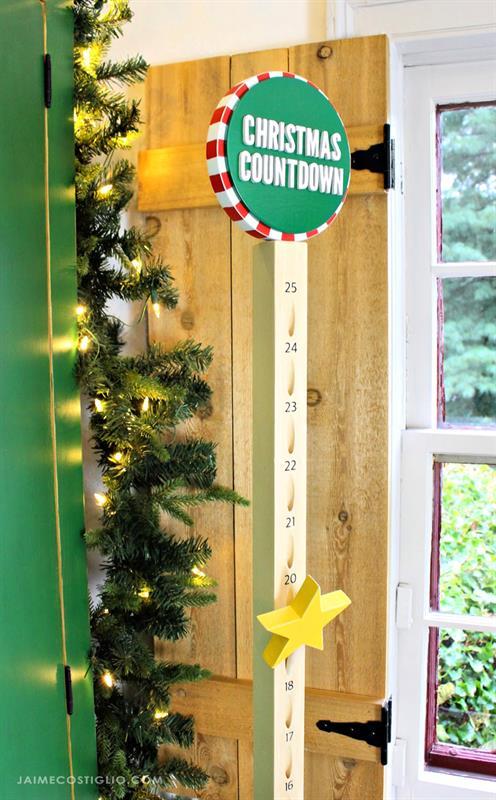
To make the circular sign at top cut out the two wood circles. Paint as desired and then attach the smaller ¼” plywood circle to the larger back circle using super glue or wood glue. Drill a 5/16” hole into the larger circle and insert the dowel using wood glue. Predrill a 5/16” hole at the top center of the post and insert the dowel with the sign.
-
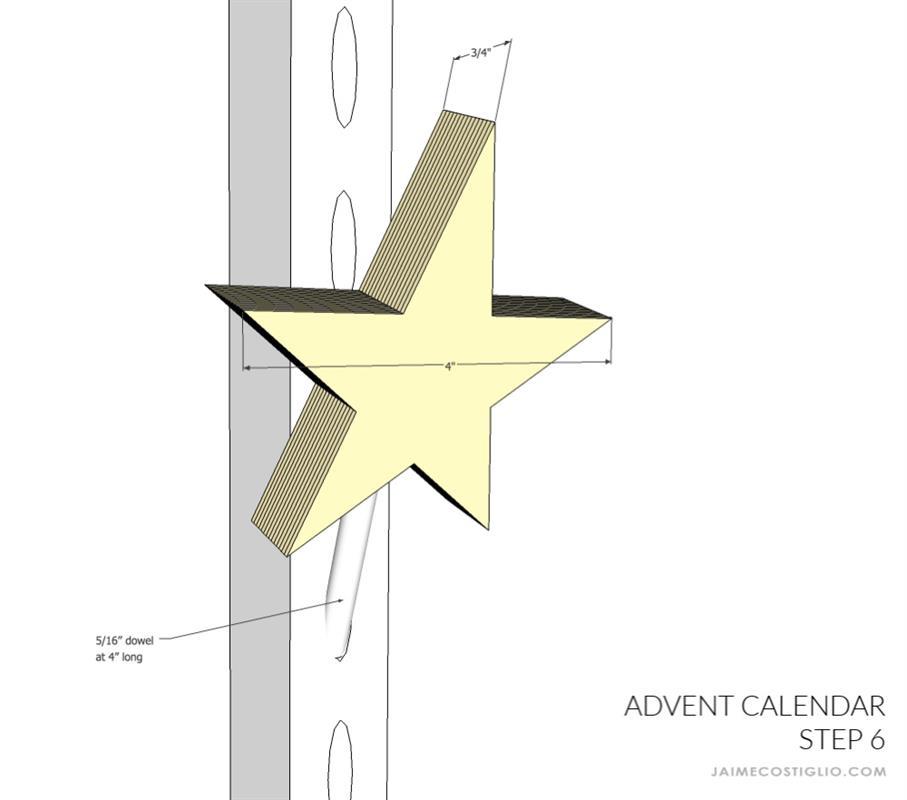
Step 6
Cut out the 4” star from ¾” thick plywood (use pattern below). Paint as desired. Predrill a 5/16” hole at center bottom and insert the 5/16” wood dowel using wood glue.